
In this article
I spend a lot of time hiking and camping with my kids, and without my dehydrator it simply would not be possible: I could not carry all the food. Dehydrating lets me prepare light, tasty and nourishing meals that only need water. This guide covers the principles and techniques that let you use a dehydrator to its full potential, food by food, with the food safety precautions that really matter.
At a glance
- Fruit is the easiest to dehydrate; hard vegetables are blanched first so they rehydrate quickly.
- For jerky, meat must reach 71 °C (160 °F) internally, and poultry 74 °C (165 °F), before drying.
- Homemade dried eggs and dairy do not make good no-refrigeration supplies: buy them as pasteurized powders.
My dehydrator also saves me a lot of money: I buy tomatoes and peppers in season, dehydrate them and have them all year. Many people own a dehydrator but almost never use it, or only for a few fruits and vegetables. I hope this guide makes you want to go further.
Before you start
Type of dehydrator: this guide is for people using an electric dehydrator. Sun drying, solar dehydrators or the oven also work, and most principles stay the same; but in Quebec, humid air makes outdoor drying unreliable.
Drying times: most guides give a table of drying times. I do not, because times vary enormously with the dehydrator's power, its airflow and the food's water content: several hours more or less. If you need a table, check your appliance's manual, and above all learn to recognize when food is dry (see below).
Experiment! Most of what I have learned came from experimenting. Do not be afraid to try your own recipes, while following food safety rules for meat, fish, eggs and dairy.
| Food | Key preparation | How to tell it is dry | Difficulty |
|---|---|---|---|
| Fruit | Slices 6 mm (¼ in) thick at most; pretreatment for long storage | Pliable, not sticky, no moisture when squeezed | Easy |
| Vegetables | Blanch hard or slow-cooking vegetables | Brittle: snaps when bent | Easy to medium |
| Cooked pasta, rice, beans | Cook, cool, drain | Hard and dry | Easy |
| Meat (jerky) | Trim fat, thin slices, heat to 71 °C internally before drying | Leathery, cracks without breaking | Advanced |
| Fish | Species-specific protocol | Very hard | Advanced |
| Eggs, dairy | Avoid at home for no-refrigeration storage | Not applicable | Not recommended |
Fruit
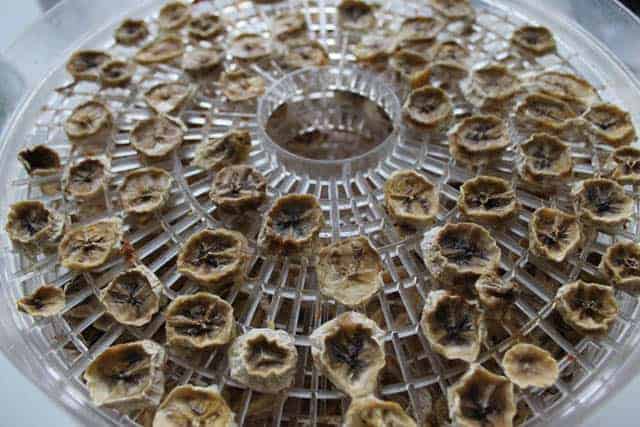
Fruit is very easy to dehydrate and gives the best results. You can snack on it as soon as it is dry or use it in cakes, pies or energy balls, which costs much less than store-bought energy bars.
Preparing fruit
If you plan to eat the dried fruit soon after drying, preparation is minimal: wash the fruit, remove large pits, cut it into slices no more than 6 mm (¼ in) thick and place them in the dehydrator.
Some fruit can even be dried whole, such as strawberries, blueberries and cherry tomatoes (yes, tomatoes are a fruit!). I still prefer to slice most fruit: drying is faster and more even.
Killing insect eggs and larvae
I used to have a plum tree in my yard. Since we did not spray it with pesticides, there were always insect larvae inside the plums. Even if fruit looks clean, it probably still carries insect eggs; if they are not destroyed, they will hatch and invade your pantry (I speak from experience!).
As a rule, do not dehydrate fruit with visible larvae or eggs, or with split skin. Choose sound fruit and remove damaged parts; drying does not make mouldy or spoiled fruit safe. For sound fruit that may carry invisible eggs, you have three options:
Blanch the fruit before dehydrating. Texture and flavour change, and some nutrients leach into the water.
Pasteurize in the oven after drying: spread the dried fruit in a single layer on a baking sheet, 30 minutes in an oven preheated to 71 °C (160 °F).
Freeze after drying: place the dried fruit in freezer bags, at least 48 hours at −18 °C (0 °F) or below.
Pretreating fruit for long storage
If you plan to keep your dried fruit a long time, pretreat it: it will last longer, taste better and keep its colour. Pretreatment slows the enzymatic reactions that brown and degrade fruit.
Commercial dried fruit is often treated with sulphites. This is safe for most people, but sulphites can cause reactions in a small share of people with asthma. At home, these simple methods work very well:
Ascorbic acid (vitamin C): available as a powder at pharmacies or grocery stores. Dissolve 1 tsp powdered ascorbic acid (or 3,000 mg in crushed tablets) in 2 cups (500 mL) water. Soak the slices for 3 to 5 minutes, drain, then dehydrate.
Fruit juice: juices rich in vitamin C, such as lemon, orange or cranberry, are used the same way. They add nice flavour to the dried fruit, and you can drink the juice afterwards.
Honey dip: your dried fruit will be very sweet and a little sticky. Dissolve ½ cup (125 mL) sugar in 1½ cups (375 mL) boiling water, let cool to lukewarm, then add ½ cup (125 mL) honey. Soak the fruit for 3 to 5 minutes.
Blanching: texture and flavour change, but the fruit keeps better. Usually allow 3 to 5 minutes, depending on the fruit.
Correction: an earlier version of this article gave 1 tsp ascorbic acid for 1 cup of water, and a honey dip made only of honey and lukewarm water. The proportions above are those of US university extension services (Clemson University). Oven pasteurization at "175 °F for 15 minutes" has also been removed, for lack of a source; the 71 °C (160 °F) for 30 minutes method is kept.
Fruit leathers
Want fruit leather? It is easy: purée the fruit in a high-speed blender, adding a little water or juice if needed. With thick fruit such as bananas or apples, the purée goes straight onto the dehydrator's fruit-leather sheet. With very juicy fruit such as blueberries, first strain the purée through cheesecloth (a clean tea towel also works). Keep the strained juice to drink: it is delicious.
What temperature to dry fruit
As a rule, dry fruit at 54 to 60 °C (130 to 140 °F). Many nutrients in fruit are heat-sensitive, and this range preserves most of them.
Fruit "sweats" a lot at the start of drying: evaporation cools it, so its temperature stays below that of the air. Do not compensate by arbitrarily raising the heat: the surface would harden too fast and trap moisture in the centre. Adjust slice thickness and airflow instead, and follow your appliance's manual.
Knowing when fruit is dry
Drying-time tables are excellent guidelines, but do not take them as gospel: always check yourself. Properly dried fruit:
- releases no moisture when cut in half and squeezed;
- is pliable when folded in half, not brittle;
- does not stick to itself once folded.
Conditioning fruit after drying
Conditioning spreads moisture evenly between pieces. Fruit never dries uniformly: some pieces hold more water than others. Never pack fruit right after drying: let it cool for about an hour. But do not wait too long either, because insects can lay eggs on dried fruit.
Place the cooled fruit in clean jars, without filling them completely so you can shake them. Close, shake daily and let stand for seven to ten days. If condensation appears, put the fruit back in the dehydrator; if mould appears, throw out the batch. Even well conditioned, homemade dried fruit can hold enough moisture to be unsuitable for packaging with an oxygen absorber.
Vegetables
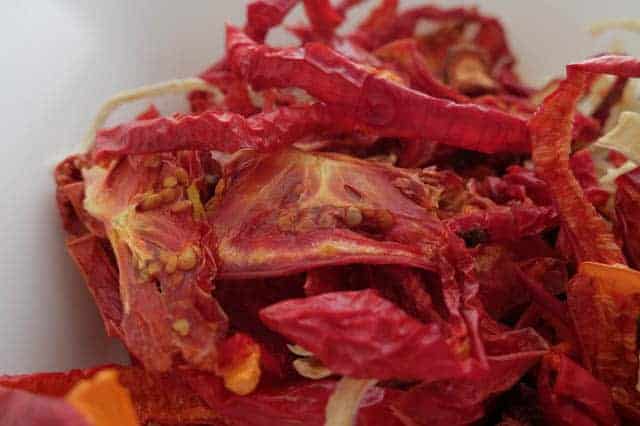
The sugar and acids in fruit slow the enzymes that break it down: that is why fruit is so easy to dehydrate. Vegetables contain much less sugar and acid: they spoil and lose flavour much faster. Some are also very high in fibre and become extremely hard once dry, like tree bark; without proper preparation, rehydrating them can take hours.
Botanically, anything with seeds is a fruit: cucumbers, zucchini, peppers… I still group them with vegetables, because they are low in sugar and dehydrate like vegetables.
To blanch or not to blanch?
One of my first experiments with dehydrated vegetables was a trail soup. I dried slices of raw vegetables, mixed them with seasonings, then boiled everything to rehydrate it. Big mistake: after more than 30 minutes of boiling, some vegetables were mushy, but the carrots and mushrooms were still hard. I had not blanched them.
Blanching (steaming or boiling) is debated. Here are its advantages and limitations:
Advantages of blanching
- Vegetables last longer, because blanching destroys the enzymes that spoil them.
- Rehydration is faster, since the vegetables are precooked: essential for carrots and onions.
- Drying is shorter, as softened tissue releases water more easily.
Limitations of blanching
- Nutrient loss, especially heat-sensitive and water-soluble vitamins.
- Vegetables can become too soft in dishes that cook a long time.
Since my soup fiasco, I always blanch hard or slow-cooking vegetables (carrots, mushrooms, beets, corn, peas…). I do not blanch those that cook very quickly, such as kale or spinach. Keep in mind that I use my dehydrated vegetables for hiking meals, which must rehydrate fast. At home, in a dish that simmers for hours, rehydration time matters much less.
| Blanch before dehydrating | Dehydrate raw |
|---|---|
| If the vegetables must rehydrate fast (hiking meals) | If you will eat them raw (sun-dried tomatoes on a salad) |
| If the vegetable is very hard or fibrous | If you want to limit nutrient loss |
| If you plan to keep them a long time | If you will grind them into powder |
| If the vegetable normally takes long to cook (carrots, onions) | If the vegetable cooks very quickly (kale, spinach) |
| Always for corn, peas and beans |
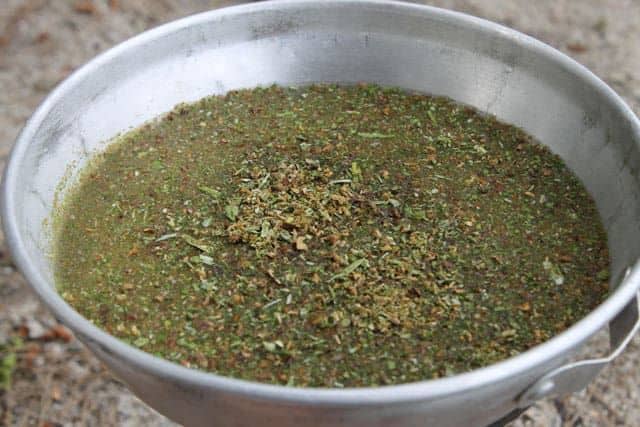
Expert tip: grind dried vegetables into powder.
I grind raw vegetables into a powder to speed up rehydration. This particular batch contains 4 tomatoes, 2 onions, 2 carrots, and 1 red bell pepper.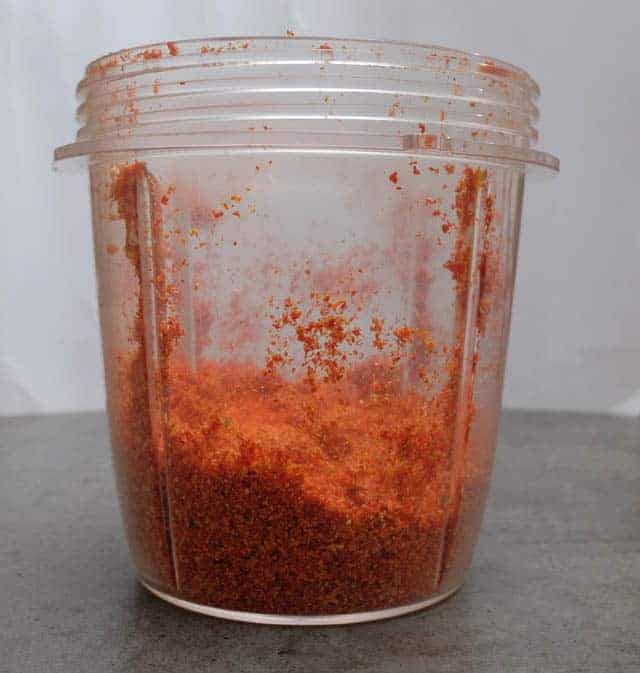
How to blanch vegetables
I prefer steam blanching, which keeps the most nutrients. Cut the vegetables as you would for dehydrating, then place them in the steamer basket no more than 5 cm (2 in) deep. Time varies with the vegetable; generally, blanching is done when the vegetable has turned a brighter colour. It should be more tender but still a little crisp: never soggy!
Dehydrating canned and frozen vegetables
Fresh vegetables always give the best texture and flavour, but you can also dehydrate canned or frozen vegetables. Canned vegetables usually turn out disappointing: already softened by sitting in the can, they get even softer after dehydrating and rehydrating. Frozen vegetables do better: a bit soft after rehydration, they keep much more texture and flavour.
Drying temperature and time for vegetables
Like fruit, vegetables are dried at 54 to 60 °C (130 to 140 °F) to preserve nutrients. They sweat less than fruit. However, they must be much drier, since they have no sugar or acid to protect them: only about 10% moisture or less should remain. The vegetable should be brittle and snap when bent. Once properly dried, they generally do not need conditioning like fruit.
Using dried vegetables
Most dried vegetables do not keep very long: I recommend eating them within six months of drying. Blanched and carefully packaged (see the storage section), they keep noticeably longer, especially somewhere cool.
Dried vegetables go into soups, stews and slow-cooked dishes. In theory you can rehydrate them to snack on, but the texture is usually unappealing. Kale and beets, however, make delicious chips.
Several dried vegetables in one dish
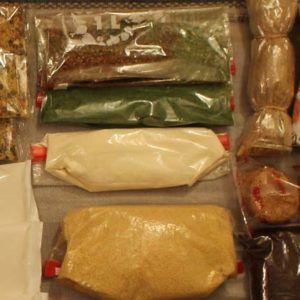
Vegetables rehydrate at very different rates. For a soup, you cannot throw all the dried vegetables into the pot at once: some would stay hard while others turned soggy. It is better to store them separately and add them one by one. For a dried vegetable soup, for example, I add the mushrooms and carrots first, the slowest, then the tomatoes and peppers. In creamy dishes and stews, texture matters less: you can add everything together. So think about how you will use your dried vegetables before mixing them; I come back to this in the section on dehydrated meals.
Starches
Starches already keep a long time as they are, so most people do not bother dehydrating them. You can still do very handy things with them, especially for hiking or emergency meals.
Potatoes and other root vegetables
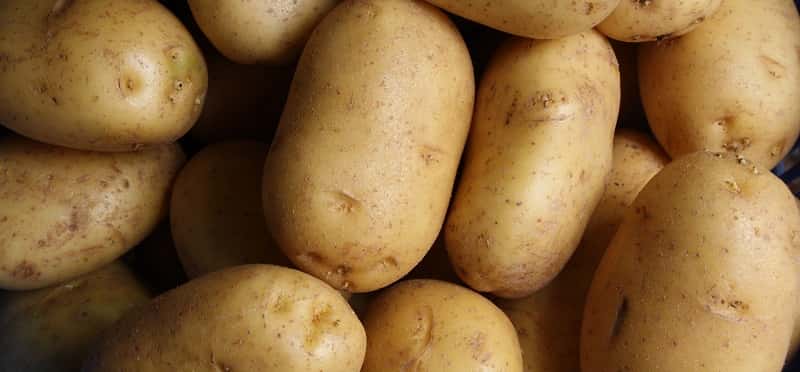
Personally, I never make dried potatoes, since you can buy instant mashed potatoes at the grocery store (they are nothing but potatoes dried and flaked). You can still easily make your own in the dehydrator. Other root vegetables work very well too: sweet potatoes, carrots, celeriac and turnips.
Boil the vegetable.
Mash it into a purée.
Spread the purée on a fruit-leather sheet.
As it dries, the purée will start to crack.
It is ready when it looks like cardboard and crumbles easily.
Backpacking Chef, one of my favourite dehydrating experts, calls these "barks". They thicken soups or can be reconstituted into a purée.
Pasta and rice
Pasta is already dry: why on earth cook it and then dehydrate it? Because cooked, then dehydrated pasta cooks much faster. That matters for emergency meals where you do not want to waste fuel boiling pasta for 20 minutes. Same for rice: brown rice takes over 40 minutes to cook, while cooked and dehydrated rice rehydrates in about 5 minutes. Cooked and dried spaghetti and angel hair rehydrate almost instantly in boiling water.
Cook the pasta in salted water.
Plunge it into cold water to stop the cooking.
Drain well.
Dehydrate at 57 °C (135 °F) for 2 to 4 hours, until hard.
Rehydrate in boiling water and eat promptly: once rehydrated, pasta and rice become perishable again. Long soaking at room temperature is not a good method.
Bread and crackers
Make your own croutons by dehydrating bread: it is very simple. To go further, there are recipes for raw sprouted-seed breads and many crackers you can make in the dehydrator.
Meat (jerky)
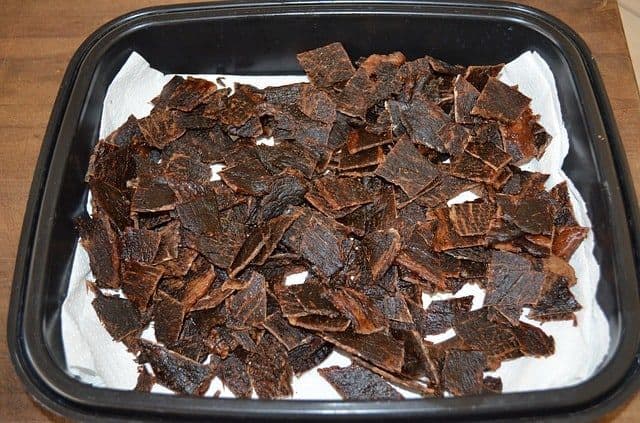
Dehydrating meat takes much more care than fruit and vegetables, because pathogenic bacteria and parasites must be controlled. That does not mean you should give up on making your own jerky: you simply need to follow the method from start to finish.
Hygiene first
Wash and sanitize all equipment: cutting boards, knives, trays and tongs. A common solution: 2 tbsp (30 mL) unscented bleach per US gallon (3.8 L) of water.
Wash your hands thoroughly before handling meat.
Keep meat in the refrigerator at 4 °C (40 °F) or below until you use it.
Never thaw meat on the counter: always in the refrigerator.
Marinate meat in the refrigerator.
Use meat from a safe source. For game, make sure it was field-dressed properly: if the animal was gut-shot, intestinal contents may have contaminated the meat. If in doubt, do not make jerky with that game; cook it thoroughly at high temperature instead.
The safe temperature, before drying
For jerky, the United States Department of Agriculture (USDA) recommends heating meat to 71 °C (160 °F) internally, and poultry to 74 °C (165 °F), before dehydrating. This moist heat destroys bacteria before drying makes them more heat-resistant. Drying then removes the water; it does not replace this step, even if your dehydrator has a high setting.
The simplest method is to bring the strips to the right temperature before placing them on the trays, for example by dipping them in boiling marinade (see the basic recipe below). Use a food thermometer with a probe thin enough for strips: a fixed boiling time or the appliance's air temperature does not prove the centre of the meat has reached 71 °C. Some validated methods instead call for an oven step after drying; if you go that way, follow the complete USDA or National Center for Home Food Preservation (NCHFP) recipe without adapting it.
Acidic marinades (vinegar, lemon juice) add flavour, but they do not make a recipe safe on their own: they replace neither the internal temperature, nor keeping meat cold, nor proper drying and storage.
Trichinellosis
Trichinella is a parasitic worm found mainly in pigs, wild boar and wild carnivores (bear, cougar…). Its larvae live in the animals' muscles. When you eat undercooked infected meat, the larvae mature in the intestine and produce new larvae, which then migrate to the muscles. An infection needs medical assessment: if in doubt, see a health professional or call Info-Santé 811.
Dehydrating does not kill Trichinella. Neither do salting, microwaving or smoking. Do not rely on a home freezer either: some Trichinella species found in game are resistant to cold.
Safety rule: always heat any meat at risk of Trichinella to at least 71 °C (160 °F) internally, before drying: pork, wild boar, bear, cougar and other wild game.
Preparing the meat
Trim all the fat from the meat: fat does not dry and goes rancid quickly. Cut the meat into slices no more than 6 mm (¼ in) thick. That is hard with fully thawed meat: the trick is to partially freeze it before slicing. Cut with the grain for a better texture. Then marinate the meat; if you heat it before drying, do so at the end of marinating.
Never overload the trays: air must circulate around each strip for fast, even drying.
Dehydrator temperature
Once the meat has been heated to the safe temperature, dry it in a dehydrator that can hold 54 to 60 °C (130 to 140 °F) continuously, according to the USDA. A hotter setting may be specified by the manufacturer, but it does not replace the preliminary cooking step.
Even if your dehydrator says it reaches 71 °C (160 °F), it may not. In a vertical-flow unit, the top trays can be much cooler than the bottom ones; in a horizontal-flow unit, the area near the door is often cooler. Since dials are unreliable, even on good models, check your appliance's actual temperature:
Test it empty: with food inside, sweating and condensation lower the temperature.
Place a thermometer inside: on the second or third tray from the bottom for vertical flow, near the door for horizontal flow.
Set the dehydrator to its highest setting.
Read the thermometer after about 20 minutes.
If the appliance cannot hold the required temperature, do not use it for meat. Excalibur and Gardenmaster are among the models that reach 71 °C (160 °F); they cost a bit more, but are worth it if you make jerky often.
Drying time and removing fat
Meat must dry for at least 4 hours, and some types for more than 12 hours. Do not rely on recommended times: check that the jerky is properly dry before removing it. It should be leathery but not brittle: when bent, a cooled piece should crack without breaking. Time and texture help you follow drying; they do not prove microbes were destroyed, which only the heating step guarantees.
During drying, oil rises to the surface of the jerky. It is very important to remove it by blotting with clean paper towel, or the jerky will go rancid much faster. So you cannot "set it and forget it": check at least twice during drying.
Basic jerky recipe
Ingredients: 4 lb (1.8 kg) lean meat, ½ cup (125 mL) soy sauce, 2 tbsp Worcestershire sauce, ½ tsp black pepper. Optional: dried garlic, dried onion, parsley, smoked paprika, liquid smoke.
Cut the meat into 6 mm (¼ in) strips, with the grain. It slices more easily partially frozen.
In a large pot, combine the soy sauce, Worcestershire sauce, pepper and seasonings.
Bring the marinade to a full boil.
Add a few meat strips, making sure they are covered by the marinade.
Let the marinade return to a boil.
Before removing the strips, check with a thermometer that they have reached 71 °C (74 °C for poultry). Transfer them with clean utensils to clean trays, without letting them touch a board or marinade that has been in contact with raw meat.
Repeat until all the strips have been heated in the marinade.
Arrange the strips on the trays, leaving space for airflow.
Dehydrate at the highest setting for 3 to 4 hours, then lower to 63 °C (145 °F). It will probably take about 4 more hours for them to dry completely.
During drying, blot the oil that rises with clean paper towel.
For the complete method and its variations, see the USDA and the NCHFP jerky page (US resources).
Other proteins
Fish
Salt slows bacterial growth, but it is not enough to make dried fish safe. Because fish contains a lot of oil, it is harder to turn into jerky. If you are starting out, choose a lean fish. Oily fish can be dehydrated too, but it needs more salt and keeps less long outside the refrigerator. It may look moist when finished, but it will be very hard.
Fish requires a preparation, salting, heating and drying method specific to the species. Without a validated protocol, keep it cold and do not treat it as a shelf-stable supply; freezing afterwards does not correct a poorly controlled process.
Nuts and seeds
Nuts and seeds already keep a long time, so most people do not dry them. I still use a lot of them in my hiking meals. For example, I make a tasty sauce with soaked cashews, lemon juice, tomato sauce and salt: I blend it, then dehydrate it. Just add water and pour it over pasta. Nuts and seeds are high in oil, though, which makes them go rancid: an off taste signals they are deteriorating.
Eggs
You can buy powdered eggs, but they are expensive: many people, especially backyard chicken keepers, would like to dehydrate their own eggs. I do not recommend it for no-refrigeration storage.
Commercial powdered eggs are made by "spray drying": liquid eggs are pasteurized, then sprayed into a heated chamber that evaporates the water instantly. They land already powdered. This industrial process combines raw-material control, pasteurization, drying and packaging. A home dehydrator does not reproduce it: eggs can contain Salmonella, and a dry, brittle egg can still be a risk. Health Canada recommends cooking egg dishes to 74 °C (165 °F).
Correction: an earlier version of this article attributed a temperature of 160 °F for eggs to Quebec's MAPAQ and Health Canada. Health Canada recommends 74 °C (165 °F) for egg dishes; 71 °C (160 °F) is the US recommendation.
Whether eggs are raw or cooked (scrambled, for example), drying them at home is not a validated storage method: ten hours of drying or a very hard texture prove neither that microbes were destroyed nor that the product is stable, and the fat in eggs can go rancid. For your supplies, choose a pasteurized commercial egg powder, rehydrated and cooked according to its label, or freeze your eggs out of the shell. For the water-to-powder ratio, follow the manufacturer's directions.
Milk, yogurt and dairy
I never bother dehydrating milk: powdered milk is very cheap. Besides, dehydrators are not designed to evaporate liquids, but to remove moisture from solid foods. It would take a long time (about ten hours), during which mould and bacteria could grow.
Yogurt, ricotta and fresh cheeses also require microbiological control that a dry texture does not prove: dry clumps on the surface can stay moist in the centre. There is no validated home method to make them into a shelf-stable powder. Keep them in the refrigerator or freezer and, for no-refrigeration supplies, buy commercial dairy powders. See our guide to powdered milk storage.
Beans
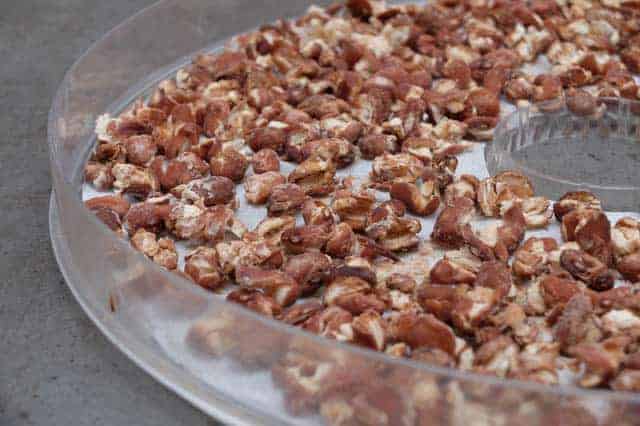
Beans are already dry: why dehydrate them? As with pasta, cooked then dehydrated beans greatly reduce cooking time. I often do this for hiking meals: I do not have two hours to soak and cook beans on the trail. For an emergency meal, it is the same: do you really want to spend more than an hour preparing it, and waste all that fuel?
I cook a big batch of beans (or simply use canned beans).
I dehydrate them until they are dry again.
To rehydrate, I boil them for a few minutes.
Making dehydrated meals
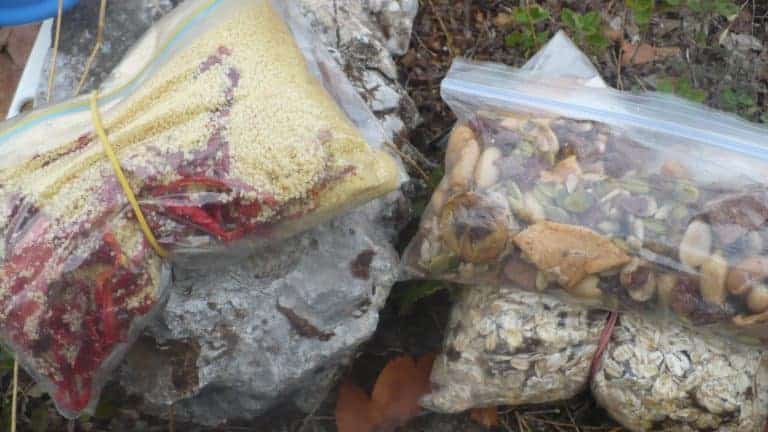
This is where dehydrating gets really interesting: you can save a lot of money by making your own just-add-water meals. Homemade meals let you adjust salt, portions and ingredients, without being healthier than every commercial meal: compare labels and match calories to each person's activity and needs. There are three ways to do it.
Method 1: dehydrate the whole meal
This method suits dishes with a uniform texture:
- cream soups;
- chili;
- pasta sauces (dehydrate the pasta separately);
- dips and spreads (hummus is my favourite).
It does not work well for chunky dishes whose ingredients rehydrate at different rates, such as minestrone: some ingredients would turn mushy while others stayed hard.
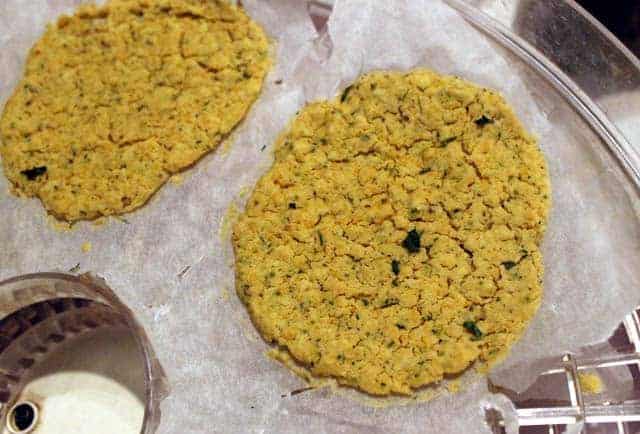
Prepare the meal. For soups, stews and sauces, use about half the usual liquid.
Spread it on the dehydrator's fruit-leather sheets.
Dry it using a method suited to its ingredients. A single setting (for example 57 °C for eight hours) does not guarantee that every mixed dish is shelf-stable: without a validated method, keep the dried meal in the freezer until you leave.
To rehydrate, cook for a few minutes in boiling water.
Tips: always dehydrate meat separately, and do not add too much water when rehydrating a sauce, or it will be too runny.
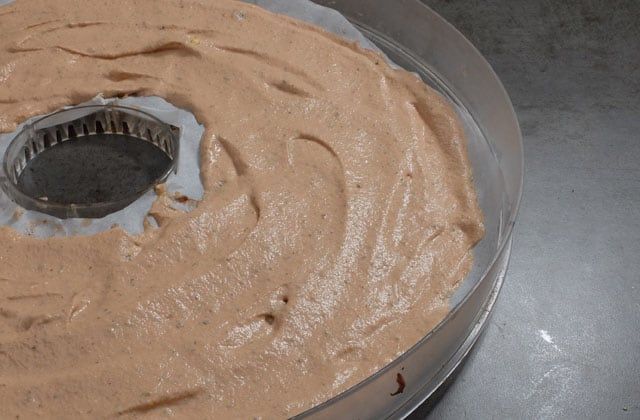
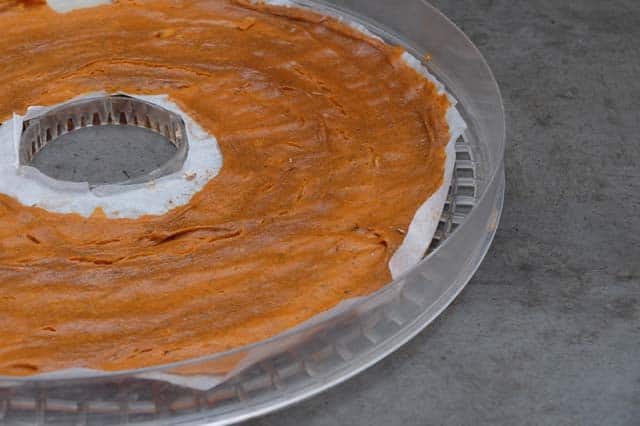
Method 2: dehydrate separately, then assemble
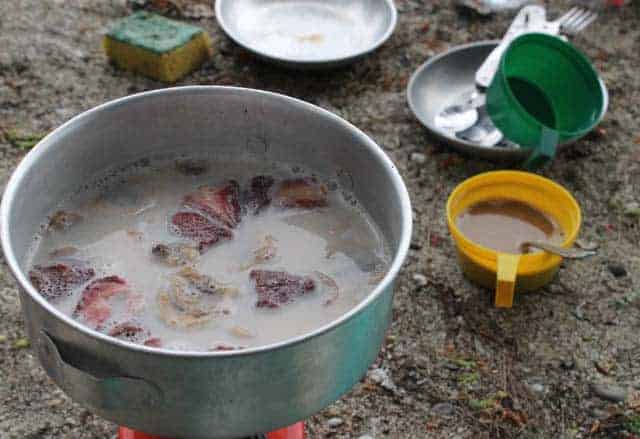
Here you dehydrate each ingredient separately, then combine them into a meal. This is the method to choose when ingredients rehydrate at different rates. A chicken noodle soup dehydrated as one block would give soggy noodles, rubbery chicken and vegetables that are too soft or too hard. It works for any dish whose ingredients separate easily:
- broth-based soups;
- chunky stews;
- pasta, rice and grains with toppings;
- beans.
Important: store each ingredient separately (at least those with very different rehydration times), and cook vegetables before dehydrating them. Seriously: I tried soups with dehydrated raw vegetables, and there were still small hard bits of carrot and onion even after 40 minutes of boiling!
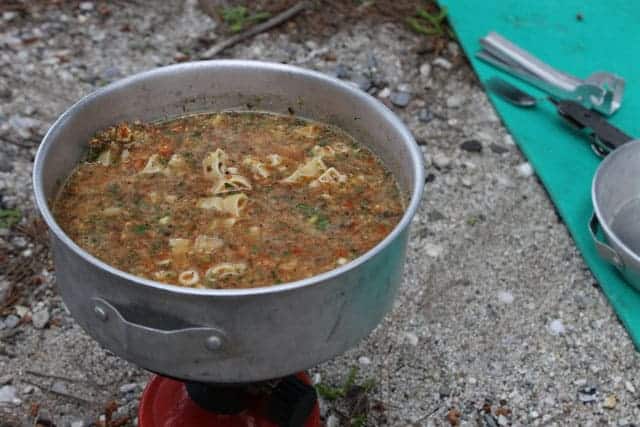
Here is how I make minestrone on the trail:
Boil the water and add the seasonings (salt, pepper, parsley, etc.).
Add the blanched, dehydrated onions, garlic and carrots. Cook about 5 minutes.
Add the blanched, dehydrated tomatoes and green onions. Cook a few minutes.
Check that the onions, garlic and carrots are tender; if not, cook a few minutes more.
Add the cooked, dehydrated lentils and pasta. Cook a few minutes.
Remove from the heat and let stand a few minutes before eating.
This method takes more prep than cream soups, but then it only takes about fifteen minutes on the trail, or in an emergency, to get a hot, nourishing meal. Worth it!
Method 3: grocery-store foods plus dehydrated add-ins
Nothing forces you to dehydrate the whole meal. I like starting from quick-cooking foods bought at the grocery store, then boosting them to make them more nourishing:
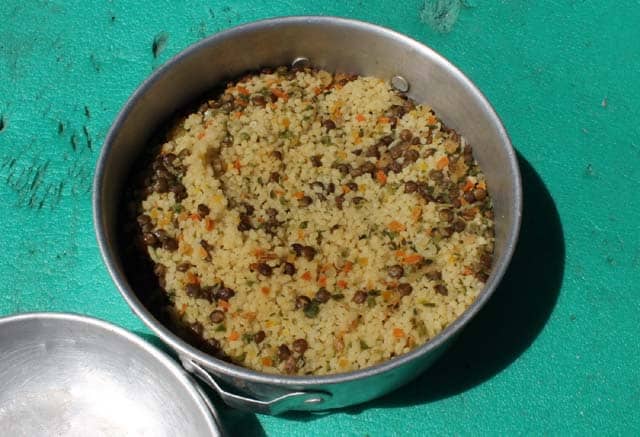
couscous, dehydrated vegetables and chickpeas;
canned beans and rice, plus dehydrated vegetables;
instant mashed potatoes and dehydrated sauce.
Keep cooking and rehydration times in mind. Couscous cooks in about 2 minutes (that is why I like it for hiking), while most dehydrated vegetables and proteins take about 5 minutes. So I rehydrate the vegetables first, then add the couscous. If I put everything in together, I would end up with hard bits of vegetable.
Expert tip: grinding dehydrated foods into powder speeds up rehydration. For example, I make mushroom powder: it boils a few minutes in the water, then I add the instant mashed potatoes. A tasty dish!
It takes a few tries, but it is well worth it. Once you have a few good recipes, you can make large batches for hiking, emergencies or nights when you do not feel like cooking.
Storing dehydrated foods
The secret of storage comes down to three words: dry, dark and cool. Shelf life depends on the food, its residual moisture, temperature and packaging. For a meal or product whose stability is uncertain, prefer the freezer and use it soon. To go further, read our article on storing dried foods.
Let food cool completely before storing it, or heat and moisture will be trapped in the container.
But store it quickly: you would be surprised how fast insects lay eggs on dried food. A pantry moth infestation is very hard to get rid of once it has settled in.
Choose airtight containers: if you do not use sealed Mylar bags, at least use glass jars with rubber seals. Insects can get into ordinary jars.
Avoid zip-top bags and ordinary plastic containers for long-term storage: they block neither air, moisture nor insects (again, I speak from experience).
Protect from light: well-sealed glass blocks air and moisture, but not light. Keep jars in a dark cupboard.
Do not mix fruit and vegetables in the same container: the flavours blend and taste strange.
Oxygen absorbers: do not add them by default. Homemade dried fruit can hold too much moisture for oxygen-free packaging; save absorbers for very dry foods.
Inspect your batches, seals and lids. An insect found after sealing may come from the original batch or a leak.
For long storage, keep your dehydrated foods in the freezer, or invest in Mylar bags and a sealer.
Common mistakes
Buying the wrong dehydrator. Choose an appliance whose temperature and airflow suit the foods you want to dry; for jerky, it must hold the temperature your method requires. Even an appliance that reaches 71 °C does not make home-drying eggs and dairy safe.
Relying on drying times to know when food is done. It once took me 4 hours to dehydrate apples, and another time 7 hours, in the same appliance at the same setting: it all depends on the fruit's water content. Keep the temperature and steps of the method, and adjust the time using each food's dryness criteria.
Dehydrating different foods at the same time. They pick up each other's flavours and smells. No problem if they go into the same dish, but bananas and onions, or peaches and fish… Yuck! Keep them apart.
Stopping dehydration partway. Never start a batch you cannot finish in one go: half-dried food starts to spoil and can become dangerous.
Not testing meals before packing them. I learned this the hard way: on a hike, the carrots in my soup stayed hard even after a long boil, because I had not precooked them. Take a small portion, rehydrate it the way you will later, and taste it. You do not want to discover in an emergency that your meals failed.
Not allowing enough rehydration time. It can take much longer than expected, even with separately dried ingredients. No one wants rubbery bits of onion in every bite!
Dehydrating oily or fatty foods. Oil does not dry and goes rancid: that is why meat must be trimmed. For my meals, I cook without oil, dehydrate, then add a drizzle of oil after rehydrating.
Forgetting insect eggs. Even invisible, they are present on fruit and, to a lesser extent, vegetables. Use a recognized method suited to the food (see the fruit section).
Storing food poorly. Dry, dark and cool, in airtight containers: see the previous section.
Frequently asked questions
How long do homemade dehydrated foods keep?
There is no universal shelf life: it depends on the food, its residual moisture, the packaging and above all the temperature. Well-dried, conditioned fruit keeps longer than vegetables; somewhere cool or in the freezer, shelf life increases noticeably. Inspect your supplies regularly and rotate them.
Can I dehydrate in the oven instead of a dehydrator?
Yes, for fruit and vegetables, if your oven goes down to a low temperature and the manufacturer allows extended use. Drying takes longer and uses more energy. Do not leave the door ajar if the manual forbids it, especially with young children. For meat, the rule of reaching a safe internal temperature before drying still applies.
Is homemade jerky really risky?
Not if you follow the complete method: sound meat kept cold, heating to 71 °C internally (74 °C for poultry) checked with a thermometer, continuous drying in a reliable appliance, then proper packaging. The risk comes from shortcuts, such as drying at low temperature without heating first, or using game without precautions against Trichinella.
Read next
Thirteen foods that are hard to dehydrate
The tricky cases and the precautions that make them possible.
Sources and verification references
- National Center for Home Food Preservation: drying methods
- Clemson University: drying fruits (pretreatments, pasteurization, conditioning)
- USDA: safe temperatures for jerky
- Public Health Agency of Canada: Trichinella pathogen safety data sheet
- Health Canada: egg safety
Equipment to compare for your needs
Some links below are affiliate links: we may receive a commission at no additional cost to you. Products are examples by function, to choose according to your needs; buying the entire selection is unnecessary.