In this article
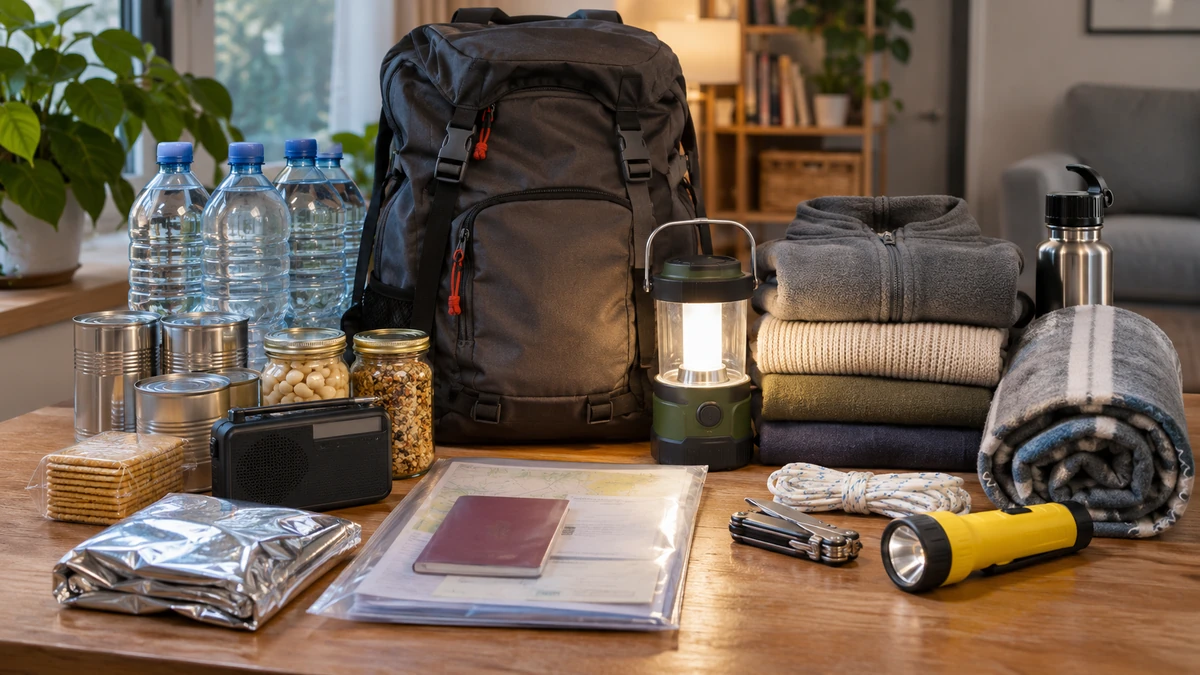
Ice storms, floods, windstorms, long outages: in a disaster, you sometimes have to manage on your own for the first few days while services get organized. That is why the governments of Quebec and Canada recommend an emergency kit for at least 72 hours. Here is why those three days matter, what the kit should contain, a complete checklist and tips for storing it and building it up gradually.
At a glance
- Water: 4 L per person per day (2 L to drink, 2 L for cooking and washing), or 12 L per person for three days.
- Food that needs no refrigeration or cooking, manual can opener, flashlight, radio, batteries, first-aid kit, medication and copies of documents.
- Start with what you already have, store everything where everyone knows, and check the kit once or twice a year.
Why prepare for the first 72 hours?
Three days of supplies are a starting point, not a guarantee for a major crisis. They help you get through the first days more calmly, without depending on a trip or last-minute purchase. But a kit replaces neither a family plan, official instructions nor an evacuation when one is needed: never stay in a dangerous building because your supplies are there.
Service disruptions: a storm can cut power and affect water, communications or heating. Prepare for the functions your household really needs, including medical devices.
Supplies: stores may close and deliveries be delayed. Rotated supplies avoid a risky trip. If space or budget is tight, knowing local support resources is also part of the plan.
Emergency services: responders prioritize calls by danger. A 72-hour kit does not mean they will wait three days: in danger, call 911 right away, and report your care or assistance needs early.
Injuries: an injury may need immediate care. First-aid training and keeping your usual medication on hand help; a kit does not replace a medical assessment. For health advice, call Info-Santé 811.

Water
Drinking water comes first. Plan at least 2 L per person per day for drinking, plus 2 L for food preparation and basic hygiene. Add water for pets, and more in hot weather or during physical effort. For a medical restriction or special need, ask a professional.
| Household | Per day | For 3 days |
|---|---|---|
| 1 person | 4 L | 12 L (about 3 US gallons) |
| 2 people | 8 L | 24 L (about 6.3 US gallons) |
| 4 people | 16 L | 48 L (about 12.7 US gallons) |
Tap water is not always safe: even if the plumbing works, check your municipality's advisories. A boil-water, do-not-consume or do-not-use advisory are handled differently, and boiling or filtering does not fix chemical contamination. Store water in clean, labelled food-grade containers, and never reuse a chemical container.
Emergency toilet
We take plumbing for granted, so few people think about an emergency toilet until they need one. Yet unusable toilets quickly cause hygiene problems.
If the sewer or septic system works but water is short, you can flush by pouring a bucket of non-potable water into the bowl. But during floods or torrential rain, saturated ground can make sewers overflow: authorities then often ask people to limit plumbing use (laundry, showers, flushing), or wastewater may back up through basement drains. Keep sanitary water separate from drinking water, in labelled containers.
Include an emergency toilet in your kit: a bucket lined with strong bags, an absorbent (cat litter, for example) and bags to close up waste, disposed of according to your municipality's instructions. To learn more, see our guide to wastewater during an outage.
Food
Plan meals suited to everyone: needs, allergies and available ways to prepare food. Familiar foods make meals easier; check the water needed and storage after opening.
Intact commercial canned goods are useful, with a manual can opener. Choose products that can be eaten without cooking if you have no safe way to cook. A damaged, bulging or flood-soiled can goes in the garbage: do not try to save a doubtful food by rinsing or cooking it. For ideas, see our list of 100 foods that need no refrigeration.
Freeze-dried meals are an option, but they often need water, sometimes hot. Read the portions, allergens and instructions, and try one in normal times before making them the basis of your supplies. Our comparison of freeze-dried and dehydrated foods explains the differences. Keep in mind that needs differ between home supplies and an evacuation bag.
Emergency heating
What will you do to stay warm if an outage hits in the middle of winter? Plan warm clothing, blankets and sleeping bags, and somewhere else to stay if the home cannot be kept warm. A heating appliance must be designed, installed and used for the space, according to its instructions. Never use a camp stove, barbecue or generator indoors: an open window does not eliminate the carbon monoxide risk.
Stay dry and change out of damp clothing: a wet blanket does not keep you warm. Watch children, older adults and sick people closely: someone who is cold, or a home that is too cold, may call for another location despite the blankets.
Lighting
Plan flashlights or headlamps and their batteries, with a backup. Personally, I prefer a rechargeable headlamp: it is much easier to work with both hands free. Avoid candles and open flames, which cause fires, and never after an earthquake or if you smell gas. Lights can also fail once wet: store them away from water.
Hygiene
Preparedness is not just about water and food. Plan:
- toilet paper;
- baby wipes, to wash without a shower;
- alcohol-based hand sanitizer (at least 60%);
- soap;
- menstrual products chosen by the person (a menstrual cup needs clean water);
- diapers, if needed;
- garbage bags.
Emergency radio

A battery or hand-crank AM/FM radio complements cellphone alerts and official instructions, if a local station is broadcasting. Plan batteries and note your local stations. Since March 16, 2026, Weatheradio Canada no longer broadcasts: a NOAA weather function does not guarantee a Canadian bulletin. A receive-only radio cannot call for help either. To choose well, see our guide to the emergency radio.
Cleaning and repair supplies
Risks vary by region: in Quebec, think mainly of ice storms, windstorms, spring flooding and extreme heat. Find out about the risks in your area before buying repair materials.
After damage, first check that the building and access are safe. Do not climb on a roof, touch a wire or work on a damaged structure. Simple protection and cleaning are only possible in a safe setting; report hazards, call a professional and follow instructions for returning home. Still keep some basic supplies for upkeep, cleaning and small repairs.
Evacuation kit
Do not forget a go-bag with the essentials, in case you have to leave home. A ready bag reduces forgotten items, but never delay an evacuation to finish packing it. If cost, a disability or an immediate departure means you leave with little, reception centres and support resources are there for that. To choose the bag, see choosing your evacuation bag.
- important documents
- water and a way to treat it
- food
- emergency shelter (survival blanket, tarp)
- sleeping bag
- change of clothes
- first-aid kit
- medication
The complete checklist
Food and water
- Non-perishable food (see our list of no-refrigeration foods)
- Water: 4 L per person per day
- Manual can opener
- A cooking method approved for the location, or no-cook meals; never a camp stove indoors
- Pots and utensils
First aid, hygiene and safety
- First-aid kit
- Suitable water treatment product, used according to the instructions (dose and contact time)
- Baby wipes and hand sanitizer
- Heavy-duty plastic bags
- Emergency toilet (a two-bucket system is recommended)
- Disposable gloves
- Respiratory protection suited to the hazard (a dust mask does not protect against gases or lack of oxygen)
- Prescription medication, with a refill plan discussed with your pharmacist
Antibiotics sold for fish are not substitute medication for humans: never use them.
Limiting damage
- Fire extinguisher
- Materials for simple repairs, without blocking an exit or touching a damaged structure
- Gas shut-off tool only with the supplier's instructions: never shut off or restore gas without instructions
- Heavy work gloves
- Broom, dustpan and shovel
Sheltering in place
- Duct tape
- 15 m (50 ft) of nylon rope
- Flashlights or other self-powered lights (no candles after an earthquake or if you smell gas)
- AM/FM radio and batteries
- Sleeping bags or wool blankets
- Change of clothes and shoes for each person
- Raincoats or ponchos
- Extra batteries, preferably rechargeable, with an off-grid way to charge them
- Solar power bank
- Lighter or fire starter, for safe use only (not for indoor light or heat)
- Whistle
- Printed emergency guides (water treatment, first aid, sheltering in place)
Other items
- Copies of important documents, in a waterproof pouch
- Comfort items: games, books, toys for children
- Cash in small bills
- Food and supplies for pets
- Spare car and house keys
Where and how to store the kit
You probably already have many items on this list, such as a raincoat in the closet. The real question is: how will you get to them in an emergency? Note where each item is, keep a short grab list and a storage spot everyone knows. Some items (medication, clothing) stay in daily use; they do not need to be moved, but their location must be clear.
Choose the location based on risks, temperature, humidity, weight and access. In a flood zone, avoid the basement; everywhere, avoid shelves that could fall. A garage or basement is not necessarily suitable for medication or water. Not everything can be stored together: food, medication and chemicals need different conditions.
Better yet, prepare more than one kit: one at home, one in the car, one at work, considering each location's temperature and space limits. Protect supplies well from water: I like to put the essentials in a sealed plastic bag inside a 19 L (5 US gallon) bucket.
Building the kit gradually
A one-month or one-year supply is not a required goal. A large stockpile needs money, space and rotation: prioritize your household's essential needs instead. If the list seems long, start with what you already have and the priority items, at a pace your budget allows.
Gather the items on the list you already own as soon as possible.
Set a small weekly budget to complete the kit.
Build your water supply in clean, labelled food-grade containers, and rotate it.
Read preparedness guides and take a first-aid course.
Review the kit once or twice a year, and whenever your household's needs change.
How many items on the list do you already have? To take stock, use your preparedness review and our tools.
Frequently asked questions
Should I buy a ready-made kit?
It is not necessary. A pre-assembled kit can help, but it contains neither your medication, your documents nor your family's special needs. Most households already have many of the items: fill in what is missing.
How often should I check the kit?
Once or twice a year, for example when the clocks change: replace water and food nearing their date, and check batteries, medication and children's clothing, which they outgrow quickly.
Equipment to compare for your needs
Some links below are affiliate links: we may receive a commission at no additional cost to you. Products are examples by function, to choose according to your needs; buying the entire selection is unnecessary.