
In this article
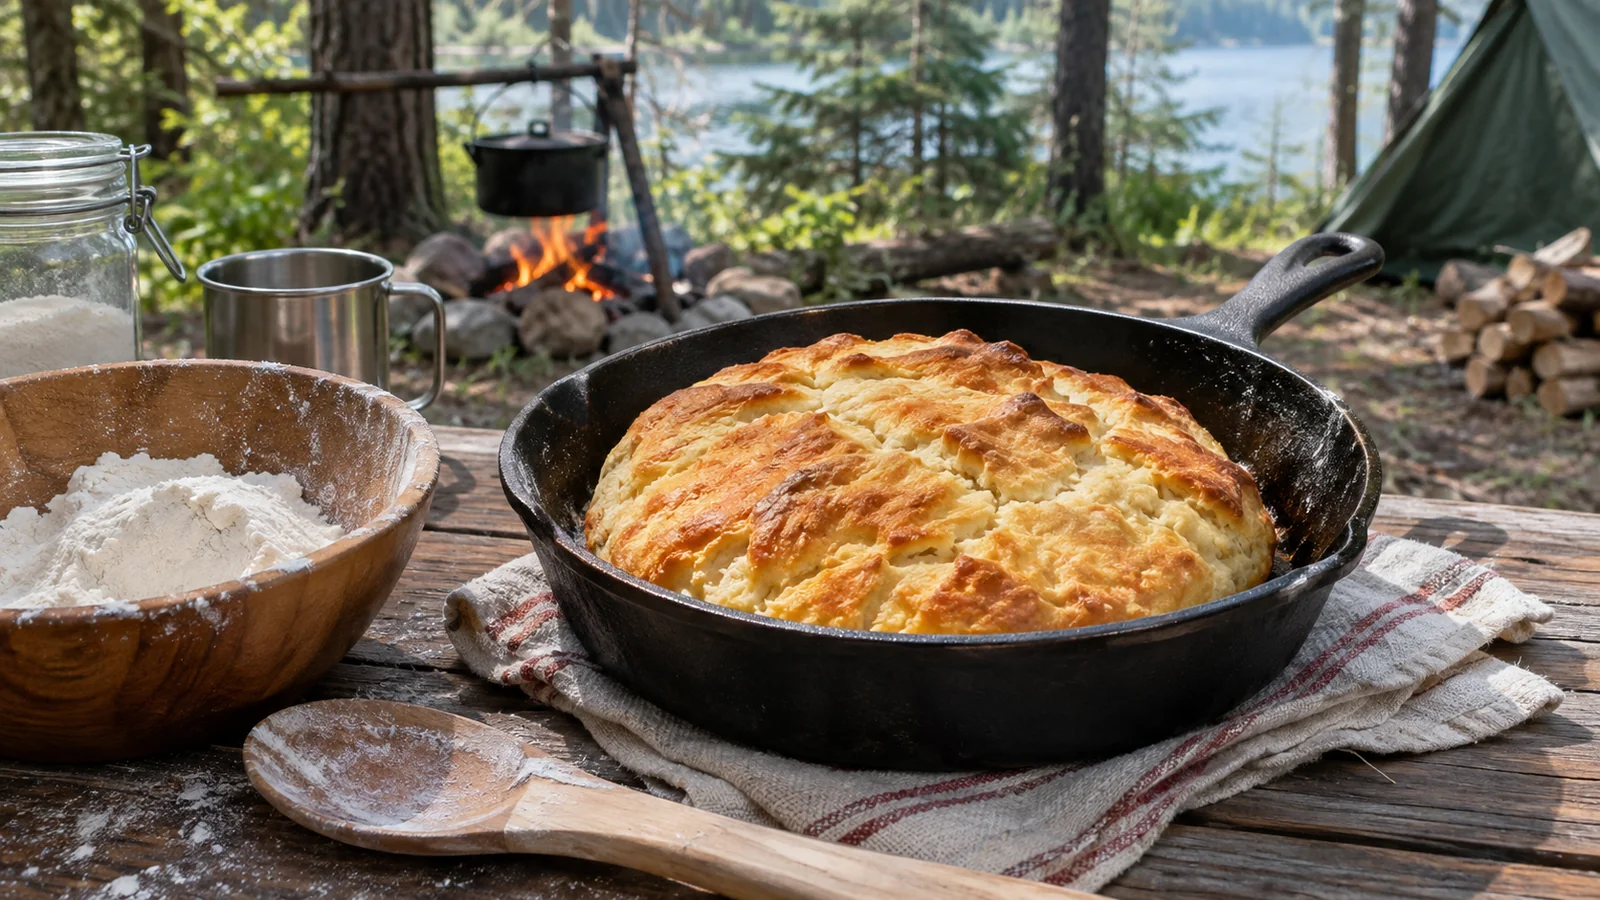
Bannock — known as “pain banique” in Quebec — represents a simple but valuable food skill: making fresh bread from basic ingredients, without sophisticated equipment, in under thirty minutes. This ability can serve when camping, during power outages, or simply to broaden your self-reliant cooking skills.
This article explores the history of this bread, presents a tested basic recipe, explains cooking techniques suited to different settings, and places this skill within a food resilience approach. The goal isn’t to make you an expert baker, but to pass on a reliable method that works with minimal resources.
History and cultural context
Scottish origins and North American adoption
Bannock has its origins in Scotland, where it traditionally referred to a flatbread cooked on a stone or metal griddle. Scottish settlers brought it to North America as early as the 18th century.
What makes bannock significant in the North American context is its adoption and adaptation by Canada’s First Nations. Indigenous peoples integrated this cooking technique into their food practices, adapting it to available ingredients and to nomadic or semi-nomadic ways of life. Today, bannock is an integral part of many Indigenous cultures in Canada, with regional and family variations passed down through generations.
This dual origin — Scottish and Indigenous Canadian — deserves respectful recognition. Bannock isn’t simply a generic “survival recipe”, but a food that carries cultural history.
Why bannock in citizen preparedness
Bannock has several characteristics that explain its persistence and relevance for food self-reliance:
- Common basic ingredients: flour, baking powder, salt, water — staples that are easy to store
- Quick to make: 20 to 30 minutes from preparation to eating
- Flexible equipment: can be cooked in a pan, in the oven, on coals, or even on a hot stone
- Low energy use: quick cooking that uses less fuel than traditional bread
- Adaptable: the basic recipe accepts many variations depending on available ingredients
- Reasonable nutritional value: a source of carbohydrates, which can be enriched with protein, fibre and vitamins through additions
Basic recipe: traditional bannock
Ingredients for 4 to 6 servings
Essential ingredients
- 500 ml (2 cups) all-purpose flour
- 15 ml (1 tbsp) baking powder
- 5 ml (1 tsp) salt
- 5 ml (1 tsp) sugar (optional, helps browning)
- 250 to 300 ml (1 to 1¼ cups) water or milk
- 30 ml (2 tbsp) oil or fat (optional but improves texture)
Note on measurements
Traditional bannock recipes vary considerably — some use more liquid for a runny batter, others less for a firm dough. The ideal consistency depends on your cooking method:
- Pan cooking: a fairly firm dough that holds its shape (like a thick biscuit dough)
- Cooking on coals: a very firm dough that can be shaped and handled without collapsing
- Oven baking: a slightly softer dough is acceptable
Start with less liquid — you can always add more, but removing liquid from a dough that is too soft is difficult.
Preparation instructions
Step 1: Mix the dry ingredients
In a large bowl, combine the flour, baking powder, salt and sugar. Mix well to distribute the baking powder evenly — this ensures an even rise.
Step 2: Add the liquids
Make a well in the centre of the dry ingredients. Add the oil if using, then gradually add the water or milk while mixing. Start with 250 ml and add more gradually until you reach the desired consistency.
The dough should be uniform but not necessarily smooth — some lumpiness is acceptable and normal.
Step 3: Let rest (optional but recommended)
Let the dough rest 5 to 10 minutes. This lets the baking powder start working and the flour absorb the liquid evenly, which improves the final texture.
Cooking techniques
Method 1: Pan cooking (indoors)
Equipment needed:
- A pan (ideally cast iron for even heat distribution)
- Oil or fat to grease the pan
- A heat source (stove)
Procedure:
- Heat the pan over medium heat with a thin layer of oil
- Shape the dough into a round about 2 to 3 cm (1 in) thick (too thick and the inside stays raw; too thin and it dries out)
- Gently place the round in the hot pan
- Cook 8 to 12 minutes per side over medium-low heat, watching to avoid burning
- Turn when the underside is golden and firm to the touch
- The bannock is done when a toothpick inserted in the centre comes out clean, or when the bread sounds hollow when tapped
Heat adjustment: if the bottom burns before the inside is cooked, lower the heat. Better to cook slowly than to burn the outside while leaving the inside raw.
Method 2: Cooking on coals (outdoors)
This traditional method needs no cookware, which makes it a valuable technique for camping or emergencies.
Preparing the coals:
- Let a wood fire burn down to an even bed of coals (no active flames)
- The coals should be hot but not glowing fiercely — a steady, moderate heat
- Flatten a section of coals to create a fairly even surface
Direct cooking:
- Shape the dough into a fairly thick round, 3 to 4 cm (1½ in) — it must be firm enough to hold
- Place it directly on the coals
- Cook 10 to 15 minutes per side, turning once
- The bread will develop a charred outer crust — this is normal and acceptable
- Check doneness by inserting a clean stick or knife in the centre
- Remove and shake or brush off the ashes before eating
Note on the charred crust: part of the crust will be charred and can be removed if you like. The inside will be cooked and edible. This method produces a more rustic but perfectly functional bread.
Method 3: Oven baking (if available)
For those with access to an oven (including a solar oven or wood oven off the grid):
- Preheat the oven to 190 °C (375 °F)
- Shape the dough and place it on a greased or lined baking sheet
- Bake 20 to 25 minutes until golden and cooked through
Flexible shape
Bannock can be shaped into one large round, small individual rolls, or even wrapped around a stick for cooking over a campfire (the “bannock on a stick” method popular with Scouts). The shape affects cooking time but not the basic principles.
Table: choosing your cooking method
| Method | Dough | Thickness | Time | Equipment |
|---|---|---|---|---|
| Pan | Firm | 2 to 3 cm (1 in) | 8 to 12 min per side | Cast-iron pan, a little oil |
| On coals | Very firm | 3 to 4 cm (1½ in) | 10 to 15 min per side | None, a bed of coals |
| On a stick | Very firm, rolled into a rope | 2 cm (¾ in) | 10 to 15 min, turning | A clean stick from a non-toxic tree |
| Oven | A little softer | Any | 20 to 25 min at 190 °C (375 °F) | Greased baking sheet |
Variations and enrichments
Sweet variations
Fruit bannock:
- Add 125 ml (½ cup) raisins, dried cranberries or dried blueberries
- Increase the sugar to 30 ml (2 tbsp)
- Optional: 5 ml (1 tsp) cinnamon
Honey and nut bannock:
- Replace the sugar with 30 ml (2 tbsp) honey
- Add 60 ml (¼ cup) chopped nuts
Savoury variations
Cheese and herb bannock:
- Add 125 ml (½ cup) grated cheese
- Mix in 15 ml (1 tbsp) dried herbs (rosemary, thyme or basil)
- Slightly increase the salt
Bacon bannock:
- Mix in 60 to 80 ml (¼ to ⅓ cup) crumbled cooked bacon
- Use a little bacon fat instead of oil
- Reduce the added salt (bacon is already salty)
Protein bannock (for trekking or physical effort):
- Replace 125 ml (½ cup) of the flour with powdered milk
- Add 30 ml (2 tbsp) seeds (sunflower, pumpkin)
Dairy-free:
- Use water instead of milk — works perfectly
- Vegetable oil instead of butter
Gluten-free:
- All-purpose gluten-free flour works, but the texture will be different
- The liquid ratio may need adjusting
Without baking powder (emergency):
- Bannock can be made without baking powder — it will be denser but edible
- Increase the cooking time slightly to make up for the density
Place in food self-reliance
Operational advantages
In citizen preparedness, bannock offers several practical advantages:
Ingredient storage:
The basic ingredients (flour, baking powder, salt) keep a long time in good conditions. Sealed flour kept cool and dry can last 1 to 2 years; baking powder, 18 months to 2 years if tightly closed.
Versatility across settings:
Bannock can be made in many settings: a normal kitchen, camping, a power outage with a gas stove or wood stove, an evacuation with minimal equipment.
A transferable skill:
The technique is simple enough to teach to children (with supervision for cooking) or to share quickly with others in a time of need.
Limits to recognize
Bannock isn’t a complete food solution:
- Modest nutritional value: mainly simple carbohydrates; low in protein and fibre unless enriched
- Dependence on flour: requires a flour supply, which itself depends on a supply chain
- Calorie density: fairly high — useful for physical effort, less so for sedentary days
- Limited keeping: once cooked, it keeps 1 to 2 days at room temperature and a few days in the refrigerator
Bannock fits into a repertoire of food skills; it doesn’t replace it. Robust food self-reliance includes preserving, sprouting, fermenting, drying and other complementary techniques.
Learning and practice
Like any practical skill, bannock benefits from regular practice:
- Making bannock occasionally in normal times builds familiarity with the technique
- Testing different cooking methods shows which works best with your equipment
- Experimenting with variations lets you adapt to family tastes and available ingredients
- Teaching others (children, loved ones) passes the skill on
The goal isn’t baking perfection, but the reliable ability to make a functional basic bread with minimal resources.
Additional resources
Visual demonstrations
Learning bannock benefits from visual demonstrations. Several resources are available:
- A video search for “bannock recipe” returns many good demonstrations
- Quebec bushcraft and camping channels often include segments on bannock
- Indigenous cultural organizations sometimes offer traditional bannock workshops
Indigenous cultural context
For those interested in the cultural history of bannock in Indigenous communities in Canada:
- CBC Indigenous: articles and reports on the cultural importance of bannock
- Canadian Museum of History: resources on traditional foodways
- Local First Nations organizations: some offer cultural workshops that include traditional cooking
Frequently asked questions
Q: What is the difference between baking powder and baker’s yeast?
Baking powder is a chemical leavening agent that acts quickly on contact with moisture and heat — no rising time needed. Baker’s yeast (Saccharomyces cerevisiae) is a living organism that ferments sugars and needs rising time (typically 1 to 2 hours). Traditional bannock uses baking powder for speed. Technically, you could make bannock with yeast, but it would become a traditional leavened bread needing several hours — losing bannock’s main advantage, which is speed.
Q: My bannock is cooked on the outside but raw inside. What should I do?
This is the most common problem with bannock. Causes and solutions: (1) Round too thick: reduce the thickness to 2 or 3 cm (1 in) at most, (2) Heat too high: lower the heat — better to cook slowly over medium-low heat, (3) Dough too wet: a very wet dough takes longer to cook in the centre, (4) Impatience: bannock really does need 8 to 12 minutes per side — don’t rush it. If the bottom starts burning before the centre is cooked, move it off direct heat and finish cooking in a cooler area, or cover the pan to create an oven effect.
Q: Can I make the dough ahead of time?
Yes, with some nuances. The dough can be made a few hours ahead and kept covered in the refrigerator. However, baking powder starts working as soon as it meets liquid — dough left too long loses some of its rise and the bannock will be denser. Ideally, mix and cook within 30 to 60 minutes. For camping when you want to prepare ahead: mix the dry ingredients at home in a sealed bag, then add only the liquid at cooking time. Dry mixes keep several weeks if well sealed.
Q: Is bannock suitable for children?
Yes, and it is even an excellent learning activity. Children as young as 4 or 5 can make the dough with supervision (mixing, shaping). Cooking needs closer supervision depending on age and setting: supervised pan cooking for ages 8 to 10 and up, cooking on coals only for teenagers with fire experience. Bannock teaches basic skills (measuring, mixing, watching food cook) with quick, edible results — very motivating for young people. It is also an excellent introduction to food self-reliance.
Q: How long does bannock keep once cooked?
Bannock keeps 1 to 2 days at room temperature in an airtight container or wrapped. In the refrigerator, 3 to 4 days. It can be frozen for up to 2 to 3 months. To reheat: oven at 180 °C (350 °F) for 5 to 10 minutes, microwave for 20 to 30 seconds, or toasted in a pan. Stale bannock can be used as breadcrumbs, in bread pudding, or dipped in soup or stew. Its limited keeping means it is best eaten fresh or in the following days — it isn’t a long-term storage food once cooked.
Q: How much bannock should you make for how many people?
The basic recipe given (500 ml of flour) makes one large round or 4 to 6 servings depending on appetites and setting. As a side to a meal: 6 reasonable servings. As a main food: 4 servings. For intense physical effort (hiking, manual work): 3 to 4 servings. The recipe multiplies easily — double all ingredients to feed 8 to 12 people. For a group, several small rounds cook faster and more evenly than one very large one. Plan on about 125 ml (½ cup) of flour per person as a starting point, adjusted to the setting.
Conclusion: a simple, useful skill
Bannock won’t revolutionize your food self-reliance on its own. But it is exactly the kind of practical skill citizen preparedness aims to develop: simple, accessible, functional, transferable and adaptable to different settings.
Mastering bannock means being able to make fresh bread from basic ingredients, without sophisticated equipment, in under half an hour. This ability can serve on recreational camping trips, during power outages, or simply to broaden your everyday cooking skills.
The best way to learn bannock is to make it. Invest 30 minutes this week to try the basic recipe. Observe how your own equipment (pan, heat source) affects cooking. Try one or two variations. Teach it to a family member or friend.
Every practical skill added to your repertoire increases your resilience a little. Bannock is one of them — not the most crucial, not the most sophisticated, but solid, reliable and useful.
Further reading
See storing baking powder long term, cooking without electricity and building a food reserve.