
In this article
- In brief
- Assess your needs before building your kit
- Pre-assembled or custom kit?
- Priority contents, category by category
- Specialized modules to add
- The individual IFAK-type kit
- Choosing the container and organizing the kit
- Checklists by use
- Maintenance and updates
- Limits and points of caution
- Frequently asked questions
A first aid kit is not something you buy once and forget at the back of a drawer. It is a preparedness tool that should be designed for how it will be used, maintained regularly and, above all, backed by the skills needed to use it. A complete kit in hands that do not know how to use it is of little help; a modest kit that is well organized and well known can change the outcome of an emergency.
This guide offers a complete method for building or reviewing your kit: understanding the main categories of injuries to plan for, choosing between a pre-assembled and a custom kit, selecting priority contents, organizing the container, adapting the kit for home, vehicle, outdoors or individual carry (IFAK), and keeping it up to date. It also covers specific needs such as burns, dental care and musculoskeletal injuries.
In brief
In brief. A good kit starts from your real needs: very frequent minor care, mobility injuries (sprains, blisters) that keep you from moving, and rarer but serious trauma (bleeding, deep wounds, extensive burns). Build a family kit for the home, a more trauma-oriented kit for the vehicle, a compact kit for the outdoors and, if you train for it, an individual IFAK-type kit. The contents never replace hands-on training, and the kit should be checked at least once a year.
Before you start. The contents of a kit do not replace the skills to use it. Hands-on first aid training, offered in Quebec by the Canadian Red Cross or St. John Ambulance and in France by the French Red Cross or Protection civile, remains essential. In a serious emergency, call 911 in Canada, or 15 or 112 in France.
Assess your needs before building your kit
Before choosing a single item, think about the injuries you are likely to face. They fall into three families that differ in both frequency and impact.
| Injury family | Likelihood | Impact | Examples | Key supplies |
|---|---|---|---|---|
| Minor care | High | Low to moderate | Cuts, scrapes, splinters, small burns, headaches | Bandages, gauze pads, antiseptic, tweezers, pain relievers |
| Mobility injuries | Medium | High | Sprains, blisters, strains, simple fractures | Moleskin, elastic bandage, cohesive bandage, malleable splint, triangular bandages |
| Trauma | Low | Very high | Limb bleeding, deep wounds, extensive burns, chest wounds | Certified tourniquet, hemostatic gauze, pressure bandage, chest seal, burn dressings |
Trauma is statistically less common, but it justifies the most specialized supplies. In some settings (remote outdoor activities, physically demanding work, the road, crisis situations), its likelihood rises. Mobility injuries do not directly threaten life, but a neglected blister or a twisted ankle can prevent an evacuation on foot. Minor care, finally, accounts for the vast majority of real kit use.
A good practice is to organize the kit by these families: one pouch or zone for trauma, another for mobility and minor care. Under stress, you will know immediately where to look.
Pre-assembled or custom kit?
Both approaches work. The choice depends on how much time you want to invest, your knowledge for selecting contents and the intended use.
- Pre-assembled kit. Convenient and quick to get. Contents are selected by professionals and cover the most common situations. Limits: standardized contents that may include items you do not need and leave out others, and quality that varies widely between manufacturers.
- Custom kit. Lets you tailor contents precisely to your needs, control the quality of each item and manage your budget. Limits: you need enough product knowledge to choose well, with a risk of forgetting something essential or overloading the kit.
The middle path is often the most sensible: start with a good-quality pre-assembled kit, then adjust it by adding what is missing for your situation (certified tourniquet, hemostatic gauze, moleskin, personal medication) and not replacing items you never use.
Priority contents, category by category
Trauma supplies
These items target high-impact situations in the first critical minutes. They all require hands-on training.
- Certified tourniquet: for severe limb bleeding that direct pressure does not control. Recognized models such as the 7th-generation CAT or the SOFTT-W are those recommended by tactical first aid guidelines. Avoid knock-offs: a tourniquet that fails under tension is more dangerous than none.
- Hemostatic gauze: for bleeding that does not respond to direct pressure, especially where a tourniquet cannot be applied (armpit, groin, neck). It is packed into the wound and held under firm pressure.
- Pressure bandage (Israeli-type bandage): maintains firm, constant pressure on the wound after packing. With practice, it can be applied one-handed.
- Chest seal: for penetrating chest wounds. Vented models block air from entering while letting excess air escape. Specific use, training essential.
- Large trauma pads: to apply broad pressure on an extensive wound while waiting for help.
- Wound closure strips (Steri-Strip type): to bring together the edges of a clean, shallow, straight cut. See the guide to wound closure strips.
- Gel burn dressings: non-stick, cooling and protective, they complement cooling with water.
- Nitrile gloves (at least two pairs), trauma shears to cut away clothing without worsening an injury, and a permanent marker to note the time a tourniquet was applied.
Supplies for mobility injuries
- Moleskin on a roll: preventing and treating blisters is one of the most underestimated priorities. Cut a ring around the blister rather than covering it directly, which relieves pressure.
- Elastic bandage: supports an ankle or knee after a mild sprain. Always check that toes or fingers keep their colour and sensation.
- Cohesive bandage: sticks to itself but not to skin, handy for hands, ankles and fingers.
- Malleable splint (SAM-type): aluminum-covered foam you cut and shape by hand to immobilize a wrist, ankle or finger. Failing that, branches, cardboard or sticks held by a bandage will do.
- Triangular bandages (two): the most versatile item in the kit, serving as sling, support, compression and splint tie.
Minor care supplies
- adhesive bandages in several sizes, including large and joint formats;
- sterile gauze pads (5 × 5 cm and 10 × 10 cm, about 2 × 2 in and 4 × 4 in) and rolled gauze;
- compact antiseptic (chlorhexidine or povidone-iodine), after thorough rinsing with clean water;
- transparent dressings to monitor a superficial wound;
- common pain relievers (acetaminophen, ibuprofen) and antihistamines;
- tweezers, a headlamp, an emergency blanket and a first aid reference card.
To choose dressings and bandages well, see the 19 types of dressings and bandages. People with specific medical needs (severe allergy with an epinephrine auto-injector, diabetes, asthma) should add their personal supplies, which do not replace the rest. See also long-term medications and continuity with your pharmacist.
Specialized modules to add
Depending on your situation, it can be useful to add modules grouped in small separate pouches.
Burn module
Burns are common in emergencies: cooking on a stove, backup heating, candles, campfires. Nine items cover most needs:
- nitrile gloves;
- a cool compress and a container for water;
- pure aloe gel, for superficial burns once cooled;
- antibacterial ointment;
- cotton swabs to apply without touching;
- non-stick dressings;
- gauze to hold the dressing in place;
- a pain reliever;
- plastic cling wrap, which temporarily protects a burn until it can be treated.
The first step is always the same: cool the burn under lukewarm to cool water (never ice-cold) for at least 20 minutes, remove rings and clothing that are not stuck, then cover. Do not apply butter, ice or toothpaste, and do not pop blisters. A burn that is extensive, deep, on the face, hands or genitals, or on a young child requires prompt medical care.
Dental module
A toothache or a lost crown quickly becomes disabling when a dentist is out of reach. A small module can hold dental floss, temporary dental cement, orthodontic wax, clove oil and a pain reliever. See dental preparedness.
Musculoskeletal module
A malleable splint, elastic and cohesive bandages, triangular bandages and an instant cold pack let you manage a sprain or suspected fracture until help arrives. The principle: immobilize the joint above and below the injury, without trying to realign it.
Personal module
A few days of prescription medication, the list of prescriptions, spare glasses, personal hygiene products, a copy of known allergies: this module is specific to each household member and should be updated regularly.
The individual IFAK-type kit
An IFAK (Individual First Aid Kit) is a compact individual kit, originally designed for the military, focused on injuries that can kill within minutes: massive bleeding, chest wounds, airway problems. It does not replace a family kit: it complements it. It belongs in a hiking pack, a vehicle or a go bag, as long as you have learned how to use it.
| Type | For whom | Typical contents | Use |
|---|---|---|---|
| IFAK | One person | Tourniquet, hemostatic gauze, pressure bandage, gloves, shears, emergency blanket | Immediate response to severe bleeding |
| AFAK (advanced) | A trained person | IFAK contents plus chest seals and airway supplies | Expanded capabilities, advanced training required |
| MFAK (multiple) | A team or family | Several tourniquets and bandages, triage supplies | Multiple casualties, vehicle, group |
| Mass casualty kit | Public places, organizations | Several bleeding control sets | Major accident or event with many casualties |
Choosing and placing your IFAK
- Training first: a bleeding control course (such as Stop the Bleed) or advanced first aid comes before buying.
- Quality: favour tourniquets and dressings from recognized manufacturers and beware of cheap counterfeits.
- Accessibility: the kit should open one-handed in seconds and always be in the same place (belt, pack strap, vehicle console).
- Context: a hiker, a driver on long roads or a hunter have different needs.
- Maintenance: tourniquets and dressings age, especially in a vehicle exposed to temperature swings.
Some equipment found in kits sold a few years ago, such as nasopharyngeal airways or decompression needles, belongs with trained professionals and has no place in a citizen’s kit without matching training. Compact elastic tourniquets that were once popular are also considered less reliable than windlass models. Better a simple, quality kit that you master.
Choosing the container and organizing the kit
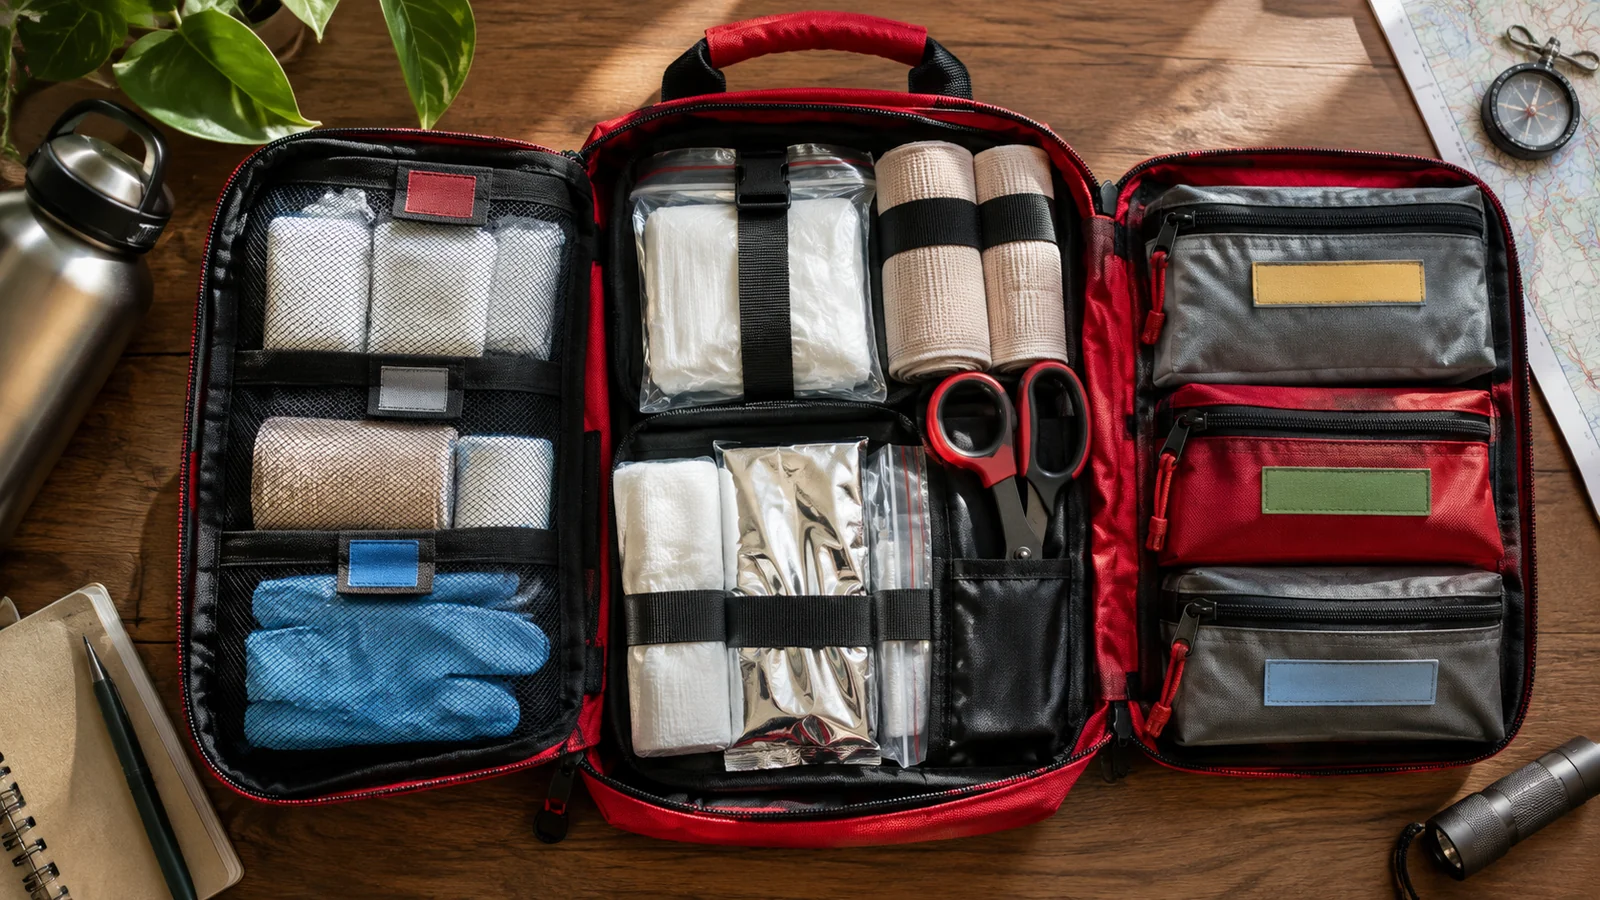
The container directly affects how useful the kit is under stress. A well-stocked kit in a bag that is hard to open or poorly organized loses much of its value. Criteria to keep in mind:
- quick opening, ideally one-handed;
- internal organization by distinct, labelled zones or pouches;
- contents visible without emptying everything;
- moisture resistance (dry bags or resealable pouches);
- suitable size: a vehicle kit can be bulkier than a hiking kit, which in turn is more complete than a pocket kit.
Practise finding each item without looking, or by headlamp: the exercise quickly reveals organization problems before a real emergency exposes them.
Checklists by use
| Kit | Basic contents |
|---|---|
| Home (family) | Assorted bandages, sterile pads, rolled gauze, closure strips, 2 triangular bandages, elastic bandage, antiseptic, pain relievers, antihistamines, tweezers, emergency blanket, 2 pairs of gloves, burn module, personal module |
| Outdoors (hiking) | Tourniquet, hemostatic gauze, pressure bandage, burn dressings, closure strips, transparent dressings, malleable splint, cohesive bandage, 2 triangular bandages, moleskin, pain relievers, headlamp, emergency blanket |
| Vehicle | Tourniquet, hemostatic gauze, pressure bandage, chest seal, large pads, 2 triangular bandages, closure strips, elastic bandage, emergency blanket, gloves, trauma shears, marker, flashlight |
| Individual IFAK | Tourniquet, hemostatic gauze, pressure bandage, gloves, shears, marker, emergency blanket |
For the outdoor kit, see a hiking first aid kit; for the car, the vehicle emergency kit. And for a practical case, read the scenario of a deep wound in the woods.
- Start from your needsMinor care, mobility, trauma: based on your activities.
- Choose qualityEspecially for the tourniquet, gauze and dressings.
- OrganizeSeparate pouches, one-handed opening, visible contents.
- Get trainedA hands-on course is worth more than any item.
- MaintainYearly inventory, immediate replacement after use.
Maintenance and updates
A kit is only operational if its contents are in good condition. An inventory at least once a year is recommended, and twice a year for a vehicle kit exposed to heat and cold, which degrade adhesives and medication.
- Expiry dates: sterile dressings, medication, hemostatic gauze and gloves all have a limited shelf life.
- Packaging integrity: a punctured or damp sterile package is no longer sterile.
- Immediate replacement of any item used, without waiting to “think about it later”.
- Changing needs: a birth, a new activity, a move, a new treatment.
The inventory is also a chance to review how each item is used, especially if your last training was a while ago.
Limits and points of caution
However well stocked, a kit covers only part of medical emergencies. Internal injuries, heart problems, strokes and severe breathing difficulties require professional care: the kit helps stabilize while waiting, not treat on your own. Calling for help remains the priority.
The tourniquet, hemostatic gauze and chest seal have a real learning curve. Having them without practising in a supervised setting greatly limits their effectiveness under stress. Training and equipment are complementary investments. To see where you stand, take the preparedness review.
Frequently asked questions
Do you need different kits for home, car and outdoors?
Ideally, yes. A vehicle kit can be bulkier and trauma-oriented, a hiking kit more compact with a splint and blister care, and the home kit more general. A single kit is possible, but it will be a compromise.
What is an IFAK and do I need one?
It is an individual kit focused on severe bleeding and injuries that can kill within minutes. It is useful outdoors, on the road or in a go bag, as long as you have trained to use the tourniquet and hemostatic gauze.
How often should you check your kit?
At least once a year, and twice a year for a kit left in a vehicle. After each use, replace consumed items immediately.
Can you fly with a first aid kit?
Most contents are accepted. Liquids are limited to 100 mL in the cabin, short-bladed scissors are generally tolerated depending on the airport, and prescription medication should stay in its original packaging with the prescription. Check the rules before you leave.
What should you do first for a burn?
Cool it under lukewarm to cool water for at least 20 minutes, remove jewellery and clothing that is not stuck, cover with a non-stick dressing or cling wrap, and seek care if the burn is extensive, deep, or on the face, hands or genitals.