
In this article
- In brief
- 1. Before the dressing: the right steps
- 2. Part 1: dressings, what goes on the wound
- 3. Part 2: bandages, what holds and protects
- 4. Part 3: joint and soft-tissue support
- 5. Building your kit for your needs
- 6. Maintaining your kit
- 7. Points to watch and limits
- 8. Key takeaways
- Frequently asked questions
- Further reading
- Sources
Dressing, bandage, gauze pad, cohesive wrap: these words are often used interchangeably, but they describe products with very different properties, designed for specific situations. Stocking a good first aid kit is not about quantity; it is about matching the product to the injury.
This article covers nineteen types of dressings and bandages used in first aid, explains what each one really does and helps you decide which deserve a place in your kit. A family with young children, a hiker in remote country and an urban cyclist do not have the same needs, and should not carry the same kit.
This article is for information only. It does not replace first aid training or advice from a health professional. For a serious injury, call 9-1-1 in Canada and the United States, or 15 or 112 in France.
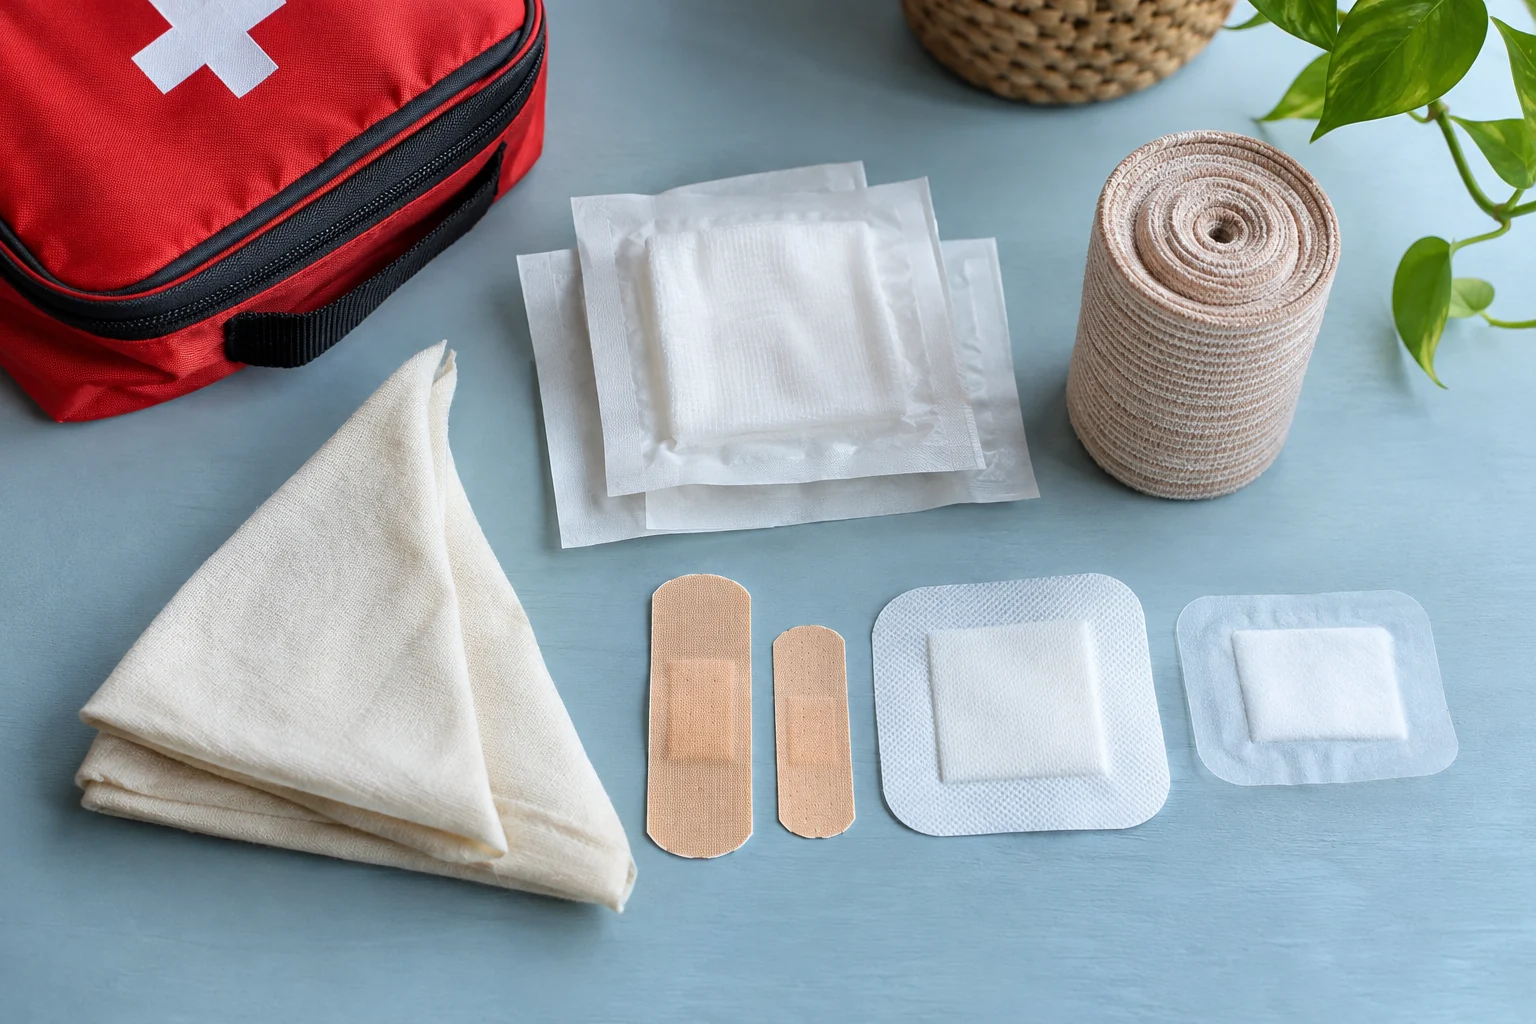
Dressing or bandage? A dressing goes directly on the wound: it absorbs, protects and supports healing. A bandage goes over it to hold the dressing in place, apply compression or provide support. Some products combine both, such as the classic adhesive bandage.
In brief
In brief. For most households, the essentials are a handful of items: adhesive bandages in several sizes, sterile gauze pads, gauze rolls, medical tape, wound-closure strips, an elastic bandage, two triangular bandages and gloves. Specialized dressings such as hydrocolloids, foams and alginates are mostly for follow-up wound care. Emergency pressure bandages, hemostatic gauze and tourniquets are useful in remote settings but require training. Before any dressing: stop the bleeding, rinse with clean water and know when to seek care.
1. Before the dressing: the right steps
The best dressing comes second to what you do first:
- Protect yourself: wash your hands and wear disposable gloves if you can.
- Stop the bleeding: press firmly and directly on the wound with a gauze pad or clean cloth, without letting up, for at least 5 to 10 minutes. For heavy bleeding that will not stop, call emergency services.
- Clean: rinse the wound under clean running drinking water for several minutes to remove dirt. Avoid pouring alcohol or hydrogen peroxide into the wound: they irritate tissue and slow healing.
- Assess: a wound that is deep, gaping, very dirty, caused by a bite, or on the face, a hand or a joint should be seen by a professional, ideally within hours if stitches may be needed.
- Cover: choose the right dressing, then watch for signs of infection: spreading redness, warmth, increasing pain, pus, fever.
Think about tetanus too: in Canada, adults are advised to get a booster every ten years, and sooner for a dirty or deep wound if the last dose was more than five years ago. Your pharmacist or local clinic can advise you.
2. Part 1: dressings, what goes on the wound
Dressings differ in composition and properties. They influence how a wound heals: by keeping it moist, absorbing fluid, limiting infection risk or helping blood clot.
1. Gauze pads and non-stick dressings
Also called sterile pads, non-woven pads or non-adherent dressings.
This is the most common and versatile dressing. In squares, rolls or sponges, gauze goes on the wound to soak up blood and fluid. “Non-adherent” versions have a treated surface that sticks less to healing tissue. You can cut, fold and layer them to fit the wound. They are the foundation of any kit, from a basic family kit to an advanced outdoor kit.
Some gauzes are impregnated with a hemostatic agent that speeds clotting in heavy bleeding. They are used by packing the wound and then applying strong pressure, a technique learned in training.
2. Foam dressings
They provide comfortable padding and keep the wound moist to support healing. They suit moderately oozing wounds, such as some deep scrapes, or wounds in the healing phase. Some contain silver for its antibacterial properties.
For a standard kit, they are less of a priority than gauze. They become useful for caring for a wound over several days, especially when care is hard to reach.
3. Hydrogel dressings
Made mostly of water in a gel, they keep moisture high and feel cool, which eases pain. They are useful for painful wounds, minor burns and dry wounds that need rehydrating.
They absorb little and do not suit heavily oozing wounds. For a burn, the first step is still to cool it under cool running water for about 20 minutes, without ice, then cover it with a clean, non-stick dressing. A burn that is large or deep, or on the face, hands, feet, genitals or a joint, or on a young child, should be seen by a professional.
4. Transparent film dressings
This thin, flexible film sticks to the skin like a second skin. Being transparent, it lets you watch the wound without removing it. It is semi-permeable: water vapour and oxygen pass through, but outside water and bacteria do not.
It only suits dry or barely oozing wounds, such as a small scrape or a friction spot. It is also used to secure and waterproof an absorbent dressing, for example to shower.
5. Hydrocolloid dressings
They contain particles that absorb fluid and form a gel against the wound, keeping it moist to support healing. They can stay on for several days, often up to seven, which means fewer changes. They are also popular for foot blisters.
They are occlusive and should not be used on an infected, very deep or heavily oozing wound. Change them if they leak, peel off or signs of infection appear. A particular smell on removal is normal; a smell that persists after cleaning is not.
6. Alginate dressings
Made from seaweed fibres, they are very absorbent and form a gel on contact with fluid. They are mostly used for deep, heavily draining wounds and must always be covered with a secondary dressing.
For a general kit, they are a low priority. They become relevant in a prolonged-care kit, with guidance from a professional.
7. Silicone dressings and tapes
They stick to dry skin but not to the moist wound. That means painless removal without tearing healing tissue, an advantage for older adults, children and fragile skin, and for frequent changes. They come as sheets, strips, foams and tapes.
Silicone sheets are also used, on medical advice, to reduce the appearance of some thick scars once a wound has closed.
3. Part 2: bandages, what holds and protects
Bandages go over dressings to hold them in place, apply compression or support a joint or limb. The choice depends on where the injury is and what kind it is.
8. Adhesive bandages
The classic “Band-Aid” type. It combines an absorbent pad with an adhesive backing that holds it without another bandage. It suits small injuries: shallow cuts, scrapes, small wounds on areas that do not move much. On joints it comes loose quickly, so choose special shapes for fingers and knuckles, or a more flexible fabric.
Essential in any family kit, it covers most everyday minor care. Stock a range of sizes, including large formats and joint shapes, and latex-free versions if anyone is allergic.
9. Gauze roller bandages
These rolls of breathable fabric hold a dressing on any part of the body. Unlike pads, they do not touch the wound and do not need to be sterile. Their flexibility fits limbs, the head or the trunk. Stretch gauze is the easiest to apply.
It is one of the most versatile items in a kit. Petroleum-jelly gauze pads, sold separately, act as non-stick dressings for sensitive wounds and minor burns.
10. Tubular bandage
Woven as a continuous tube, it slides over a limb to hold a dressing without wrapping. Its light compression also helps support a mild sprain. It is very handy for fingers, toes, arms and legs, and can be cut to length.
11. Moleskin
A thick, padded fabric with adhesive on one side, moleskin protects friction spots: blisters, corns, calluses. It does not treat the injury but removes the friction causing it. Hikers and long-distance walkers swear by it.
Cut it into a ring around a blister rather than sticking it on top, to relieve pressure without tearing skin on removal. Better still, apply it to a red spot before a blister forms.
12. Liquid bandages
Sprayed or brushed on, they dry in air into a flexible, water-resistant protective film. They protect small clean cuts and hard-to-cover areas such as fingertips or knuckles. They do not suit wide, deep, dirty or jagged wounds, and they often sting when applied.
13. Wound-closure strips
Also called adhesive skin closures or “butterfly” strips.
These strips are placed across a wound to bring its edges together and hold them. They suit clean, straight, shallow cuts whose edges meet without tension, after thorough cleaning and on dry skin. Some newer devices offer stronger closure for areas that move.
They do not replace stitches for a deep, gaping, heavily bleeding or very dirty wound, or a bite: in those cases, seek care promptly. Never seal a contaminated wound tightly, as it may become infected.
14. Triangular bandage
One of the most versatile tools in a kit. Its large size lets you hold a dressing, make a sling to immobilize an arm, secure an improvised splint or maintain pressure on a wound. Folded into a cravat, it works as a headband or tie.
Carry at least two in an outdoor kit. In a pinch, it can serve as a pre-filter to remove particles from cloudy water, but the water must then be boiled or disinfected before drinking.
15. Emergency pressure bandages
Also called trauma dressings, compression bandages or, after a well-known design, “Israeli bandages.”
These are designed to control severe bleeding quickly. They combine a thick absorbent pad, an elastic wrap and a device for applying and holding strong pressure. Some include a hemostatic agent. Many can be applied one-handed, an advantage if the injured person must treat themselves.
They are useful in outdoor, vehicle or worksite kits, alongside direct pressure. Their effectiveness depends on technique, though: take a first aid course that covers bleeding control. Tourniquets, sometimes included in trauma kits, should only be used after training, for life-threatening limb bleeding, while calling emergency services immediately. Occlusive chest seals also require advanced training.
4. Part 3: joint and soft-tissue support
This group covers bandages used for sprains, strains, bruises and while waiting for a possible fracture to be assessed. Their role is mostly mechanical: compress, support, immobilize.
16. Elastic bandage
Also called a tensor bandage, ACE bandage or compression wrap.
Made of stretchy fabric, it wraps around a joint or limb to apply compression that limits swelling and supports injured structures. It suits mild to moderate sprains and bruises while you wait for assessment if needed.
Tension matters: too loose and it does nothing; too tight and it cuts off circulation. Wrap from the far end of the limb toward the heart, overlapping each turn by half, and check regularly that fingers or toes keep their colour, warmth and feeling. Loosen it if they turn pale, bluish, cold, numb or painful, and take it off to sleep unless advised otherwise.
17. Kinesiology tape
This elastic adhesive tape mimics the stretch of skin. It gives light support to muscles and tendons without immobilizing the joint, unlike an elastic bandage. It is mainly used in sport and rehabilitation, often on a physiotherapist’s advice. Scientific evidence for its effectiveness is limited, and it is not suitable for an acute sprain that needs real support.
18. Cohesive bandage
It sticks to itself but not to skin or hair, so it can be applied and reapplied easily. Its firm compression helps stabilize a joint, hold a dressing on a tricky spot such as a hand or ankle, and protect an improvised splint. It is widely used in veterinary care too, making it a good choice for a kit that also covers household pets.
Because it tightens slightly as it is applied, unroll it before wrapping and watch circulation, as with an elastic bandage.
19. Plaster bandage
It contains water-activated plaster: wetted and moulded around a limb, it hardens within minutes into a rigid cast. It is used in medical settings to make casts.
It does not belong in a first aid kit: a cast is applied after assessment, often with an X-ray, to check fracture alignment, and incorrect application can cause serious complications such as compressed blood vessels. In an emergency, a padded improvised splint made from a triangular bandage, stiff cardboard, a rolled magazine or branches is safer until care is reached.
5. Building your kit for your needs
Nineteen types of product does not mean you need them all. The right contents depend on your situation: a family with young children, outdoor activities, a risky workplace or a remote region call for different kits.
| Kit | Essential dressings and bandages | Worth adding |
|---|---|---|
| Basic family | Assorted adhesive bandages, sterile gauze pads, gauze rolls, medical tape, closure strips, elastic bandage, 2 triangular bandages | Gloves, scissors, tweezers, liquid bandage, moleskin, petroleum-jelly gauze |
| Outdoor and hiking | Gauze pads, cohesive wrap, triangular bandage, closure strips, hydrocolloid dressings for blisters, moleskin | Emergency pressure bandage, emergency blanket, burn gel or dressing |
| Remote or extended trips | All of the above in larger quantities, film and foam dressings for follow-up care | Pressure bandages, hemostatic gauze and tourniquet, only with suitable training |
In every case, a few non-dressing items round out the kit: disposable gloves, bandage scissors, tweezers, a thermometer, single-use sterile saline and a first aid guide. For over-the-counter medicines, ask your pharmacist.
Quality matters as much as quantity: a small set of reliable products you know how to use beats a wide range of cheap ones. Keep the kit in a waterproof container, somewhere the whole family knows.
6. Maintaining your kit
A kit forgotten at the back of a cupboard is of little use. A few habits keep it ready:
- Yearly check: look at expiry dates; sterility of pads is guaranteed until the date shown as long as the package is intact. Adhesives lose strength with time, heat and humidity.
- Replace right away: restock what you use as soon as you get home, so you never find an empty box at the wrong time.
- Store it well: avoid a car glovebox in summer or a damp bathroom for your main supply.
- Quick access: group emergency items, such as gauze and gloves, in a pouch you can grab fast.
To organize your kit step by step, see our guide to organizing first aid supplies.
7. Points to watch and limits
Knowing the types of dressings is useful but does not replace the skill to pick the right one for a real injury. A first aid course, even a few hours long, turns these guidelines into reflexes you can use under stress. In Canada, the Red Cross, St. John Ambulance and other organizations offer courses for the public; in France, the PSC1 course serves the same purpose.
Some specialized dressings, such as hydrocolloids, alginates and foams, are more about follow-up wound care than emergencies. Whether they belong in your kit depends on how self-reliant you want to be and how far you are from care.
Finally, see a professional promptly if a wound keeps bleeding despite pressure, is deep or gaping, was caused by a bite or a rusty object, shows signs of infection, or if the person has diabetes or a weakened immune system. Equipment supports skill; it does not replace it.
8. Key takeaways
Nineteen types, three main families, and as many different situations. Most everyday needs call for only a small share of these products, well chosen and well mastered: adhesive bandages, sterile gauze pads, gauze rolls, an elastic bandage, closure strips and triangular bandages. The point is not to own everything but to know what to use, and why, when the moment comes.
Frequently asked questions
What is the difference between sterile and non-sterile dressings?
A sterile dressing has been treated to remove micro-organisms and is needed for anything that touches an open wound directly. A non-sterile product, such as a gauze roll used to hold a dressing, can go on top. Avoid putting non-sterile products directly on a wound.
Can a hydrocolloid dressing stay on for several days?
Yes, often up to seven days, on a clean wound. Change it if it leaks, peels off or signs of infection appear: spreading redness, warmth, increasing pain, pus, fever.
Elastic or cohesive bandage for a sprain?
An elastic bandage is reusable and easy to adjust for compression during the first days. A cohesive wrap is handy on an ankle or hand because it holds without clips. Either way, watch circulation and seek care if pain is severe, you cannot bear weight or there is visible deformity.
Do dressings expire?
Yes. Sterility is guaranteed until the date shown if the package is intact. Adhesives age with heat and humidity. Inventory your kit once a year.
When does a cut need stitches?
When it is deep, gaping or long, its edges do not meet, it is still bleeding after 10 minutes of pressure, or it is on the face, a joint or the hand. Ideally, get it seen within hours.
Does a family kit need a tourniquet?
Not necessarily. A tourniquet is effective for severe limb bleeding but should only be used after training. For most families, gauze, a pressure bandage and confident direct pressure come first.
Further reading
- Household emergency kit: a complete guide
- A hiking first aid kit: contents and organization
- Over-the-counter medicines: planning with your pharmacist
- Plants and wounds: traditional uses versus first aid
Sources
- Canadian Red Cross, first aid and CPR guide.
- St. John Ambulance, bleeding control and wound care resources.
- Government of Canada, Canadian Immunization Guide: tetanus vaccine.
- Stop the Bleed and training organizations, bleeding control.