
In this article
- In brief
- 1. Choosing the site
- 2. Assessing your needs
- 3. The 11 shelter designs
- 4. Fire, carbon monoxide and safety
- 5. Comparison table
- 6. Ground insulation, often overlooked
- 7. The best shelter starts before you leave
- 8. Where can you practise?
- 9. Training
- 10. Key takeaways
- Frequently asked questions
- Further reading
- Sources
In the outdoors, shelter is often the most urgent priority, ahead of food and, in many cases, ahead of water. Cold, rain and wind can lead to hypothermia within hours, even in a Canadian summer once you are wet. Knowing how to put up a shelter quickly, suited to the materials at hand, the weather, the number of people and the time left before dark, is a very practical skill, and its value depends entirely on practising beforehand.
This article presents 11 shelter designs, from the quickest to the most elaborate. Some use a tarp; others only branches and debris found on site. For each, you will find its strengths, its limits and, where useful, construction steps. We also cover safety rules, especially around fire and carbon monoxide, and where you can practise.
In brief
In brief. The best shelter is the one that keeps you dry and off the cold ground as quickly as possible. With a tarp and cord, an effective shelter goes up in 10 to 20 minutes; without gear, a debris shelter takes one to several hours. Pick a dry site, away from dead trees and flood zones, and visible to rescuers. Insulate underneath as much as above. Avoid fires inside, except in extreme cold with wide ventilation. Most important of all is what you do before you leave: tell someone your route and carry an emergency blanket, a light tarp and a way to call for help.
1. Choosing the site
Choosing the location comes before any building. A poor site can cancel out the best-built shelter.
What to look for
- Flat or slightly raised ground: on a slope, rain seeps under the shelter and your bedding slides.
- Dry ground: avoid wet areas and hollows where water and cold air collect at night.
- A sensible distance from water: banks can flood quickly after a downpour and attract insects, but water should stay within reach.
- Materials nearby: dead branches, dry leaves, conifer boughs. The less you walk to gather them, the more energy you save.
- A visible spot: if you are lost or injured, set up near a clearing, trail or shoreline, and mark your position with a bright tarp or piece of clothing so rescuers can see you.
Hazards to avoid
- Areas exposed to rockfall or landslides.
- Dead trees or large dead limbs overhead, which can fall in strong wind; they are sometimes called “widowmakers.”
- Flood-prone low ground and stream beds, even dry ones.
- Summits and ridges exposed to wind and lightning.
- Snow-loaded slopes prone to avalanches in the mountains.
If the only site available slopes slightly and rain is forecast, a small trench dug uphill of the shelter diverts water before it reaches your bed.
2. Assessing your needs
The best survival shelter is not the most sophisticated one, but the one that fits the real conditions of the moment.
What guides the choice
- Number of people: an A-frame suits one person; a lean-to or tipi suits a group.
- Temperature: a low, closed shelter holds body heat; an open shelter needs a fire in front of it.
- Rain and wind: the stronger they are, the lower, tighter and more closed on the windward side the shelter must be.
- Time available: a tarp goes up in 10 minutes; a well-insulated debris shelter can take hours. Start at least two hours before dark.
- Expected duration: one night waiting for rescue, or several days.
- Your energy: building a shelter makes you sweat. In winter, take off a layer while working so you do not get wet from the inside.
Useful but not essential tools
- A light tarp of roughly 2.5 × 3 m (8 × 10 ft), plus an emergency blanket.
- Cord, for example 15 to 30 m (50 to 100 ft) of paracord, for a ridgeline and corner guylines.
- A sturdy knife for carving stakes and preparing wood.
- A folding saw, safer and more efficient than a hatchet for cutting dead branches.
- A small folding shovel, very useful for moving snow in winter.
For most hikers, the tarp, cord and emergency blanket do most of the work: they turn an hours-long build into a few minutes.
3. The 11 shelter designs
Design 1: the simple tarp shelter
The tarp is stretched flat or slightly angled between two trees, then staked to the ground on one side. In an emergency, a large rain poncho can do the same job for one person.
Strengths: the fastest option, under 10 minutes; beginner-friendly and can cover a group.
Limits: little protection from wind and sideways rain, no insulation. Always angle the tarp so rain runs off instead of pooling.
Design 2: the ridgeline tarp tent
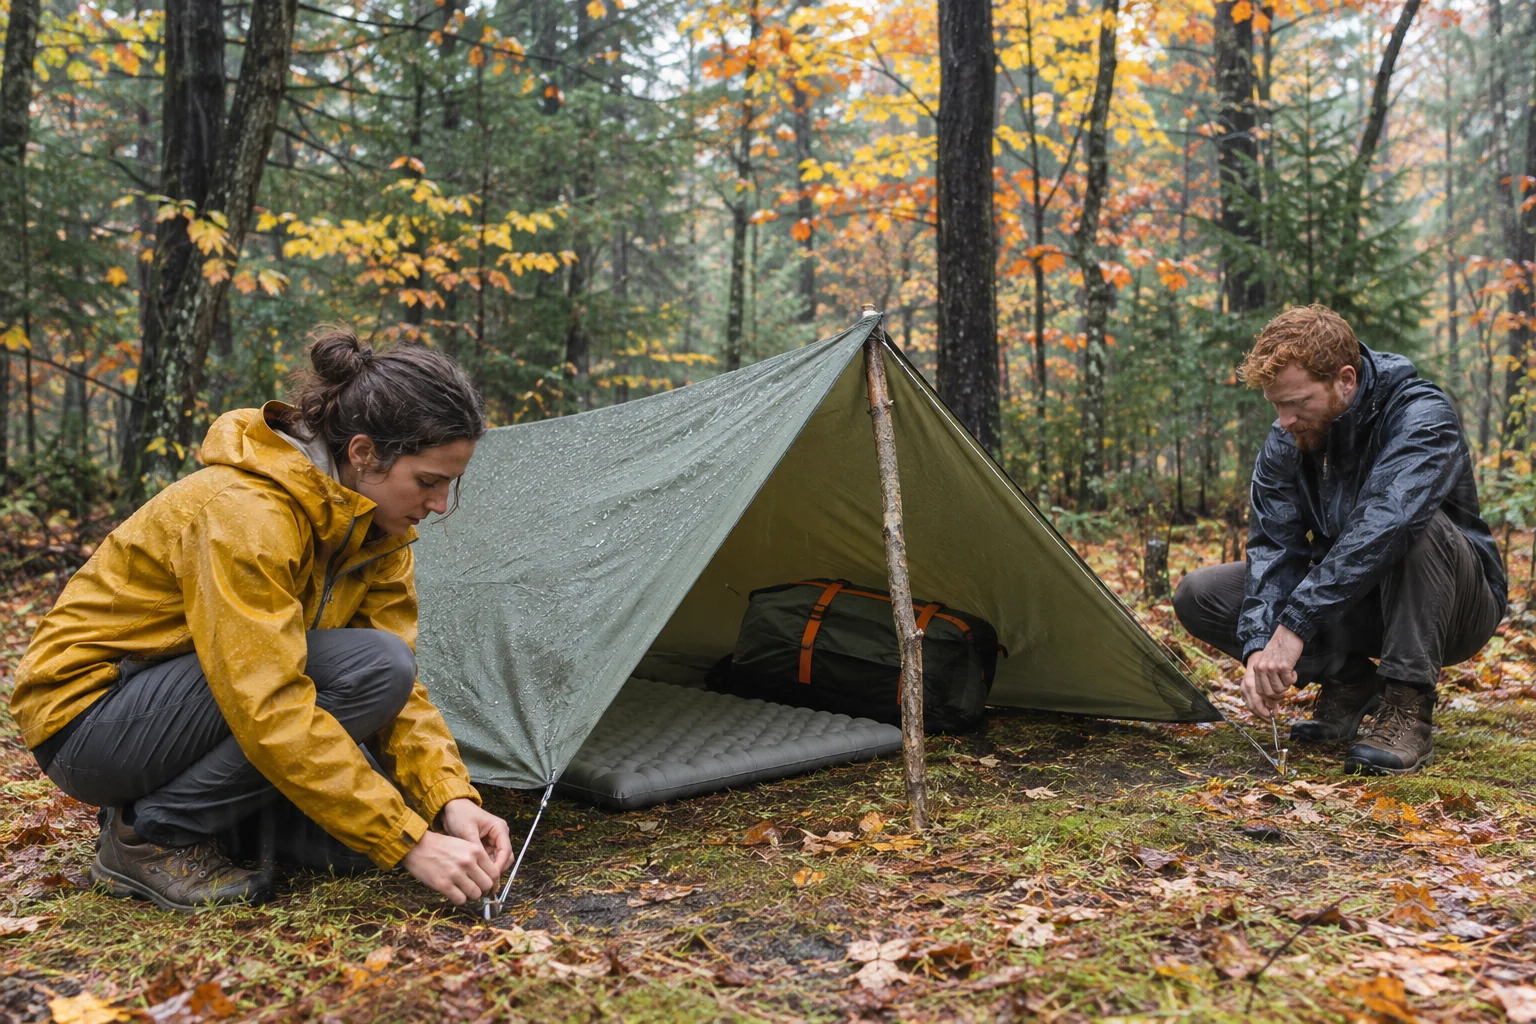
A cord is tied horizontally between two trees at hip or waist height. The tarp is draped over it like a roof, and the sides are anchored with stakes, rocks or extra cord.
Strengths: quick, simple and very effective against vertical rain. Lowering the ridgeline improves wind protection.
Limits: moderate wind protection if the ends stay open. Close the windward end with a tarp flap, branches or your pack.
Design 3: the tarp tipi with poles
Three or more poles are joined at the top and spread at the base to form a cone, with the tarp wrapped around them. An opening at the top lets out moisture and, if a small fire is lit inside, smoke.
Strengths: fits several people, good protection, sturdy once properly built.
Limits: takes practice to stabilize and needs a large tarp. Rain gets in through the top opening. An indoor fire carries serious risks (see the safety section).
Design 4: the hanging tarp tipi, no poles
The tarp is folded into a triangle. A small pebble is placed in the point and a cord is tied around it, so the tarp does not need to be pierced. The cord is then tied to an overhead branch and the base is anchored in a circle.
Strengths: good protection, no poles to find, and the tree above adds some cover.
Limits: needs a large tarp and a strong branch at the right height, which is not always easy to find. Check that the branch is not dead.
Design 5: the snow lean-to
A tree serves as the anchor point. A pole is leaned against the trunk at about 45 degrees; snow is shovelled into a wall on the windward side, and the tarp is stretched over the pole. The floor gets a thick layer of conifer boughs for insulation. Dense conifers often have a natural hollow under their low branches, a good starting point.
Strengths: suited to winter emergencies; snow insulates and blocks wind; the size adapts to the group.
Limits: moving snow without a shovel is slow and exhausting, and the effort makes you sweat. Dug snow shelters such as a quinzhee or a snow trench take experience: a roof that is too thin can collapse, and a closed shelter must always have a vent hole. Never light a fire or stove inside without ventilation.
Design 6: the fallen-tree shelter
A downed trunk serves as wall and frame. A tarp can be draped over it like a tent, or branches and leaves can be leaned against it to form a sloping roof. The entrance can be partly closed with more branches in cold or windy weather.
Strengths: quick if the tree is well placed, good protection from wind and snow, works with or without a tarp.
Limits: depends on finding a stable fallen tree. Make sure it cannot roll or slide and that no other broken trees threaten to fall. Rotting wood harbours insects.
Design 7: the hammock under a tarp
A variation of the ridgeline tent with the bed slung between two trees instead of on the ground, and the tarp pitched above as a roof.
Strengths: off wet ground and away from crawling insects, very comfortable in mild weather.
Limits: requires a hammock and straps, offers little side-wind protection and gets cold as soon as temperatures drop because air moves under your body. You then need dedicated insulation underneath. Use wide straps to protect tree bark.
Design 8: the debris A-frame
An A-shaped structure built entirely from natural materials, ideal for one person for a night.
Strengths: no gear needed, holds body heat well thanks to its small volume.
Limits: slow to cover properly, fits only one person, and a fire outside will not warm it.
How to build it:
- Find a strong ridgepole about one metre (3 ft) longer than your height.
- Rest one end on a stump, a rock or two crossed sticks at knee height; the other end sits on the ground.
- Lean shorter branches along both sides, like ribs, leaving just enough room to lie down.
- Cover with small branches, then a thick layer of dead leaves, needles or moss: aim for 60 cm (2 ft) or more, so that a hand pushed in cannot see daylight.
- Fill the inside with at least 15 to 20 cm (6 to 8 in) of dry leaves under you, and keep a pile of leaves to plug the entrance once you are inside.
Design 9: the debris tipi
A cone of branches covered with natural debris, no tarp required.
Strengths: fits a few people, no tools or tarp essential.
Limits: needs many long branches, is vulnerable to strong wind because of its height, and its large volume holds heat less well than a low shelter. Leaf cover can blow away.
How to build it:
- Gather three long poles of similar length and tie them at the top into a tripod. Cord makes this much easier.
- Lean more poles against the tripod, leaving a gap for the entrance.
- Fill the gaps with smaller and smaller branches.
- Cover with conifer boughs, dead bark or a tarp, starting at the bottom so layers overlap like shingles. If you use a tarp, add branches on top to hold it down.
Fallen birch bark makes excellent roofing. Do not strip it from a living tree: that injures it for years.
Design 10: the debris lean-to
An open-fronted structure with a sloping roof of branches and debris resting on a horizontal pole. With a fire in front of the opening, the roof throws some heat back inside; a reflector wall of stacked logs on the far side of the fire improves efficiency greatly.
Strengths: quick, roomy, beginner-friendly; with a fire and reflector, good for several nights.
Limits: cold without a fire, wind gets in from the sides, and the fire needs tending all night. Put the back of the shelter to the wind.
Design 11: the closed shelter with a smoke hole
A closed structure with an opening at the top to vent smoke from an indoor fire, inspired by traditional dwellings. It can be a tipi variant with a wider opening, or a semi-buried hut covered with earth.
Strengths: retains heat well, many variations possible, suited to a longer stay in severe cold.
Limits: slow to build, requires experience, and carries the highest fire and carbon monoxide risks of all the designs.
4. Fire, carbon monoxide and safety
A fire inside a shelter should only be considered in life-threatening cold. Two risks are real: the structure, made of highly flammable materials, catching fire, and carbon monoxide poisoning from an invisible, odourless gas that causes headache, nausea, drowsiness and then loss of consciousness.
- Always favour a fire outside, in front of a lean-to, with a reflector.
- If an indoor fire is truly necessary, keep it very small, provide a wide smoke opening and an air intake near the ground, and keep an exit clear at all times.
- Never use a stove, fuel lantern or embers inside a closed shelter, tent or snow shelter without ventilation, even briefly.
- Before lighting a fire, check current fire bans with SOPFEU in Quebec or your provincial wildfire service, and drown it completely with water before leaving.
For lighting and putting out a fire, see our guide to lighting and controlling a campfire.
5. Comparison table
| Design | Gear | Approximate time | People | Best for |
|---|---|---|---|---|
| Simple tarp | Tarp, cord | Under 10 min | 1+ | Speed |
| Ridgeline tent | Tarp, cord | 10–20 min | 1–3 | Rain |
| Tarp tipi with poles | Large tarp, poles | 30–60 min | 2–6 | Full protection |
| Hanging tipi | Large tarp, cord | 15–30 min | 1–3 | No poles |
| Snow lean-to | Tarp, shovel | 30–90 min | 1–4 | Winter, wind |
| Fallen tree | With or without tarp | 20–60 min | 1–3 | Wind, snow |
| Hammock under tarp | Hammock, tarp, straps | 15–30 min | 1 | Wet ground, insects |
| Debris A-frame | None | 1–3 h | 1 | Warmth without fire |
| Debris tipi | Cord helps | 2–4 h | 2–4 | No tarp |
| Debris lean-to | Cord helps | 1–2 h | 1–4 | With fire and reflector |
| Smoke-hole shelter | Varies | Several hours | 2+ | Longer stays |
Times are rough guides and vary widely with experience, weather and materials. A first build often takes twice as long as expected.
6. Ground insulation, often overlooked
People think mostly about the roof, but the ground is often the biggest source of heat loss at night: a body lying on cold earth or snow loses heat by conduction much faster than to the air. A well-packed bed of conifer boughs, dry leaves or grass at least 15 to 20 cm (6 to 8 in) thick matters as much as the cover. Failing that, your empty pack, coiled rope or a sit pad all help.
Keep your clothes dry too: a damp layer loses most of its insulating power. Change socks before sleeping and wear a toque, even in summer in the mountains.
7. The best shelter starts before you leave
In most real situations, search and rescue teams find lost people within 24 to 72 hours, especially when someone knows where to look. A few simple steps matter more than any building technique:
- Leave your route and expected return time with someone you trust; AdventureSmart offers a free trip plan.
- Carry an emergency blanket or bivy bag, a light tarp, cord, a headlamp and a whistle.
- In areas without cell coverage, a personal locator beacon or satellite messenger lets you call for help.
- If you are lost, stop, stay put and build a shelter before dark rather than walking at night. Three whistle blasts are a recognized distress signal.
8. Where can you practise?
Cutting live branches, moving vegetation or building a shelter is not allowed everywhere. In Quebec’s and Canada’s national parks, these activities are prohibited outside a genuine emergency. On private land, you need the owner’s permission. Some outdoor centres, outfitters and clubs offer land and courses where you can practise legally. In France, building shelters and bivouacking are governed by local rules and the regulations of parks and reserves. After practising, take the shelter apart and scatter the materials.
9. Training
Practising under controlled conditions is the only way to build a skill you can use under stress. Build an A-frame or a lean-to on a camping trip using only what you find on site, and time yourself. Then sleep a night in it, close to your tent or car, to see how well it really works. Repeat in the rain, then in winter. Building as a group is also a good way to share tasks and learn together.
10. Key takeaways
A good survival shelter is small, dry, insulated from the ground and up before dark on a safe, visible site. A tarp, cord and emergency blanket save hours; without them, debris shelters are still possible but take time and energy. An indoor fire is a last resort. And the most effective shelter is the one you never need: a trip plan left with someone and a small emergency kit in your pack.
Frequently asked questions
Does shelter come before water?
In most outdoor situations, yes. Exposure to cold, rain or heat can become dangerous within hours, while dehydration usually takes longer. The “rule of threes” (3 minutes without air, 3 hours without shelter in bad weather, 3 days without water, 3 weeks without food) is a rough guide, not an exact rule.
How thick should the debris be on an A-frame?
At least 60 cm (2 ft) of dry debris on the sides and top, more in severe cold. The outer layer can be wet, but the inside must stay dry. The bed under your body, at least 15 to 20 cm (6 to 8 in) thick, matters as much as the cover.
Which way should the entrance face?
Put the back of the shelter to the prevailing wind, with the entrance downwind. In Quebec, prevailing winds often come from the west and northwest in winter and from the southwest in summer, but local terrain can change that. An entrance facing south or east catches the morning sun.
How big should a survival shelter be?
As small as possible while letting you lie down with a little room and sit up slightly hunched. A shelter too big for your body heat to warm stays cold unless you have a fire outside.
How can I practise without waiting for an emergency?
Build a shelter on a camping trip, on land where it is allowed, time yourself and sleep in it for a night with a fallback nearby. Repeat in tougher conditions, in the rain or in winter.
Can I heat a snow shelter with a stove?
It is risky. A stove in an enclosed space produces carbon monoxide. If you need to melt snow, do it near the entrance with a clear vent hole and for short periods, watching for headaches and drowsiness.
Further reading
- Cold-weather survival: warmth, shelter and first aid
- The seven pressures of wilderness survival
- Drinking water treatment methods
- A family backpacking trip to test your self-reliance
Sources
- Canadian Red Cross and AdventureSmart, outdoor trip preparation advice.
- Health Canada, carbon monoxide information.
- SOPFEU, open-fire bans and prevention in Quebec.
- Sépaq and Parks Canada, flora protection regulations.