
In this article
- I. Understanding the risks of helicopter flights
- II. Preparation before flight
- III. Behavior during flight
- IV. Immediate action in case of imminent crash
- V. Evacuation after crash
- VI. Survival in hostile environments
- VII. Emergency call and waiting for help
- VIII. First aid
- IX. Mental preparedness and resilience
- X. Prevention and training
- Sources for pre-flight preparation
Helicopter flights meet a variety of needs: transportation, work, tourism or care. The risks depend in particular on the operation, the aircraft, its environment and the organisation of the flight. This guide develops the passenger's preparation and the themes of the emergency, without asserting a general increase in flights or promising that a series of actions will guarantee survival in an accident.
Helicopter accident statistics
To interpret statistics, it is necessary to know the year, the territory, the operations included and the denominator used. Historical figures for 26 Canadian accidents in 2020 and 0.72 fatal accidents per 100,000 hours, attributed to the TSB and the IHSF without a specific chart, do not allow a reliable comparison here. One rate per hour of flight is not directly compared to one rate per trip or passenger. Consult the original data of the organization concerned rather than draw from these values a promise on your flight.
Purpose of the article
The objective is to understand the questions to be asked before departure, the equipment of the occupied seat, the limits of a general procedure and the needs after an accident. The responsibility for the flight is not based solely on the passenger's reaction. The briefing, safety card and instructions specific to the aircraft and operation take precedence; an article does not replace practical training or crew decisions.
I. Understanding the risks of helicopter flights
To maximize your chances of survival in the event of a helicopter crash, it is essential to understand the risks inherent in this type of flight. Helicopters are multi-purpose aircraft, but they have features that distinguish them from fixed-wing aircraft and can influence how accidents occur.
Special features of helicopters
Hovering, vertical take-off and landing
- Hovering: Many helicopters can maintain a position above a point under the conditions and limits provided. This capacity is not absolutely exclusive to them among aircraft and does not mean that any area is accessible or that hovering is possible with any load or weather.
- Vertical take-off and landing : Helicopters can take off and land without the need for a runway. This allows them access to remote or confined areas, but also involves complex manoeuvres that require a great deal of pilot expertise.
Safety implications :
- Complexity of piloting : Take-off, landing and hovering manoeuvres require precise coordination. A pilot error can quickly result in a loss of control.
- Proximity to the ground : Low-altitude operations increase the risk of collision with obstacles such as buildings, electrical cables or trees.
Sensitivity to weather conditions
- Winds : Helicopters are particularly sensitive to wind gusts and turbulence, which can affect their stability.
- Reduced visibility : Fog, rain, snow or dust can affect the pilot's visibility, making navigation more difficult.
- Icing (frost) : Ice formation on rotors or instruments can compromise the performance of the aircraft.
Safety implications :
- Critical pilot decisions : Adverse weather conditions require quick and judicious decisions from the pilot to ensure flight safety.
- Operational limits : Helicopters have specific performance limits that must be met according to weather conditions.
Common causes of accidents
The following categories help to understand the topics examined in an investigation. They do not constitute a statistical classification or diagnosis that the passenger could establish from a noise. Fatigue, organization, decisions, equipment and the environment can interact; the analysis of an event is not simply an individual fault.
Human errors (piloting, maintenance)
- Piloting :
- Error in judgement Underestimation of environmental conditions or overconfidence in aircraft capabilities.
- Experience and training: they intervene in the preparation of crews, without deducing the cause of an accident of an assumed number of hours or age of the pilot. An investigation distinguishes between the facts and factors that actually contributed to the event.
- Maintenance :
- Inadequate maintenance : Negligence in regular inspections or in the replacement of worn parts.
- Non-compliance with protocols Use of non-compliant parts or incorrect maintenance procedures.
Potential consequences :
- Avoidable mechanical failures Human errors can lead to malfunctions that could have been avoided with proper maintenance.
- Inappropriate reactions : In an emergency situation, a bad response from the pilot can worsen the situation.
Mechanical problems
- Engine failure: rotor and manoeuvring possibilities depend on aircraft type and location. A failure does not automatically mean a vertical drop without control; autorotation is one of the possibilities that the pilot can use under certain conditions. The passenger shall not attempt to pilot or interpret a noise as an instruction to exit.
- Rotor problems :
- Main Rotor : Any anomaly can affect lift and stability.
- Anti-torque systems and control: some helicopters have a tail rotor, others have a different configuration. A failure has model-specific effects and procedures; it would be misleading to have uncontrolled rotation as the systematic outcome of a tail rotor problem.
- Hydraulic and electrical systems : Affects the operation of controls and instruments on board.
Potential consequences :
- Loss of control : A major mechanical failure can make the aircraft uncontrollable.
- Emergency landing : The pilot may be forced to make an autorotation landing, a delicate manoeuvre requiring a great deal of expertise.
Adverse weather conditions
- Poor visibility : Fog, heavy rain or snow can reduce the pilot's ability to see obstacles.
- Turbulence : Sudden wind changes can destabilize the aircraft.
- Icing : Ice formation can add weight to the aircraft and affect the rotors.
Potential consequences :
- Spatial disorientation Without visual references, the pilot may lose direction.
- Collision with terrain : Increased risk of striking the ground or obstacles.
Environmental factors (birds, obstacles)
- Birds: A collision can damage an aircraft, depending on the location and circumstances. The altitude or sighting of a bird does not allow the passenger to quantify this risk; report a useful obstacle without distracting the crew by improvised analysis.
- Obstacles :
- Electrical cables : Difficult to see, especially in low light conditions.
- Buildings and structures : Presence of unreported or undetected obstacles.
- Uneven terrain : Mountain or forest environment increasing risks.
Potential consequences :
- Structural damage : Impact on the performance of the device.
- Fatal accidents : A collision with an obstacle can result in an immediate crash.
Importance of preparedness and vigilance
Understanding these risks allows you to:
- Asking the right questions Before the flight, ask the operator about safety measures and contingency plans.
- Pay attention to alert signs : Unusual noises, strange aircraft behaviors or changing weather conditions.
- Follow safety instructions : Listen carefully to the safety briefing and know how to react to problems.
Helicopter flights present specific risks related to the nature of the aircraft and the conditions under which it operates. By being aware of these risks and by properly preparing yourself, you increase your chances of responding effectively to emergencies. The next section will discuss pre-flight actions to best prepare you for a critical situation.
II. Preparation before flight
Pre-flight preparation is a crucial step in ensuring your safety during a helicopter trip. By taking proactive action, you can reduce risks and be better prepared for emergencies. Here are the main aspects to consider before boarding.
1. Choice of operator
The choice of the operator deserves a check, but his reputation does not guarantee the absence of an accident. Find out about the proposed operation, passenger information and the contact person who can meet your needs before booking or boarding.
Check the company's certifications and reputation
- Official certifications : Ensure that the operator has all the licences and certifications required by the competent aeronautical authorities, such as Transport Canada.
- Security history Learn about the company's safety history. Reports from the Transportation Safety Board of Canada (TSB) or similar organizations are available.
- Customer reviews: They can provide information on the reception or organization they perceive, but do not certify maintenance or compliance of the operation. Distinguish these notices from the authorities' authorizations and information; a commercial rating does not measure the actual risk of your flight.
Ensure safety standards are met
- Regular maintenance Ask if helicopters are maintained in accordance with the manufacturer's standards and regulations.
- Staff training Check that pilots and crew are qualified and receive ongoing training.
- Emergency procedures Make sure the company has clear protocols in case of an incident.
2. Safety briefing
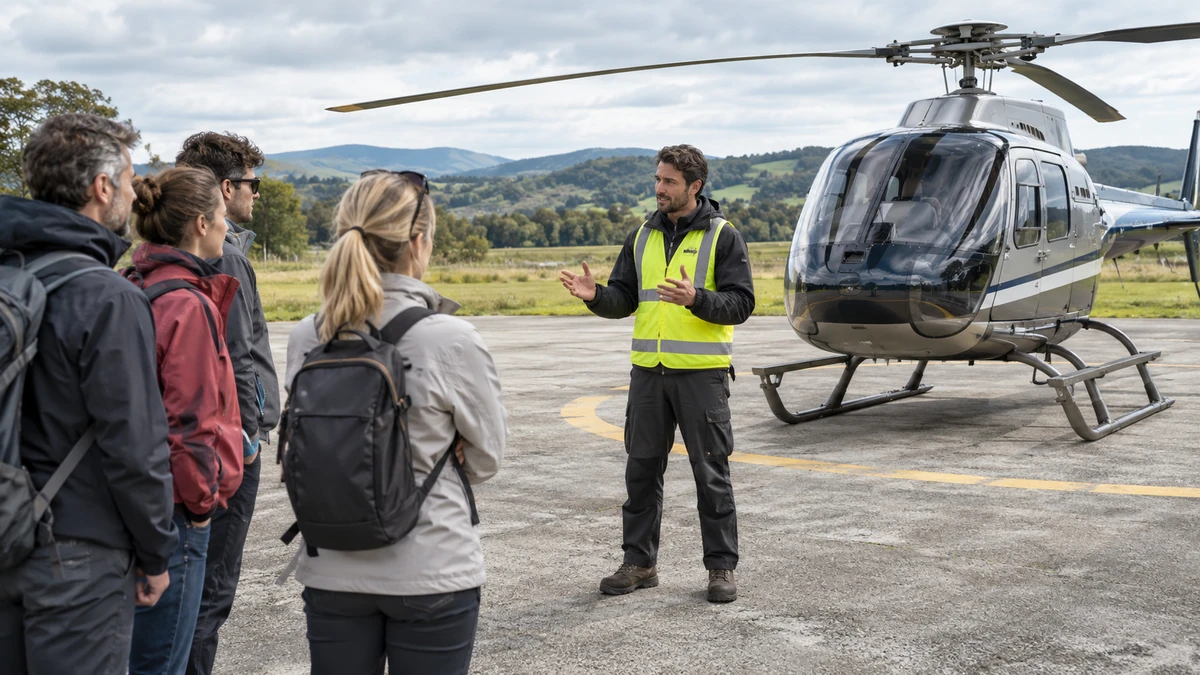
Before take-off, a safety briefing shall be conducted by the pilot or crew. This briefing is essential to familiarize you with the aircraft and emergency procedures.
The importance of listening carefully to the pilot's instructions
- Vital information : The briefing covers key points such as the use of seat belts, the location of emergency exits, and emergency procedures.
- Compliance with instructions Follow the instructions carefully can increase your chances of survival in case of a problem.
- Questions and clarifications : Don't hesitate to ask for clarification if something isn't clear.
Questions to ask before take-off
- Emergency exits - Can you show me where the emergency exits are and how to use them?
- Safety equipment - Are there lifejackets or buoyancy devices on board?
- Emergency procedures What should we do in case of emergency landing or engine failure?
- Weather conditions - Are weather conditions favourable for the flight?
3. Appropriate clothing
Your choice of clothing can have a significant impact on your safety in the event of an accident.
Clothing suitable for flight and the environment
- Textiles: cotton, wool and synthetic fibres have different behaviour when exposed to heat, but no common clothing becomes "non-flammable" because it is natural. Follow the operator's requirements, including whether it provides specific protective equipment or an immersion suit.
- Some synthetic fibres can melt under the influence of heat; this is not enough to determine a universal outfit for all flights. The need for thermal protection, waterproofing and flotation also counts. Ask for instructions before buying or adding equipment that may interfere with the harness or exit.
Closed and comfortable shoes
- Foot safety Wear closed shoes that protect your feet well, such as sturdy boots or sports shoes.
- Avoid sandals or high heels These types of shoes can hinder your mobility in the event of an emergency evacuation.
- Comfort : Comfortable shoes facilitate quick and safe travel, especially if you need to walk on rough terrain after a forced landing.
4. Safety equipment
Make sure you use the security equipment provided and know where the emergency devices are.
Wearing helmets and seat belts
- Protective helmet :
- Helmet: Distinguish a protective helmet suited to the operation from a simple audio headset. A communication helmet does not automatically provide impact protection. Do not add a bulky helmet without checking its acceptance, fit and compatibility with the seat and harness.
- Communication systems : Headsets equipped with microphones make it easy to communicate with the pilot and crew.
- Safety belt :
- Obligation : Always attach your seat belt during the flight, including during take-off and landing phases.
- Adjustment: ask to be shown fastening, tightening and release of the installed system. A well-fitted harness must fulfil its restraint function; the only comfort criterion does not allow it to be checked. Report a difficulty and do not place the strap according to a method learned on another aircraft.
Location of emergency exits and fire extinguishers
- Emergency exits :
- Locations Note the location of exit doors and emergency windows.
- Mode of opening : Familiarize yourself with the opening mechanism, which can vary from one aircraft to another.
- Fire extinguishers :
- Availability Check the presence of fire extinguishers on board.
- Use : Although the use of fire extinguishers is generally reserved for the crew, it may be useful to know where they are.
- Other emergency equipment :
- First aid kit : Find out about the location of the first aid kit.
- Overwater flight: Ask what equipment and procedures apply to the trip, how to wear the vest, and when to inflate it. Do not inflate a vest inside the aircraft. Immersion protection, raft and vest do not perform exactly the same function and are not automatically available on any flight.
Additional tips for optimal preparation:
- Baggage and personal items :
- Limit bulky objects Avoid bringing large luggage that could impede evacuation in the event of an emergency.
- Pointy or heavy objects : Store objects that could become projectiles or cause injury in the event of turbulence.
- Electronic devices :
- Aeroplane mode : Put your electronic devices in plane mode to avoid interference with navigation instruments.
- Security Put your electronic devices away during take-off and landing to prevent them from falling or distracting the pilot.
- Diet and hydration :
- Avoid alcohol and substances that alter vigilance Stay sober to be fully alert during the flight.
- Personal needs: plan hydration, treatments and transportation problems depending on your situation. Do not arbitrarily reduce drinks or medications to avoid discomfort; discuss health needs and travel constraints before leaving.
Taking the time to prepare before the flight, you actively contribute to your safety and that of other passengers. The next section will discuss the behaviour during the flight to minimize risks and be prepared to respond to unusual situations.
III. Behavior during flight
The behaviour you take during the flight can have a significant impact on your safety in an emergency. Stay vigilant, follow the pilot's instructions and know how to react to unusual situations are key elements to maximize your chances of survival.
1. Stay vigilant
Observe the pilot's instructions
- Follow the instructions : The pilot is responsible for flight safety. It is essential to follow all instructions carefully, whether during the take-off, flight or landing phases.
- Pay attention to announcements : Pilots may provide important information on the conditions of the flight or any necessary adjustments. Keep in mind the messages transmitted by the crew.
Avoid distracting the pilot
- Limit unnecessary conversations Avoid talking to the pilot during critical phases of the flight, such as take-off and landing, unless necessary.
- Respect the cockpit space : Do not touch the cockpit controls or equipment. Do not lean over the pilot or obstruct the pilot’s view.
- Electronic apparatus Use your electronic devices in accordance with crew instructions to avoid potential interference with navigational instruments.
2. Management of unusual situations
Describe an unusual situation without diagnosing a breakdown
- Unusual noises : Pay attention to abnormal sounds, such as excessive vibrations, grinding or unusual engine noises.
- Apparatus behaviour Note any erratic movement, sudden loss of altitude or difficulty maintaining a stable trajectory.
- Visual indicators : Smoke in the cabin, light alerts on the dashboard (if visible) or any other anomaly.
Follow the pilot's instructions in case of emergency
- Stay calm Keep cool so you can react appropriately.
- Instructions: Listen to the instructions given for the aircraft and the situation, without assuming that the crew will always have time to explain everything during the emergency. Questions about the harness and exits arise before take-off.
- Ask questions if necessary : If you do not understand an instruction, ask for clarification quickly.
3. Security position
Adopt protective posture in case of emergency descent
The protective posture depends on the seat, its orientation, the restraint system and the passenger's needs. Ask for a demonstration during the briefing and consult the aircraft’s safety card. A generic description of "head to knees, hands to head" does not apply indiscriminately to seats with or without shoulder straps.
- Standard seating position :
- Safety belt : Make sure that it is well attached and adjusted.
- Supports: Position the feet according to the instructions shown for your seat. A given hip width or distance in a text does not constitute a validated rule for each cabin, in particular if the space is reduced or if the seat has a different orientation.
- Torso: Do not lean systematically to the knees. The position can be different with a shoulder harness; the safety briefing must show the one that actually fits your position.
- Hands and arms: apply the position taught, without automatically interlacing the fingers behind the head. This instruction does not describe all restraint systems and may be inappropriate for certain configurations.
- Seats with restricted space :
- Feet: Check the seat instructions and keep exit spaces clear; do not adopt a position that interferes with controls or the neighbouring passenger.
- Backrest: A seat support can be part of a posture depending on the harness, but it's not a chosen alternative only because you can't lean. Report your need for mobility to obtain an appropriate explanation.
- Hands: Do not choose between thighs, chest or harnesses from a general list. The configuration and, for some operations, the evacuation procedures after immersion determine the instructions given to passengers.
- Head: A cushion or garment shall not change the adjustment of the harness or replace the position indicated. Do not waste time looking for an object that is not within range.
Additional advice :
- Objects: Set aside in advance what can hurt or detach, according to the briefing. For glasses necessary for vision, ask how to secure and keep them accessible. A search in the pockets during an urgent descent should not delay the requested posture.
- Ensure that objects are secure Store heavy or bulky objects to prevent them from becoming projectiles.
- Preparation: Take some essential instructions rather than constantly anticipating an accident. Fear may be present; it does not deprive you of the right to ask a question or request assistance.
By adopting these behaviours during the flight, you increase your chances of responding effectively to emergencies. Vigilance, respect for the pilot's instructions and knowledge of safety positions are essential to ensure your protection and that of other passengers.
IV. Immediate action in case of imminent crash
If an emergency is announced, the time available can be very short. Use the set-up and posture explained for your seat; do not seek to complete a complete list before protecting yourself. A rapid descent alone is not proof that an accident is inevitable and does not allow the passenger to handle controls or exits.
Before impact
1. Tighten the seat belt
- Immediate verification : Make sure your seat belt is properly fastened and adjusted. It must be tightened so as to keep you firmly in place without being uncomfortable.
- Assistance: If the crew has planned and this remains possible without delaying your own protection, help a child or person to check his/her system. Do not detach yourself to travel in the cabin during an emergency.
Why is it important?
- Injury prevention : A well-fitted belt reduces the risk of being thrown inside the cabin during impact.
- Maintenance of position : It helps you maintain the safety position without slipping or inadvertently moving.
2. Apply seat and harness posture
The protective posture seeks to reduce certain injuries; it does not protect against all impacts. A demonstration for the occupied seat is essential, especially for a child, infant or person whose movements are limited.
- Seating position tilted forward :
- Head and torso: Use the displayed position, which may differ depending on the restraint. Do not assume that maximum bending better protects a passenger held by a shoulder harness.
- Hands: Keep the arrangement explained at the briefing rather than a universal position behind the head. The instructions of a seaplane, airline or other helicopter do not necessarily describe your seat.
- Arm: Do not force elbows or shoulders to reproduce an inappropriate drawing. Space, harness and seat direction shall be considered prior to flight.
- Feet: Follow the specified placement, without automatically applying a position behind the knees if it has not been demonstrated for your configuration.
- If space is limited :
- Support: a straight position against the backrest corresponds to certain restraint systems; confirm the correct posture for your seat instead of choosing a variant in this guide.
- Cross arms: This position may appear in some instructions, without being a rule for each device. The briefing and safety card must specify the expected disposition.
Why is it important?
- Protection: The adjustment of the restraint and posture may reduce certain stresses. They do not guarantee the absence of head or neck injury; do not interpret pain after impact as proof of wrong application on your part.
- Limitations: Squeezing is not a general protection of internal organs and may be incompatible with the installed harness. The proper posture is not deduced from a mental picture of a passenger on an airliner.
3. Removing personal objects
- Storage: Place the effects only in the spaces allowed by the crew. An under-seat space or pouch is not automatically provided for luggage and shall not obstruct an exit or equipment.
- Remove items from pockets : Remove sharp or bulky objects from your pockets, such as pens, keys or glasses, and store them in a safe place.
Why is it important?
- Avoid projectiles : Unsecured objects can become dangerous projectiles during impact.
- Preventing injuries : Objects in your pockets can cause injury in the event of pressure or impact.
During impact
1. Stay calm and follow instructions
- Respiration control Take deep breaths to keep your calm. Controlled breathing can reduce panic and improve mental clarity.
- Active listening If the pilot or crew gives instructions, listen carefully and execute them immediately.
- Reactions: A person can scream, tremble or hesitate. Seek to hear the instructions and to limit unnecessary gestures, without assigning the severity of the event to the emotional reactions of passengers.
Why is it important?
- A short and familiar instruction can facilitate action. Finding a complete calm is not a mandatory prerequisite for closing a harness or following the required posture.
- Positive influence Your calm can help calm other passengers and maintain a safer environment.
2. Protecting his head and neck
- Maintenance of crash position : Continue to maintain the safety position adopted before impact.
- Strengthening protection :
- Maintain: Keep the prescribed position without adding pressure from the hands on the neck that would not have been taught. Do not force the neck to look for a better "locking" of the body.
- Alignment: Do not correct your posture according to a general spinal-alignment rule "as straight as possible". The expected support and bending depends on the configuration; follow the applicable instruction instead of combining several variants.
Why is it important?
- Injury prevention The head and neck are particularly vulnerable to serious injury during an impact.
- Reduction of impact forces : A correct position can help distribute the body's forces, reducing the risk of internal injuries.
Additional tips to maximize your chances of survival:
- Announcement: Adopt the posture when instructed or according to what has been explained for an emergency. A visually rapid descent does not allow the passenger to choose a manoeuvre or open a door to anticipate a landing.
- Non-verbal communication : If noise or circumstances prevent verbal communication, use gestures to tell other passengers to prepare.
- Look: don't make eye closing a permanent instruction. After impact, orientation and identification of an exit may need to be looked at, especially during immersion; do not transpose a tip about debris to the entire sequence.
- Flexibility : Be ready to adjust your position if necessary, depending on the space available and the situation.
V. Evacuation after crash
After impact, the risks depend on the condition of the aircraft, rotors, terrain, fire and possible immersion. A land evacuation and an underwater evacuation do not follow a single recipe. Take into account the instructions received and the immediate threat, without looking for baggage or assuming that a forced landing is necessarily followed by an explosion.
1. Assessment of the situation
Check your physical condition
- Rapid self-assessment :
- Condition: Identify difficulty breathing, pain, bleeding or disorientation and report it if you can. Being able to think does not rule out a serious injury.
- Limbs: Do not systematically mobilize them to "test" a fracture. Avoid unnecessary manipulation; a possible movement does not demonstrate the absence of injury.
- Pain Note any intense pain that may indicate a serious injury.
- Priority :
- Displacement: Lack of extreme pain is not enough to decide that an exit is safe. Directions, exits, rotors, height and area of arrival must also be considered.
- If you are injured, indicate what you cannot do. Do not attempt to assess severity alone before reporting a need and do not remain exposed to immediate danger to complete a self-assessment.
Why is it important?
- Prevention of aggravated injury : Rising too quickly can worsen an undetected injury.
- Ability to help others : By knowing your condition, you will know if you can help other passengers.
Identify immediate hazards (fire, smoke, fuel)
- Fire :
- Look for flames : Look around you to detect any start of fire.
- Heat : If you feel an increase in heat, it may indicate a fire nearby.
- Smoke :
- Smoke : Smoke can be toxic and reduce visibility.
- Smoke: A wet cloth does not protect against toxic gases and does not allow you to stay in a smoke-filled cabin. Do not delay a possible exit to wet it; make the smoke and difficulty breathing known.
- Fuel :
- Fuel odour : A strong odour may indicate a leak, increasing the risk of explosion.
- Ground liquids Avoid liquid puddles that may be flammable.
Why is it important?
- Fire and fuel: they are one of the possible hazards, without being able to say that a fire or an explosion is a usual consequence of any accident. Observed signs and instructions determine precautions, not an invented countdown.
- Limited time : The presence of these dangers means that you must evacuate quickly.
2. Evacuation procedure
Use emergency exits
- Quick location :
- Find the exits Use the knowledge gained during the safety briefing to locate emergency exits.
- Obstacles : Check if the passages are clear. If an exit is blocked, look for an alternative.
- Opening of exits :
- Follow the instructions : Use the opening mechanisms as explained by the crew.
- Exterior: Take into account rotors, terrain, debris and the direction indicated by the crew. A moving rotor can be difficult to see; do not go to the rear of the aircraft or to an unauthorized area to follow a shorter route.
- Rapid but careful movement :
- Avoid panic : Keep calm to avoid jostling.
- Help if possible : If someone has trouble opening a way out, give your help.
Why is it important?
- Effectiveness : Rapid evacuation reduces exposure time to immediate hazards.
- Security : Use emergency exits correctly prevents additional injuries.
Moving to a safe place according to the aircraft and the hazards
- Direction opposite to the wind :
- Direction: Avoid fumes, vapours and discharges while respecting the route indicated to avoid encountering rotors. A wind direction does not remove other risks from the terrain or aircraft.
- Safety distance :
- Distance: one hundred metres is not a universal safe distance, and reaching it may be impossible or expose you to danger. Move away from immediate hazards as instructed, remain visible and never cross a road, river or unstable terrain merely to reach a stated number.
- Secure land : Head towards a clear place, away from trees, unstable structures or steep slopes.
- Stay together :
- Grouping If possible, stay with the other survivors to facilitate relief and ensure the safety of all.
Why is it important?
- Prevention of secondary injuries : An explosion or fire may occur after the crash.
- Visibility for rescue : A group is easier to spot for rescue teams.
3. Assistance to other passengers
Helping the injured if possible
- Rapid assessment :
- Consciousness : Check whether other passengers are responsive.
- Breathing : Make sure they breathe normally.
- Bleeding: Identify significant bleeding that requires immediate attention.
- Priority of relief :
- Help: Report a blocked person and the dangers around her. Do not expose yourself to a rotor, smoke or spill to undertake a rescue without suitable means.
- Basic techniques :
- Support Provide support to help them walk or move around.
- Portage: Do not conclude a slight injury because someone asks to leave. Improvised transport can aggravate injuries or cause carers to fall. Help according to your abilities and instructions, distinguishing an immediate threat from a movement for comfort.
- Do not worsen injuries :
- Mobilization: Avoid unnecessary travel after trauma, while taking into account breathing, resuscitation or immediate danger. An absolute immobility rule must not prevent a vital gesture; be guided as soon as contact with rescue is possible.
Why is it important?
- Saving lives Your help can be crucial for people unable to escape alone.
- Solidarity Working together increases the chances of survival for all.
Counting people to make sure everyone's out
- Grouping :
- Point of assembly : Determine a place where everyone must meet after the evacuation.
- Census :
- List of passengers : If possible, use a list or make a call to check each person's presence.
- Visual verification : Count the people present and compare with the initial number of passengers.
- Reporting of missing persons :
- Missing person: transfer the known number, its last position and your possible uncertainty to the crew or rescue. Do not automatically go back to the wreck to check a count and do not have the group vote on a dangerous intervention.
- Do not take unnecessary risks : Do not go back to the helicopter if it endangers your life.
Why is it important?
- Census: it helps to signal a need, without confirming that each person has gone out or out of danger. A person may have reached another safe place; distinguish absence from the assembly point from confirmed presence in the aircraft.
- Information: Give an exact number only if you know it, if not a clearly announced estimate. The wounded, the missing people and their last location are useful, even if the group does not have a complete list.
Additional tips for a successful evacuation:
- Communication :
- Coordination: relay the instructions of the crew if they are able to give instructions. The group may allocate suitable tasks without automatically assigning a technical authority to the person who speaks louder.
- Visual and sound signals : Use gestures or calls to guide others, especially if visibility is reduced.
- Environmental precautions :
- Uneven terrain : Pay attention to falls or obstacles during your trip.
- Weather conditions Protect yourself from cold, heat or weather once you're away.
- Avoid additional hazards :
- Electrical lines : Pay attention to electrical cables that may have fallen during the crash.
- Wild animals : If you are in a wilderness, be vigilant about the local wildlife.
VI. Survival in hostile environments
In an isolated location, waiting may require shelter, alert and needs management. The following themes do not justify exploring around the wreckage. Stay close to a recognizable site when it is safe, and move the group only for security reasons or as directed. Care needs can take precedence over a comfort task or a food search.
1. Terrestrial environment
Forests, mountains and deserts have different constraints. No shelter or order of priority applies regardless of injury, weather, water and communication. Especially evaluate what can be done without aggravating the situation; a technical description does not prove that you have the equipment or skills to do it.
a. Basic survival techniques
i. Survival priorities
- Protection : Your first priority is to protect yourself from the elements. Find shelter to protect you from cold, heat, wind or rain.
- Water Dehydration can occur quickly. Identify sources of drinking water or ways to purify it.
- Food: first use safe supplies and known special needs. A theoretical period of survival without food is not a benchmark for a child, a sick person or a treatment that requires a meal.
- Fire: only if the place, means and conditions permit, away from fuel, wreckage, dry vegetation and flammable materials. A flame is not an obligation and can add a major danger. Do not heat a closed shelter with a fire or improvised combustion device.
ii. Specific techniques
- Forest :
- Simple shelter: prioritize available equipment and a stable setup without hazardous branch-cutting or climbing. A description of a lean-to or tipi cannot guarantee protection from rain, wind or cold. Preserve a safe fallback option where possible.
- Water: An accessible source, rain or runoff are not automatically potable, especially near a spill. Treatment depends on the hazard; a hiking filter does not remove all chemical pollutants and cloth does not disinfect.
- Local food: do not experiment with plant identification, fishing or trapping in an emergency. Confusion, safety, rules and effort may make these steps inappropriate; do not leave a site rescuers can spot to look for a hypothetical meal.
- Mountain :
- Mountain: Do not consider a cave, overhang or snowy slope as a safe refuge by default. Falling stones, water, snow, access and visibility must be considered; short protection with available material may be preferable to risky exploration.
- Snow: Melting it requires safe means and its melting is not enough to make it safe. Avoid cooling yourself by searching for or using snow to replace a reserve. Adapt actions to the state of the person and to the advice received.
- Food : Resources may be limited. Focus on the protection against the elements.
- Desert :
- Shelter Protect yourself from the sun during the day by creating shade. At night, a shelter can protect you from the cold.
- Water Water is rare. Avoid moving during the warmest hours to reduce water loss by sweating.
- Food : Resources are limited. Do not waste your energy looking for food if it compromises your hydration.
b. Emergency signaling
Signalling: first use a suitable and accessible warning device. Making a site visible does not guarantee immediate detection; do not create a fire or move away at risk to install a signal.
- Fire :
- Fires: three fires are included in some signal descriptions, but do not constitute an obligation or an international guarantee of identification. Do not light them if fire danger, fuel or restrictions make this gesture inappropriate. A contrasting surface or lamp can be safer.
- Smoke: Do not burn green materials, debris or plastics to make a plume near the group. Exposure to smoke and the risk of spread may exceed the interest of a signal; non-pyrotechnic means should be preferred when available.
- Mirrors :
- Reflections: A signalling mirror can help if you know how to use it. A telephone screen is not a guaranteed equivalent; do not lose it or damage it to try an improvised signal.
- Technical : Orient the mirror towards the sun and reflect the light towards the rescue potential by forming repeated movements.
- Tags :
- Tag: a 406 MHz PLB activates according to its instructions in real distress, with the recommended antenna and position. The integration of coordinates depends on the model and the reception; not all beacons immediately deliver a precise GPS position or a visible acknowledgement of receipt.
- Ground markings : Create messages or symbols visible from the air by using stones, wood or tracing in the ground. Letters such as "SOS" or arrows indicating your position may be useful.
2. Aquatic environment
If the crash occurs above water, such as a lake, river or sea, you must adapt your actions to survive in this specific environment.
a. Use of flotation devices
- Life jackets :
- Lifejacket: ask before the flight how to wear it and when to inflate it. If wearing it is required, it must be compatible with the harness and operation. Never inflate it in the aircraft: buoyancy can prevent an underwater exit.
- Inflation: Use only the equipment planned for the flight and follow the briefing. Do not replace an aviation vest prescribed by an automatic inflating nautical model that could trigger in the cabin. Check the set-up before departure, not at the time of immersion.
- Floating objects :
- Floating: Do not assume that any seat or cushion floats or constitutes lifesaving equipment. Locate the actual equipment and do not delay your exit to detach an object whose function is unknown.
- Energy conservation Stay calm and avoid unnecessary movements to conserve your energy and body heat.
b. Underwater evacuation: subject of briefing and practical training
- Underwater orientation :
- Immersion can disorient quickly. The preparation shall cover the exit, the reference points, the restraint and the sequence specific to the apparatus. A reading does not reproduce the conditions or learning of a HUET training; do not try these gestures alone under the water.
- Orientation: Do not rely on bubbles as the only guide to the exit or surface. Darkness, movement and configuration can prevent reliable reading. Tactile reference points and the exit must have been explained and practiced in a specialized setting.
- Evacuation procedure :
- Movement of the apparatus: the time and way to prepare an exit are part of the procedure taught for the model. "Waiting for it to be stable" is not a universal chronometer, and must not become an indefinite expectation without reference or preparation.
- Restraint release: do not automatically unbuckle as soon as a movement stops. Maintaining your orientation, establishing the exit path and keeping a fixed point are among the principles explained in the specialized briefings; the precise sequence depends on the equipment and must be shown before the flight.
- Exit: learn its mechanism and the alternatives specific to your seat. The efforts and opening conditions cannot be inferred from a car door; do not build an improvised procedure by combining advice from different models.
- Back to the surface :
- Exit: A leg thrust is not a universal rule; it may strike another person or cause a marker to be lost. Evacuation must be learned with the gestures and space of the training device, without amateur exercise in a swimming pool or vehicle.
- Breathing: Instructions for an air reserve or emergency breathing equipment require equipment-specific training. Do not present a slow exhalation as a method to ensure controlled and injury-free ascent. This guide does not provide a diving protocol or use of a respiratory device.
- On the surface: apply the inflation and grouping taught, then request help when possible. Don't start a new dive in the wreckage to look for other people with no means and suitable lifesaving qualification.
3. Extreme weather conditions
Weather conditions can exacerbate survival challenges. It is essential to know how to protect yourself from the elements.
a. Protection against cold or heat
i. Extreme cold
- Thermal insulation :
- Clothes layers : Wear several layers to trap heat.
- Insulating materials : Use leaves, moss or available materials to insulate you from cold soil.
- Prevention of hypothermia :
- Stay dry : Moisture accelerates the loss of body heat. Avoid getting wet and change wet clothing as soon as it is safe to do so.
- Cold: Limit heat loss and exhausting effort. A person injured or with hypothermia should not be forced to exercise to warm up; protect her, handle her carefully and seek medical assistance.
ii. Extreme heat
- Solar protection :
- Coverage Cover yourself with light and long clothing to protect your skin.
- Head and neck : Wear a hat or improvise a protection to avoid insolation.
- Prevention of dehydration :
- Hydration: offer a drink adapted to a fully conscious person who normally swallows, according to his/her needs. Confusion or difficulty in swallowing prohibits the imposition of a drink to correct heat or stress.
- Darkness : Avoid activities during the warmest hours of the day.
b. Construction of an improvised shelter
- Materials available :
- Branches and foliage : Use them to build a simple structure.
- Wreckage: do not dismantle the aircraft or handle sharp, contaminated components or pieces near electrical equipment to build a shelter. Retrieve equipment only when it can be done safely and in accordance with instructions. No gain in comfort justifies returning to danger.
- Types of shelter :
- Materials: Do not stack unstable debris above people and do not use a fuel-contaminated component as a wall near a heat source. A shelter must remain simple, stable and ventilated.
- Digging can exhaust, expose to water or make it less visible. A trench is not a general recommendation after an accident; prefer feasible protection with the means present and the conditions of the site.
- Snow: an igloo or cave requires appropriate skill and conditions, with risks of collapse and ventilation. Do not improvise this work from a few lines and do not install a combustion appliance; look for a simpler shelter or undergo training before a particular trip.
- Considerations :
- Location Choose a safe place, sheltered from falling trees or rockfalls.
- Visibility for rescue : If possible, build the shelter in a visible place for rescuers.
General advice for survival in a hostile environment :
- Support: A realistic task, exchange and help can be useful. Optimism alone does not determine survival; fear, sadness or exhaustion are not individual faults. Adapt the tasks to the individual state.
- Saving energy : Do not exhaust yourself unnecessarily. Keep your strength for essential tasks.
- Resources: inventory and allocate according to actual needs, without arbitrarily reducing water, food or treatment. Ask for help and report a deficiency as soon as contact is possible.
- Working as a team : If you are not alone, work with other survivors to share tasks and moral support.
VII. Emergency call and waiting for help
Surviving a helicopter crash is a test in itself, but once in immediate safety, it is essential to contact the rescue and manage your resources effectively while waiting for their arrival. This section will guide you on how to use the available means of communication, report your position and manage your resources to maximize your chances of rescue.
1. Use of means of communication
Radios, satellite phones, hand signals
a. Satellite radios and telephones
- Communication: Find out before the flight about the equipment and its access. A helicopter does not automatically carry a satellite phone for each passenger. Do not go back to a threatening wreck to look for one; first use a means you can access safely.
- How to use these devices :
- Turn on the appliance : Make sure the device is switched on and functional. Look for the power switch or switch.
- Radio: 121.5 MHz is an aviation distress frequency, not a universal channel accessible on every radio. Distinguish voice transmissions from a 406 MHz distress beacon. Before travelling, check satellite-phone coverage and emergency contact numbers: 911 or 112 may not work. Operate equipment according to training and its instructions.
- Transmit a clear message : Indicate your situation, approximate position, number of survivors, and any relevant information on immediate injuries or needs.
- Example message Mayday, Mayday, Mayday. Here [your name], we had a helicopter crash. We are [number of people] survivors. We think we are in the [approximate location] region. We have injured people who need urgent medical assistance.
- Energy and Listening: Reduce unnecessary functions, but do not systematically cut the call between attempts. You may miss a callback or instruction. An activated distress beacon follows its own instructions; it does not turn off to save after a few minutes without visible results.
b. Manual signs
If you do not have access to electronic devices, you can use manual signals to attract attention.
- Whistle: Repeated short signals can attract attention with less effort than continuous screams. Do not assume that a code will be recognized everywhere, or that a sound will carry in any weather; this means completes the alert without replacing it.
- Mirrors : Use a signal mirror or any reflective object to send light signals to aeroplanes or high points.
- Torches or lamps : At night, use flashlights to create light signals, using the SOS code in Morse code (three short, three long, three short).
2. Distress Signals
Visual and sound signals to attract attention
a. Visual signs
- Distress fires :
- Signal fire: only if its use is safe, controlled and compatible with the instructions. A clear site is not automatically safe near a wreck, spill or dry vegetation.
- Three fires: do not consider them a mandatory protocol to be carried out. The cost of energy, the means of control and the risk of spread may make this proposal inappropriate.
- Prevention: If the safety of a fire is not ensured, do not light it. A person able to monitor a flame does not guarantee that the wind or fuel will not change the situation.
- Ground markings :
- SOS : Draw the letters "SOS" on the ground using stones, wood, or dig in snow or sand. The letters must be as large as possible to be visible from the air.
- Contrast Use materials that contrast with the surrounding soil.
- Coloured objects :
- Fabrics : Extend brightly coloured fabrics on the ground or suspend them to trees.
- Clothing : If you have coloured clothes, use them to increase your visibility.
b. Sound signals
- Voice calls :
- Limited use : Cries can exhaust you quickly and don't carry far. Use them as a last resort or when you hear help nearby.
- Metallic noises :
- Noise: Do not use an electrical component, an unstable part or an aircraft tank to strike. An available object is useful as a signal only if it can be handled without adding injury or spark.
- Whistles :
- Pattern : Use series of three short strokes to indicate distress.
3. Resource management
While waiting for rescue, it is crucial to manage your resources to ensure your survival.
Managing water and food
a. Water
- Water: needs change with heat, effort, health and fluid loss. There are no days of survival allowed to delay hydration of a person in difficulty; ask for and organize a safe supply as soon as possible.
- Rationalization :
- Do not arbitrarily reduce drinks to maintain a reserve. Instead, limit effort and exposure to heat when possible, allocate water as required, and report a shortfall. A child, treatment or sick person may require special attention.
- Collection: rain, dew and surface water can be contaminated. A soiled fabric or water close to a spill must not be treated as a safe reserve. Evaluate the actual means of treatment and do not leave a recognizable area to search for an uncertain source.
- Purification :
- Boiling: it can treat microbiological hazards according to the applicable guidelines, without removing chemical contaminants. It requires a safe container and heating, then a cooling protected from contamination. Do not fire near fuel to implement a method that would not meet the hazard.
- Fabric: may retain certain visible debris, without removing the microbes or dissolved pollutants. Clarified water is not made safe; this distinction remains essential even if no other equipment is available.
b. Food
- Secondary priority : Food is less critical in the short term, but it is important to maintain your energy.
- Rationalization :
- Equitable sharing : Divide the available food between the survivors.
- Prudent consumption : Avoid consuming all your stock quickly.
- Food sources :
- Natural : If you have knowledge, identify edible plants, fruit or small animals.
- Cautions : Do not consume plants or fruit that you cannot identify with certainty to avoid poisoning.
Energy conservation
- Rest :
- Limit physical activity Avoid unnecessary efforts to maintain your strength.
- Shelter Stay safe to maintain your body temperature and reduce energy expenditure.
- Core activities :
- Prioritize : Focus your efforts on essential tasks such as building a shelter, collecting water and signalling for rescue.
- Maintenance of heat :
- Isolation : Use extra clothes or natural materials to isolate yourself from the cold.
- Warmth and the group: offer consensual proximity and blankets without imposing contact, position or displacement on an injured person. This does not replace shelter, ground insulation or management in the event of hypothermia.
- Mental state :
- Moral: A presence, clear information and pause can help. Distress does not mean that the person is wasting his energy or voluntarily compromising the group.
- Routine Establish a routine to structure your days and occupy your mind.
Additional advice :
- Ongoing monitoring Keep in mind the signs of the emergency approach, such as the noise of helicopters or vehicles.
- Communication with the group If you are with other survivors, contact regularly to coordinate efforts and support morale.
- Avoid unnecessary risks : Don't get too far from the crash site unless it's necessary for your safety.
- Preparation for arrival of rescues :
- Arrival of rescuers: get visible from a safe position and wait for their instructions. Do not approach a rescue helicopter, run under a rotor and do not grab a winch cable to improvise the reception.
- Information Be prepared to provide information on the condition of the injured, the number of survivors and urgent needs.
VIII. First aid
Injuries may require first aid after the accident. Safety of the place, alerting, breathing and life threatening bleeding are essential landmarks. The following sections retain the themes of hemorrhage control, fractures, burns and body temperature, without constituting a complete medical protocol. Be guided as soon as a contact is possible and do not improvise a specialized technique from a list.
1. Injury assessment
a. Control of bleeding
Significant bleeding can be fatal if not controlled quickly. Here's how to do it:
Steps to control bleeding:
- Quick assessment:
- Identify the source of the bleeding.
- Wear gloves if available to avoid contamination.
- Direct pressure application:
- Use a clean cloth, compress or even clothing to cover the wound.
- Apply firm and constant pressure directly to the wound.
- Limb elevation:
- For bleeding, do not replace the direct pressure with the elevation of a limb and do not force a traumatized limb. A comfortable position should not delay a control gesture or an urgent alert.
- Pressure maintenance:
- Do not release the pressure to check the wound. Keep it until the bleeding stops or rescues arrive.
- Use of a compressive bandage:
- If bleeding decreases, hold the compress in place with a bandage or piece of tissue.
- Make sure the bandage is tight but does not impair circulation.
- Tourniquet: for life-threatening limb bleeding:
- Tourniquet: life-threatening limb bleeding can justify an appropriate device according to the training and instructions of the rescue. It is not a general solution for each wound, a trunk injury or a bleeding already controlled.
- Device: prefer a suitable commercial tourniquet and learned gestures. A simple tight band described in one sentence is not a reliable technique of improvisation; do not deduct a method for any limb or injury.
- Note the time of application of the tourniquet and tell rescuers.
Precautions
- Do not remove penetrating objects: If an object is housed in the wound, do not remove it. Stabilize it in place to avoid additional bleeding.
- Concerning condition: paleness, sweating, weakness, confusion or unusual breathing require rapid monitoring and assistance. Install according to tolerance and instructions; do not systematically lift the legs after trauma and do not give a drink to a person whose consciousness or swallowing is altered.
b. Fracture immobilization
A suspicion of fracture calls for limiting manipulation and obtaining an evaluation. Pain or swelling does not make it possible to make a certain diagnosis; a splint is not an obligation to perform at all costs before having alerted or treated a vital danger.
Limb-support guidance, to be implemented according to training or instructions received:
- Evaluation:
- Look for signs of fracture: intense pain, deformation, swelling, inability to move the limb.
- Do not move the limb unnecessarily:
- Avoid repositioning or manipulating the fracture.
- Capitalization:
- Splint: make one only if you know how to use or are guided, with appropriate equipment and without delaying support. Sticks or boards can create pressure points or impose a painful position.
- Skin protection: Place a cloth or garment between the skin and the strap to avoid friction.
- Fixing: Secure the splint with bandages, belts or pieces of fabric, ensuring that it does not tighten too hard to allow blood circulation.
- Immobilize adjacent joints:
- Maintenance: Support can affect neighbouring segments depending on the injury and technique taught. Do not force an alignment or articulation to apply a general rule "above and below".
- Monitoring:
- Regularly check the circulation by observing the skin colour, temperature and sensation of the immobilized limb.
Precautions
- Pain: Stop a manipulation that worsens the situation and signal it. The position found can be supported if tolerated, but deformation, wound or altered sensitivity requires urgent notice; do not impose tight immobilization.
- Do not try to realign: leave this task to health professionals.
2. Basic care
a. Burning treatment
Burns can be caused by fire, hot surfaces or chemicals.
Steps to treat a burn:
- Assessment of the degree of burn:
- Appearance: A painful redness may accompany a superficial burn, without sufficient classification by a passenger.
- Blisters: They can accompany a deeper injury. Do not deduce by themselves the extent or the complete conduct; do not pierce them.
- White, blackened or insensitive skin: signs of severe burn. Little pain does not rule out a deep burn; ask for urgent help.
- Cooling:
- Thermal burn: cool with clean, cool water when safe, often for around twenty minutes on a small area according to applicable guidance, without excessively cooling the whole body. Calling for help and life-saving actions must not wait until a timed period ends.
- Avoid ice or ice water that may cause additional hypothermia or damage.
- Burn protection:
- Do not pierce blisters: They protect against infection.
- Cover burn with a sterile, non-adhesive bandage or clean tissue.
- Do not apply substances:
- Avoid use creams, oils, butter or home remedies.
- Hydration:
- Drink: the mere fact of being conscious is not enough to establish that a drink is safe after a serious trauma. Confusion, difficulty swallowing, respiratory impairment or contrary medical advice may rule it out. Do not present water as a universal treatment of a burn.
Precautions
- Chemical: Avoid contamination and identify the product if possible without exposure. The first measures also depend on its shape and reactions; a 20-minute rinse is not a complete recipe for all products. Alert and request specific instructions, without attempting to neutralize with another product.
- Help: Extended burn, deep, electrical, chemical, on a sensitive area or associated with inhalation requires an appropriate assessment. Don't wait until you rank the "degree" or see a worsening to ask for help.
b. Prevention of hypothermia or hyperthermia
Hypothermia (dangerous decrease in body temperature):
Prevention and treatment:
- Thermal insulation:
- Add layers dry and warm clothes.
- Cover head, hands and feet to minimize heat loss.
- Shelter:
- Protect the victim of wind, humidity and cold by placing it in a shelter or using survival blankets.
- Progressive warming:
- Warming: Isolate and protect with the means available without imposing skin-to-skin manipulation or contact on an injured person. A blanket limits heat loss, but does not alone produce sufficient heat under all conditions.
- Avoid burning the skin or rapidly warming a fragile person. A heat source requires protection and monitoring; the management of significant hypothermia is not limited to a hot bath or approaching a fire.
- Hydration and nutrition:
- Lukewarm drink: only if the person is fully conscious, can swallow normally and there is no contraindication. Alcohol is not a means of warming up; don't give anything by mouth to a sleepy or confused person.
- Food: only if the person is in a position to eat safely and according to his/her needs; do not impose it to treat a temperature drop or delay the help.
Hyperthermia (dangerous rise in body temperature):
Prevention and treatment:
- Cooling:
- Move the victim in a shade or in a cool place.
- Remove excessive clothing to allow heat dissipation.
- Hydration:
- Water: for a conscious person who normally swallows, according to instructions. Do not force to drink in the event of confusion, loss of consciousness or suspicion of heat stroke; alert and cool without delay.
- Beverages: No general ban on sugars or caffeine should be diverted from safety and cooling priorities. Rehydration needs and medical restrictions are to be adapted to the person, without a universal recipe.
- Body cooling:
- Apply wet cloths on the forehead, neck, armpits and groin.
- Vente the person to increase evaporation.
- Monitoring:
- Heat stroke: confusion, unusual behavior, loss of coordination or consciousness in a heat environment are alarming. The person can still sweat; dry skin is not required to recognize the danger.
- Urgency: Ask for help immediately in case of suspicion of heat stroke and start cooling according to safe means and instructions. Don't wait for a worsening to act.
3. First aid kit
a. Importance of having it on board
A first aid kit is an essential element on board any helicopter. It provides immediate care that can save lives while waiting for professional relief.
Reasons for having a first aid kit:
- Rapid response: the first few minutes after an injury are crucial to the prognosis.
- Versatility: A well-equipped kit can handle a variety of injuries, from minor cuts to fractures.
- Autonomy: In isolated environments, you may be the only one who can provide initial medical assistance.
b. Recommended content
The content depends on the operation, the applicable requirements and the persons competent to use the material. The following categories are elements to be discussed with the operator, not a list certifying that a helicopter is compliant or that a passenger can perform advanced care:
Bleeding control equipment:
- Sterile compresses of different sizes.
- Elastic bandages to keep the compresses in place.
- Adhesive dressings of different sizes.
- Appropriate commercial tourniquet if planned and associated with training; a supply to improvise one does not constitute guaranteed equivalence.
Splinting equipment:
- Flexible splints or materials for improvising them.
- Roller bandages to fix the splints.
- Triangular scarves to support members.
Burn-care supplies:
- Burn dressings sterile non-adhesive.
- Burn-care product: only for intended use and without replacing water cooling when indicated. A gel does not treat smoke inhalation or an unknown chemical burn.
Additional equipment:
- Disposable gloves non latex to protect against infections.
- Medical scissors for cutting clothes or bandages.
- Tweezers: useful for some controlled small care, but not to remove a deeply embedded object or explore a wound.
- Emergency blanket to maintain body heat.
- Antiseptic pads to clean up small wounds.
- Sterile saline solution to rinse the eyes or wounds.
- Adhesive tape and medical tape to fix dressings.
Resuscitation equipment:
- Pocket mask for cardiopulmonary resuscitation (CPR).
Other useful elements:
- Pain relievers: selected for those concerned with a professional. Paracetamol/acetaminophen and ibuprofen have contraindications; do not distribute them automatically after trauma.
- Antihistamines: do not replace anaphylaxis management or a prescribed emergency medicine. Check the indication and possible effects before use.
- First aid manual to guide interventions.
Considerations for the kit:
- Regular verification: Make sure the kit is complete and the perishable products have not expired.
- Accessibility: the kit shall be readily accessible in case of emergency.
- Training: it is recommended that regular passengers and crew be trained in first aid to use equipment effectively.
General advice for first aid:
- Protect yourself first: Make sure the scene is safe before you assist to avoid becoming an additional victim.
- Use protections: wear gloves and avoid direct contact with blood or body fluids.
- Stay calm: Your tranquillity will help calm the victims and make care more effective.
- Do not exceed your skills: Provide basic care and avoid interventions for which you are not trained.
- Monitoring: Stay alert to response and breathing, report worsening as soon as contact is possible. Prolonged pulse checks by an untrained person should not delay guided resuscitation if the person is unresponsive and is not breathing normally.
- Document the care provided: Note what you did, what time, and the victim's condition. This information will be useful to health professionals.
By providing first aid appropriately, you can stabilize injuries and potentially save lives while waiting for rescue. Knowledge of basic techniques and the availability of an adequate first aid kit are essential in an emergency situation such as a helicopter crash.
IX. Mental preparedness and resilience
The psychological support and organization of the group can help certain tasks, but survival also depends on injuries, danger and means of relief. It does not measure the will or moral resilience of a person. The suggestions below are optional and reserved at a time when immediate safety and care needs have been addressed; no relaxation replaces an alert or treatment.
1. Stress management
a. Respiration and relaxation techniques
Importance of stress management:
- Stress: It can complicate attention or decision, without automatically turning a person in danger for the group. A short set-up and help can be more useful than an injunction not to panic.
- Trembling, heart rate or unusual breathing can accompany stress, but also an injury or medical problem. Do not automatically attribute them to emotion after an accident.
Respiration techniques to reduce stress:
- Deep breathing (diaphragmatic breathing):
- First exercise, optional out of immediate danger: take a gentle breath at a comfortable pace; four seconds is just an example, not a time to reach in case of discomfort.
- Possible break: four-second retention proposed in some exercises is not mandatory. Do not hold your breath if it bothers, especially after immersion or inhalation.
- Exhalation: let the breath out slowly if it's comfortable, without trying to impose six to eight seconds. Respiratory difficulty requires evaluation, not performance in exercise.
- Repeat: a few cycles may be suitable for some people. Stop if you have dizziness, pain or discomfort; regaining calm is not a prerequisite for urgent action.
- Square breathing:
- Another exercise sometimes called square breathing: the four-second inspiration remains an example to adapt, without obligation to keep up with this rhythm.
- Retention: may be omitted; do not impose on a person whose breathing is difficult or whose health is not known.
- Expiration: Keep a comfortable breathing rather than a strict four-second count that would accentuate discomfort.
- New break: optional, without seeking to cause a lack of air to finish the square.
- Limit: this exercise does not validate normal respiratory function and does not have to be performed by the entire group. Ask for help in the presence of disturbing medical signs.
Relaxation techniques:
- Progressive muscle relaxation:
- Muscle relaxation: a five-second contraction is an example of non-emergency exercise, without application to an injured area. After an impact, do not contract a painful limb to check that it works.
- Progression: Do not systematically tense the neck, back or each muscle group after trauma. You can simply relax a comfortable tension, or completely give up exercise.
- Possible effect: Some people find this soothing; no guaranteed reduction in tension or absence of injury can be inferred from it.
- Positive visualization:
- Visualization: only from a safe place, without neglecting ongoing monitoring or an urgent task. Closing your eyes should not prevent you from seeing an order, a risk or the arrival of rescue.
- Sensory details : focus on the sounds, smells and sensations associated with this place.
- Use: a soothing image may be suitable for some, without the need to distract attention from a real danger. It's not a treatment for a traumatic reaction.
Practical tips:
- Early practice Learn about these techniques before you end up in an emergency.
- Group: propose without imposing. Respect the refusal and avoid concluding that a person who does not exercise harms the atmosphere or the survival of others.
2. Maintenance of cohesion
a. Working as a team with other survivors
Importance of group cohesion:
- Effectiveness A coordinated team can perform tasks more effectively (construction of shelters, food searches and signalling).
- Moral support mutual support helps maintain the morale and determination of everyone.
- Security Working together reduces individual risks and allows mutual supervision.
Strategies to promote cohesion:
- Open communication:
- Information sharing - Exchange information about the situation.
- Active listening - pay attention to the concerns and ideas of others.
- Clarity Be clear and precise in your instructions and requests.
- Positive Leadership:
- Initiative: propose a task in your skills, in coordination with the crew and rescue when they are available. An outdoor experience does not automatically give a medical or aeronautical authority.
- Collaboration Encourage everyone's participation and delegate tasks according to individual strengths.
- Compliance : Treat each member of the group with respect and consideration.
- Establishment of roles and tasks:
- Organization: assign useful, safe and accepted tasks. Do not designate a wood gathering or an automatic food-search assignment if it removes people, exhausts the group or increases the risk.
- Flexibility Be prepared to adapt the roles according to the evolution of the situation and the abilities of individuals.
- Conflict management:
- Recognition of tensions : Identify disagreements or frustrations quickly.
- Peaceful resolution : approach conflicts calmly, seeking mutually acceptable solutions.
- Maintenance of the common objective Remind the group of the importance of collaboration for the survival of all.
Benefits of Teamwork:
- Presence: feeling accompanied can provide support, without guaranteeing a decrease in anxiety for all. A person may also need a little space in a safe place.
- Optimization of resources : sharing resources and skills maximizes their use.
- Coordination: It can facilitate the division of labour and the reporting of needs, but does not demonstrate a higher survival rate for a given group. Don't blame an injured person who can't participate.
3. Positive attitude
a. Importance of hope and determination for survival
Role of mental attitude in survival:
- Motivation: Choose an accessible task rather than requiring a positive state of mind. Exhaustion, pain and fear can limit action regardless of the will to live.
- Adaptation: Supports, resources and time can help after a difficulty. Hope does not guarantee to bounce quickly or turn losses into personal progress.
- Influence on group : your positivity can inspire others and strengthen cohesion.
Strategies to maintain a positive attitude:
- Setting realistic objectives:
- Immediate objective: safe and feasible action, e.g. transmit a position or isolate from the ground, rather than automatic ignition of a fire.
- Progress : each objective achieved strengthens morale and gives a sense of accomplishment.
- Positive thinking:
- Internal Speech: Use factual phrases that help you, without the obligation to replace all concerns with positive statements. Recognizing a real danger sometimes facilitates a useful decision.
- Benchmarks: You can note the means still available, without asking people to feel gratitude after a loss or to relativize a serious injury.
- Emotional Management:
- Emotions: Fear, anger and sadness can be present. They do not have to be removed to qualify for help; seek support if they become difficult to manage.
- Expression: share what you want with a trusted person, without a speech on the event or pressure to tell a traumatic experience.
- Visualization of the rescue:
- Expectation: preparing a message or making a signal visible can be useful, without setting an imaginary hour of arrival of the rescue or a reassuring scene presented as certain.
- Planning : Prepare yourself mentally for the next steps after the rescue.
Importance of determination:
- Perseverance : determination helps you to continue your efforts even when the results are not immediate.
- Adaptability : being determined allows you to adapt to changes and unforeseen events.
- Inspiration for others : your commitment can motivate other members of the group not to give up.
Tips for growing hope:
- Staying informed If possible, use the means of communication to obtain information on rescue efforts.
- Celebrating small victories : to recognize each progress, however small, reinforces optimism.
- Maintain a routine establishing a daily routine gives a sense of normality and control.
Keep an essential limit: being determined does not allow you to overcome any injury or environment. Material assistance, care, information and coordination are important. A person in distress or deceased after an accident did not necessarily lack preparation, courage or hope.
X. Prevention and training
Training and briefing allow you to discover gestures before you depend on them. They do not make an accident manageable for sure and do not replace the operational accident prevention. Choose content adapted to the flight and the environment, with competent stakeholders, safe conditions of practice and a possibility of assistance for special needs.
1. Recommended training
Survival and first aid courses can complement a preparation. For a flight exposed to immersion, specialized helicopter underwater evacuation training is a separate subject; a forest trip or reading does not replace it.
a. Hostile survival course
Objectives of the survival courses:
- Developing practical skills to survive in various environments (forest, mountain, desert, aquatic).
- Learning to use natural resources to build shelters, to find water and food, and to light a fire.
- Improving mental resilience learning how to manage stress and maintain a positive attitude in difficult situations.
Typical Content of a Survival Course:
- Guidance techniques : use of the compass, reading maps, navigation without instruments.
- Construction of shelters : manufacture of temporary shelters with available materials.
- Water and food: methods adapted to the risks and rules of the place. A responsible course also teaches to abandon inappropriate picking or displacement rather than promise immediate food autonomy.
- Fire ignition : methods to light a fire without matches or lighters.
- Distress signals : creation of visual and sound signals to attract the attention of the rescue.
- First aid in the wild : care of injuries with the resources on hand.
Where to follow these courses:
- Specialized bodies Survival schools and outdoor-training centres.
- Government programmes Some institutions offer training for professionals and the general public.
- Online courses: useful for some theoretical benchmarks, without validating a practical first aid, survival or underwater evacuation capability.
b. First aid training
Importance of first aid:
- Respond quickly The first few minutes after an injury are crucial for the outcome.
- Stabilize victims : know how to control bleeding, immobilize fractures and recognize and respond to shock.
- Preventing complications - adequate intervention can reduce the risk of infection or aggravation of injury.
Typical content of first aid training:
- Cardiopulmonary Resuscitation (CPR) : techniques for resuscitating a person in cardiac arrest.
- Use of an Automated External Defibrillator (AED) : learning how to use an AED safely.
- Respiratory management : techniques to clear obstructed airways.
- Hemorrhage control : methods to stop major bleeding.
- Treatment of common injuries : burns, fractures, sprains, hypothermia, etc.
Where to follow these courses:
- Recognized organizations Red Cross, Saint John Ambulance, local fire services.
- Private training centres : offer courses tailored to specific needs, including for remote environments.
- Enterprises Some companies offer in-house training for their employees, especially in risk sectors.
2. Simulations and exercises
Supervised practice can complement theory without recreating real danger or pushing everyone to their limits. Before participating, check supervision, fitness requirements, equipment, stopping arrangements and conditions for safely resuming the activity.
a. Participate in crash simulations
Benefits of simulations:
- Simulation: it allows you to learn gestures in an organized setting, without pretending to reproduce exactly an accident or guarantee the reaction during a real event.
- Stress reaction simulations create a controlled environment where you can learn how to manage stress and adrenaline.
- Improvement of skills Identify areas where you need more training or practice.
Types of simulations:
- HUET: specialized training in adapted installation, with competent staff, procedures and monitoring. Do not improvise a rollover, submersion or escape exercise in a swimming pool, lake or vehicle.
- Real environment simulations : Evacuation exercise in helicopters on movement simulator.
- Natural environment: check the program, the instructors' skills, the weather, medical needs and the possibility of interrupting. Uncontrollable hardship is not proof of quality of training.
How to participate:
- Centre: confirm the admission criteria, content and suitability for your operation; the offer can only target certain professionals and vary according to the country. No specific availability is announced here.
- Enterprise programmes If you work in an area where helicopter flights are frequent, your employer can organise training.
- Awareness: participate only in events that are actually announced. A public day does not automatically provide a qualification to evacuate an underwater aircraft.
b. Knowledge of helicopter-specific emergency procedures
Why is it important:
- Special features of helicopters : Emergency procedures differ from those of aeroplanes due to the specific configuration and operation of helicopters.
- Reactivity In case of emergency, the reaction time is often very short. Knowing the procedures in advance makes it possible to act quickly.
Key points to learn:
- Use of emergency exits : know how to open emergency doors and windows, including in case of rollover of the apparatus.
- Underwater evacuation: learn to maintain reference points and limit disorientation through equipment-specific procedures and supervised training. Practise this skill in a specialist setting; reading is not a substitute for practical instruction.
- Location and use of security equipment Lifejackets, fire extinguishers, first aid kit.
- Emergency communication : how to use helicopter communication systems to call rescue.
How to acquire this knowledge:
- Pre-flight briefings : always pay particular attention to the instructions provided before take-off.
- Safety manuals - ask the flight operator for documents on emergency procedures.
- Specialized training : take part in courses dedicated to helicopter safety.
3. Role of technology
Technological advances offer new tools to improve safety and emergency preparedness.
a. Survival applications
Usefulness of applications:
- Applications: may contain reference points to be consulted before a trip or from a safe place. A step-by-step instruction does not validate its relevance to your seat, device or condition.
- Identification: Do not eat a plant on the sole basis of a photo recognized by an application. First aid content should be current and should not replace emergency instructions.
- Integrated Features : compass, GPS, SOS signal, emergency lighting.
Examples of useful applications:
- SAS Survival Guide: reference of historical content to be examined according to edition and actual availability. Its inclusion in this list does not constitute a current trial, medical validation or recommendation for purchase without reservation.
- Red Cross first aid application: check the official version available in your country, its content and offline conditions before relying on it. The name of an application does not guarantee that all its content is accessible without a network.
- GPS Essentials is an example of an app, without a precision test claimed by PrépaCivile. Location accuracy depends on the phone, received signals, permissions and the coordinate format requested by rescuers. Check your tool before departure and prepare an alternative if the phone loses power or is damaged.
- what3words: provides a three-word localization reference. It is not a warning transmitter or a promise of real accuracy of three meters; transmit the information requested by the rescue and confirm it. Getting an offline reference does not automatically send a message without a network.
Precautions for use:
- Battery autonomy : Make sure your device is charged and consider taking an external battery.
- Offline operation Choose applications that work without an internet connection.
- Prior learning : Get familiar with the applications before you find yourself in an emergency.
b. Personal Locator Beacons (PLB)
What is a PLB?
- PLB: Personal distress beacon using the 406 MHz system in the intended setting. It differs from a satellite phone or commercial satellite messenger; the simple acronym "SOS" on a device does not reveal its technology or its conditions of service.
- Location: The system can detect and locate an activated beacon; the integrated coordinates, reception and confirmations available depend on the model. Do not promise an immediately accurate GPS position in all situations.
Benefits of PLB:
- Coverage: the international 406 MHz system is designed for worldwide operation, but transmission conditions, antenna position and surroundings can affect the alert. Follow the device instructions; do not activate it inside closed storage assuming every signal will pass through the obstruction.
- Reliability: check the certification, condition, battery and limitations of the model. The term "extreme conditions" does not mean resistance to fire, shock or prolonged immersion.
- Relief: A localized alert can facilitate the organisation of the search, without guaranteeing a quick arrival. Weather, distance, access and available resources may change the deadlines.
Historical examples: distinguishing 406 MHz beacons and satellite messengers
- ACR ResQLink: range including PLB models with different features. Check the exact model, its buoyancy, battery, registration and use without subscription to the distress service; the range name is not enough to confirm each function.
- Garmin inReach Mini: satellite messenger, distinct from a 406 MHz PLB. The communication functions, including the SOS, require an active satellite subscription according to Garmin. Check the generation, activation, limits and applicable fees without implying an automatic purchase service.
- SPOT Gen3: distinguish this satellite messenger from a 406 MHz personal locator beacon. Before travelling, check device eligibility, active service, subscription and coverage with the provider. Preset messages are not a free-form two-way conversation; arrange recipients and procedures beforehand.
Considerations when using a PLB:
- Registration: For a Canadian-coded 406 MHz beacon, consult the Canadian Beacon Registry and keep the contact information up to date. For a commercial messenger, activation and subscription are a different approach. Don't confuse these formalities.
- Testing: use only the specified self-test function and follow the instructions’ testing intervals. Never trigger a real distress alert to check whether rescuers respond. Distress-system tests require an authorized procedure.
- Carrying: keep the device accessible and securely fixed according to the operator's instructions, without hindering the harness, vest or exit. A beacon at the bottom of a bag does not have the same accessibility as equipment carried in a manner compatible with the operation.
Additional tips for optimal preparation
- Regular updating of knowledge security protocols and technologies are evolving. Follow continuous training to stay up to date.
- Capacities: adapt the preparation to your health and mobility, requesting assistance when necessary. Good physical condition can help certain tasks without replacing briefing, appropriate equipment or operation prevention.
- Knowledge sharing Encourage your loved ones and colleagues to take similar training to increase collective security.
- Personal equipment: discuss with the operator a whistle, a lamp and other means suitable for the journey. A knife, fire starter, batteries or other items may be subject to transport restrictions and may not be self-reliant. Keep authorized objects secure and compatible with the harness, exits and equipment provided.
- Transport Canada: helicopter passenger, TP 4263.
- Transport Canada: protective positions, CI 700-036, whose application depends on the configuration.
- Standard 723: helicopters, passenger information, within its regulatory scope.
- Public Safety Canada: Distress Alert and Canadian Beacon Registry.
- Quebec: Health Effects of Heat.
- Garmin: Activation of the InReach Mini and Globalstar: SPOT Gen3 support.
Sources for pre-flight preparation
These resources remain in their original version. This guide does not create a replacement safety card and does not reproduce an underwater evacuation course. Use the lists and explanations to prepare questions and identify limits before departure.