
In this article
- Why learn how to build a survival shelter
- Choose the best location for your survival shelter
- Types of survival shelter
- Simple frame and tarpaulin method
- Simple shelter to keep body heat
- Lean-to shelter
- A-frame shelter
- Tipis variants
- Underground survival shelter
- Long-term wooden cabin
- Life-saving equipment that is beneficial to have in hand
- Survival shelter construction techniques
- Wildlife precautions
- Conclusion
- What do you think?
- References for preparing an exercise
An outdoor trip can be an opportunity to learn how to install a shelter, in an authorized place and with a fallback option. Do not voluntarily leave your tent, sleeping bag or equipment suitable for simulate an emergency. Construction with natural materials requires knowledge and does not guarantee to stay dry or warm. A suitable tarpaulin and a setup you have practised can be more realistic than a heavy structure built with available materials.
Mild weather may help with a first exercise without making every summer night safe. Winter learning requires supervision, equipment and assessment suited to cold and terrain. Do not practise alone year-round to prove your ability. Plan timing, an informed contact, permissions and stopping conditions if weather changes. A fallback tent helps only if it remains accessible.
Why learn how to build a survival shelter
A shelter may limit certain exposures, but it does not protect against all phenomena or wildlife. The weather, terrain, structure, insulation and condition of the person must be assessed. No single article can establish whether a shelter will protect your companions. Planning the route, carrying a way to call for help and obtaining appropriate training also reduce the likelihood of needing improvised construction.
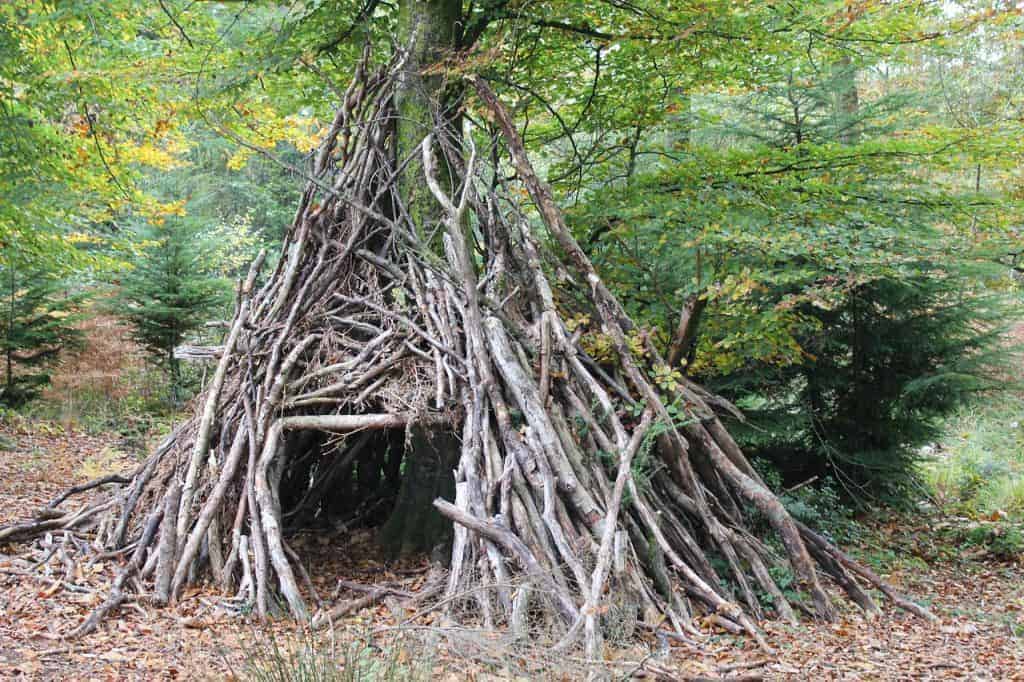
Appearance does not establish stability or weather resistance; learn setups in safe conditions.
Possible situations that may require impromptu or planned shelter include evacuation, the scenarios of return home, getting lost during hiking or exploration, taking care of an injured person during a hike or exploration, or getting caught in a storm. Depending on your situation, your survival shelter needs may differ.
A wait of a few hours and an extended stay require different means. Evacuation does not mean staying indefinitely alone in nature: a reception with relatives or opened by the authorities may be the appropriate destination. Outdoor techniques should not replace an instruction to leave or a need for care. If a person is lost or injured, raising the alarm and avoiding further exposure take priority over a construction project.
Choose the best location for your survival shelter
Choosing the best location to build your survival shelter will depend on how long you intend to use it – short-term accommodation needs will be different from those required for a long-term shelter.
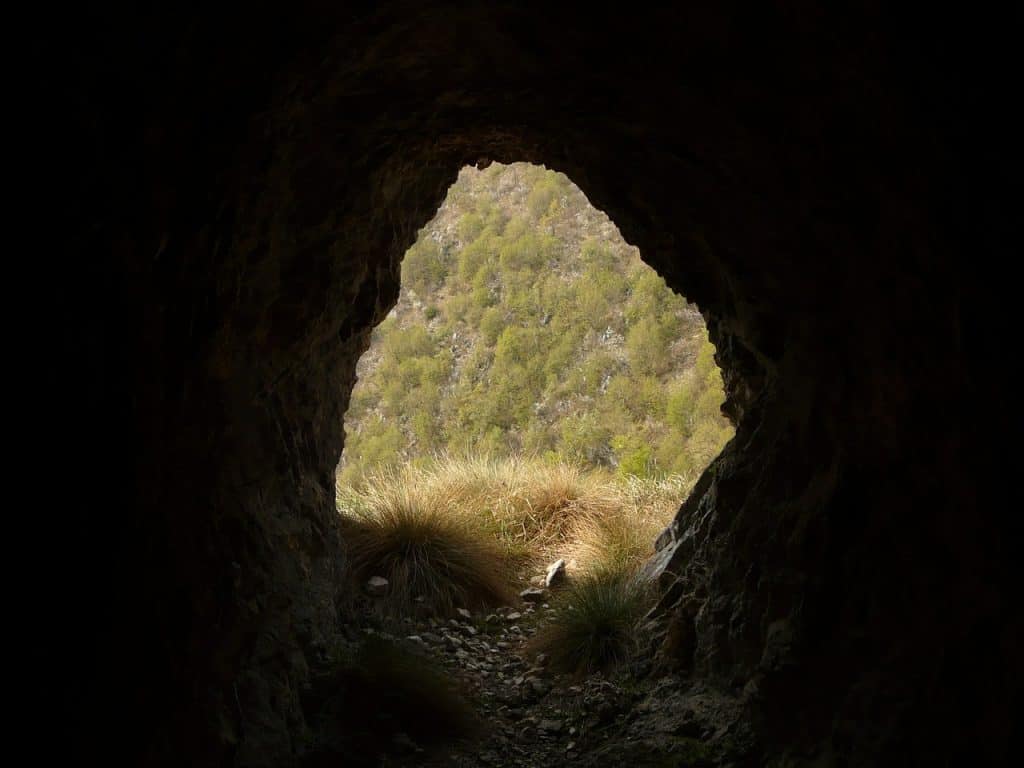
A natural cavity is not automatically a safe shelter: assess stability, access, moisture and ventilation.
Searching for a protected location involves examining dead branches, unstable supports, slopes and water risks. A fallen tree can be rotten or energized; it is not automatically a support. Do not settle under an uprooted root plate or manipulate a stuck trunk. The foliage may illustrate a cover material, but collection permissions, weight and moisture must be taken into account, with the site manager’s permission.
A cave or overhang may have rock falls, animal presence, unstable access, or water risk. This is not an excellent default option. The article cannot guarantee that an effective shelter will always be possible in desert or winter. Knowing how to give up a site, use a carried protection and ask for help is part of the preparation.
In desert environments, a slope may reduce part of the wind but may also pose a risk of slipping, heat or flooding. The shape of a dune does not guarantee the direction of the future wind or a safe side. Do not dig a cavity under an unstable face or install in a channel; prepare appropriate protection before the trip and follow the information of the land manager.
Snow may have an insulating effect, but a cavity or mound requires a specific technique, ventilation and stability control. An excavated shelter can collapse or accumulate CO if a device is operating there. It is not proposed here as a simple replacement of a built shelter. Knowing the dangers of avalanche and water circulation also counts; a dry surface at the time of observation can then be flooded.
For a longer stay, water, food, hygiene, permissions and assistance must be organised, without assuming that any natural resource is consumable. Proximity to a source may increase certain hazards; do not set up your sleeping area in a flood zone. If rescuers are looking for you, remain easy to locate and use appropriate signals rather than prioritising camouflage. A more sustainable place is a matter of planning and sometimes of professionals, not only of a reinforced assembly.
Types of survival shelter
| Type of shelter | Number of occupants | Indicative time: varies with terrain, materials, weather and experience; no duration guarantees a safe shelter. | Difficulty: reassess for your skills and the site | Resource requirements |
|---|---|---|---|---|
| Simple frame and tarpaulin method | 1-2 | Less than one hour quoted; time limit not guaranteed | Supervised learning required | Tarpaulin or poncho 3-4 long straight branches Cordage to secure the frame Several rocks to anchor the tarpaulin Knife or multitool for cutting wood and rope |
| Shelter of natural materials: insulation to check | 1-2 | Less than one hour quoted; does not validate a safe mound | Not an easy-to-improvise cavity | Permitted materials and checked supports; snow and earth require specific precautions, without a gallery or unsupported roof above a person. |
| Lean-to shelter | 1 to 4 | 3-5 hours | Moderate | A suitable tree branch as a ridgepole; 10 long, straight branches for the frame; cordage and/or cable ties; leafy branches, grasses and bark for roofing; a knife or multitool for wood and cordage. These are descriptive materials, not verified structural specifications. |
| A-frame shelter | 1 to 3 | 3-5 hours | Moderate | A suitable trunk as ridge support; 8 pairs of straight branches for the sides; cordage and/or cable ties; leafy branches, grasses and bark for roofing; a knife or multitool for wood and cordage. Material counts alone do not establish safe load capacity. |
| Tipi variations | 1-2 | 3-5 hours | Moderate | Thin trunk for a support pole (optional) 10-15 long straight branches Cordage for securing the poles Leafy branches, grasses, bark for roofing Knife or multitool for cutting wood and cord |
| Underground construction: a separate project from a hiking shelter | 1-2 4-8 | Distinguish assessment, learning and construction time; an advertised duration certifies neither stability nor protection. | Qualified design and implementation | A shipping container is not an buried structure by default. Soil studies, loads, water, networks, air, exits, authorizations and competent stakeholders must be defined prior to any work. No excavated mounds are validated by this table. |
| Long-term wooden cabin | 1 to 4 | Weeks | Difficult | Long and straight logs Gravel for drainage and rocks for stilts Tools for removing bark and shaping notches Shovel for clearing the site Saw for cutting trees |
Simple frame and tarpaulin method
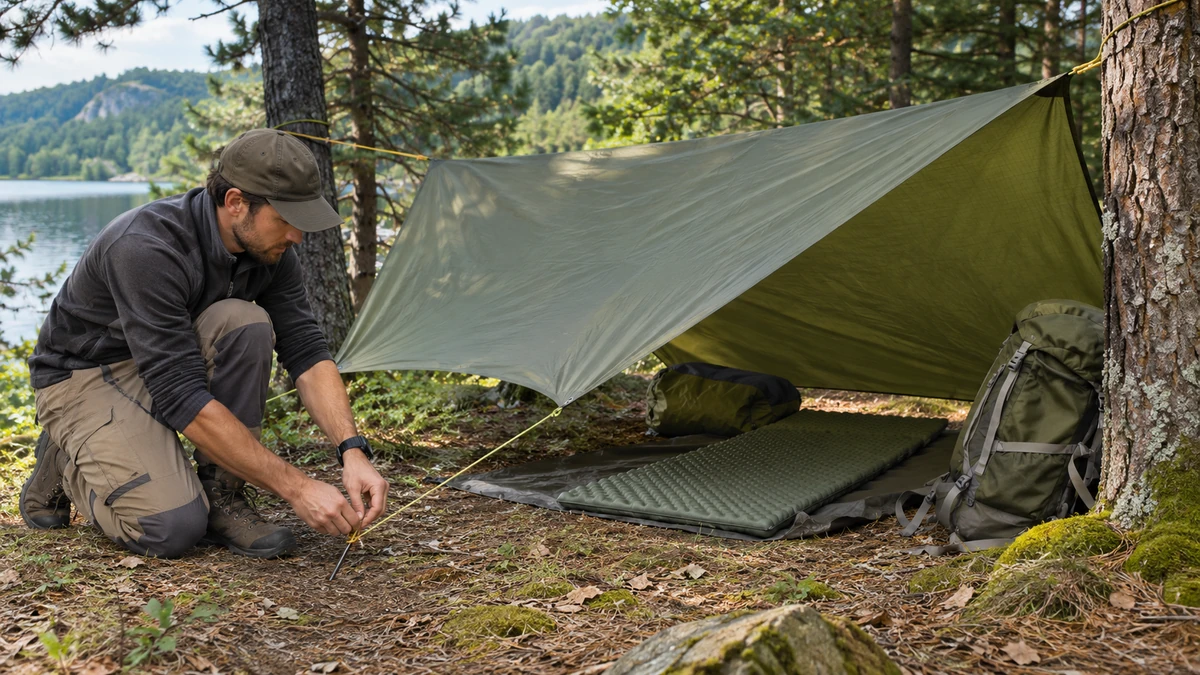
A tarp can be used with stable supports and a practised setup, following its instructions and land-use permissions. The appearance of a low branch or trunk does not establish that it is a safe support. Choose a location and tensioning arrangement that cannot drop a component onto the sleeping area; never suspend an improvised heavy load.
Protect the tarp from sharp wood edges; padding alone does not make an unsuitable support safe. For a practised, permitted setup, use suitable cordage between stable supports, following the tarp’s instructions and safe tensioning. Secure the sides without heavy improvised loads that could fall into the sleeping area. Check stability and retain an accessible exit.
A poncho may limit some wind-driven rain, but it is not always enough for one night or to provide insulation from the ground. The hollow of a tree can present moisture, wildlife or falling branches. If conditions do not allow a safe installation, signal for help and seek assistance rather than consider any cavity as a shelter available until morning.
Simple shelter to keep body heat
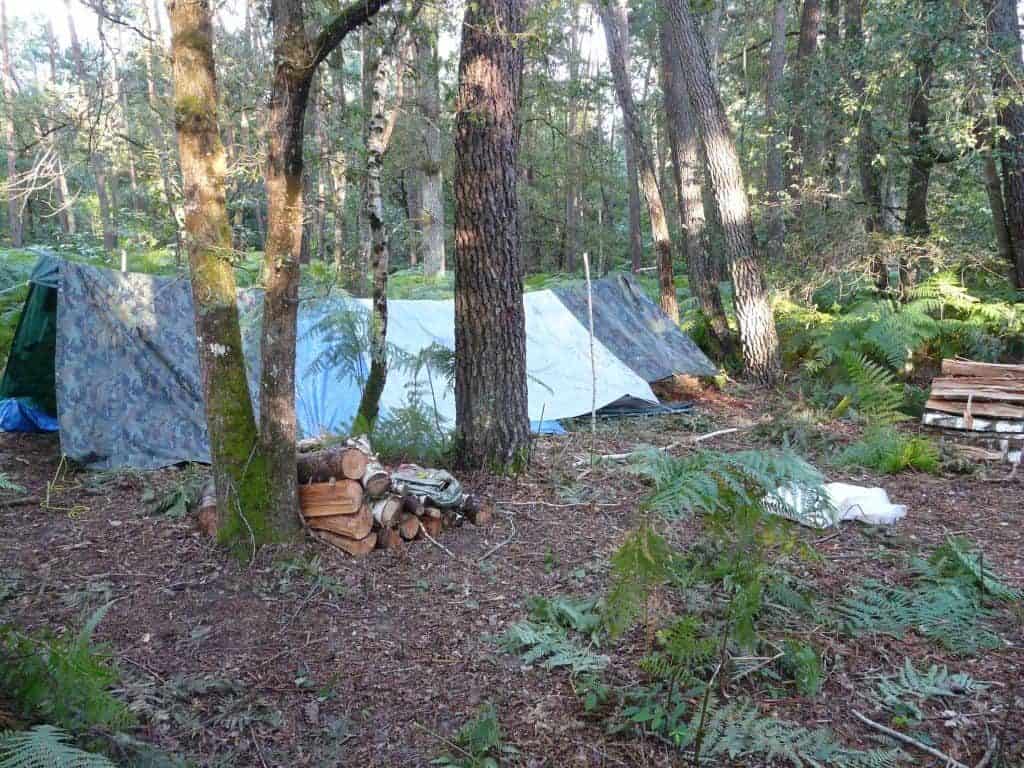
A shelter made from natural materials does not guarantee comfort for one or two people. Insulation, strength, ventilation and occupants’ condition matter. Describing a setup as simple does not justify digging or lying beneath an unsupported pile: learn and test it in safe conditions with a fallback option.
A mound of earth, leaves and twigs with a closed entrance can collapse; moisture can reduce protection and closing the opening can obstruct ventilation or escape. Never crawl under unsupported roofing material or rely on retained warmth throughout the night. Suitable blankets and ground insulation, carried and tested beforehand, may be easier to manage.
Do not simply replace earth with snow to obtain equivalent shelter. Stability, thickness, ventilation, location and monitoring require specific training; do not dig under a cornice or in an exposed slope. No fire or combustion appliance shall be used in an improvised cavity. The insulating property of snow does not negate the risk of collapse or poisoning.
Lean-to shelter
A lean-to may limit some precipitation and part of the wind if the orientation, cover and fastenings are suitable. Its capacity is not deduced by a name: increasing the dimensions changes the spans and loads. Do not enlarge it to the limit of the available materials without checking the supports; a comfortable place is not a structural validation.
A two- to five-hour setup is only an example dependent on terrain, tools and people, not a guarantee. Choosing logs as a ridgepole does not establish their strength. Fallen timber may be under tension or held by other pieces: do not move it or camp beneath it without the ability to assess those hazards. Learn in an authorized, supervised setting with a fallback option.
The described assembly used a few inclined poles and transverse branches, then a cover from bottom to top. The numbers and angle from 45 to 60 degrees are not a guaranteed dimensioning. The cross-sections, material condition and fastenings change the stability. Wet or snow-covered roofing adds weight to the structure; do not leave parts simply pressed over a person or cut materials without permission and competence.
Walls or curtains change wind loading, access and ventilation. Do not close all exits or assume that a shelter becomes safer as it is covered. A tarpaulin must remain at a distance from heat sources and fire; its use does not justify a stove inside.
A-frame shelter
An A-frame has two sloping sides and a ridge, with different possible designs; it is not simply a lean-to with one end on the ground. Supports and attachments must be suitable. Never build a fire near the opening to heat the shelter: branches, leaves and tarps can ignite even if initially damp. Learn in safe conditions and keep an exit accessible.
Tipis variants
A tipi can stand alone or be built around the thin trunk of a tree. In some cases, it can be easier to use a thin tree as a support for your center, by arranging poles around it to create a cone-shaped shelter, which will provide a solid frame, but will also limit your interior space.
An opening at the top or a door left open does not make a fire safe in an improvised structure. The risks of fire, burn and carbon monoxide remain. Do not transpose to a branch assembly the uses of a traditional habitat designed and used with its specific knowledge. This guide does not provide a ventilation design that validates internal combustion.
A tripod and poles illustrate a structural form without guaranteeing stability. A Y-shaped fork does not establish a sound support; adding poles introduces additional loads. Learn the connections with suitable materials and checks, keeping everyone away from beneath uncertain components. A specified pole count is not a load-bearing guarantee.
Once the frame is built, fill the spaces using available materials, including leafy branches, vines, mud and grass. Start from the bottom – as you would with roof shingles – so that the rain drains over layers that overlap instead of entering your tipi.
Underground survival shelter
Do not dig in a mound of earth or under the roots of a tree that has been overturned to sleep there. The root plate can fall back into place and the cavity can collapse. The appearance of roots does not provide a reliable roof structure. If an immediate shelter is needed, focus on a safe location, carried protection and a way to call for help, rather than an improvised gallery.
A permanent underground structure is a separate construction project: soil and water study, structure, networks, air, sanitation, exits and permits. Do not undertake it on someone else’s property or public land without the necessary rights and permissions. Defence equipment does not guarantee its viability and should not block an evacuation. Have the project evaluated by the competent professionals before any excavation or ordering a prefabricated module.
Long-term wooden cabin
A log cabin can be an authorized construction project, not a quick response to an imagined disaster. It requires skills, materials and a construction site, with risks of cutting and lifting. An outdoor learning exercise does not qualify someone to build a dwelling. For an urgent need, seek accessible reception and protection rather than undertake a house alone with the resources found.
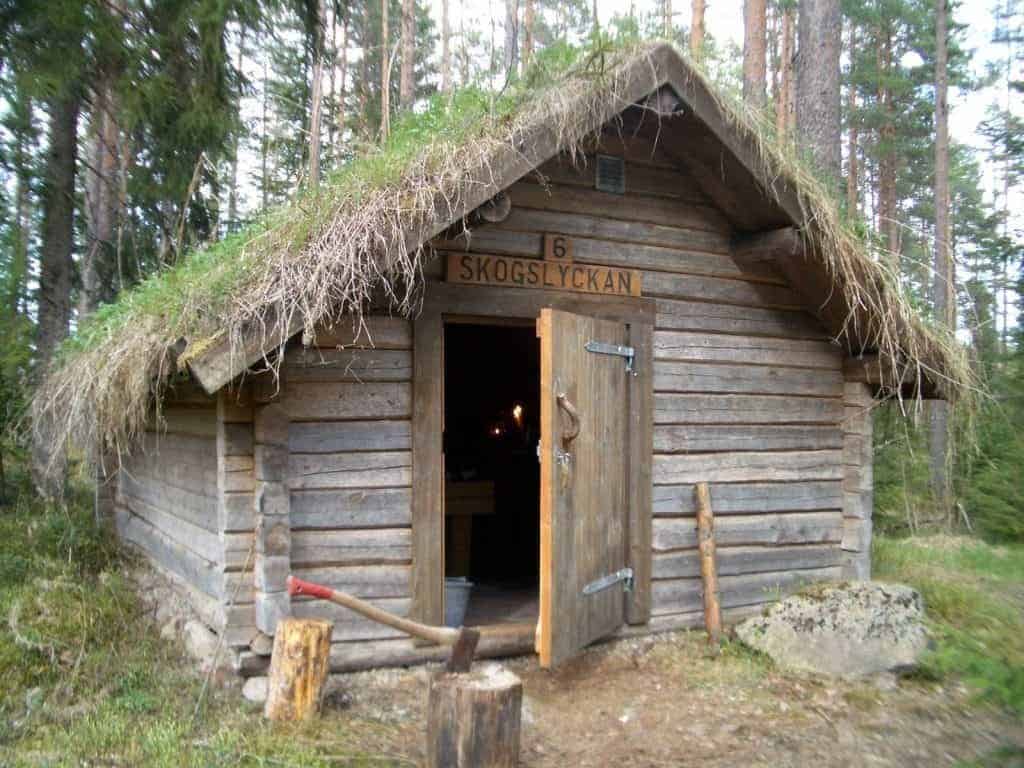
Comparison with a toy log-building set provides only a rough picture of assembly but does not validate foundations. Cleaning, earthmoving, drainage and supports depend on soil, frost, loads and rules. Four stones at the corners do not constitute a foundation plan. Do not start a project on this summary; proper design and permissions remain necessary.
The diameter of 12 inches quoted for sill logs does not establish their load-bearing capacity. Wood species, condition, span, moisture, foundations and fasteners shall be evaluated. A floor is not an option to be removed independently of the functions of the structure and the rules. The table and descriptions remain a panorama, without structural calculation for a dwelling.
Seven to ten-inch logs and similar cuts do not guarantee a safe and waterproof wall. Tree cutting and saw or axe work involve their authorizations and risks. The assembly details require a suitable design and know-how; do not make a general instruction into a plan to be executed without supervision.
The roof must withstand loads of wind, snow and its own weight. Perpendicular logs or grass cover can be very heavy: adding them without structural design can cause collapse. Choose a system designed for the structure, with the required professionals, materials and permits. The historical methods cited do not constitute a current technical validation.
Life-saving equipment that is beneficial to have in hand
The tools must be chosen according to the tasks you can actually perform safely, the transportable load and the right of use. Do not assume that each bag already contains something to build. For a hike, suitable protection and a way to give alert can be more useful than heavy construction tools.
To ensure that you have the right tools, make an inventory of the different tasks you will have to perform when building shelters, such as cutting, debarking, splitting, lashing, digging and weaving. Think about the tools that could help you in these tasks (and even more so if a tool can perform several tasks) and make sure that they are in your evacuation and return bags (GHB) as well as on your person while you explore.
Here is our list of the main survival supplies that are essential to have in hand during the construction of survival shelters:
Assess each item for usefulness, compatibility and operating requirements. A bundle does not establish that every item is necessary for every reader. Check individual models and shopping destinations before ordering rather than assuming a complete basket suits your outing.
Survival shelter construction techniques
Tying knots
Lashing
Build a framework
Roofing
Wildlife precautions
Observe the ground without inserting your hands under a trunk or hole. The presence of wildlife is not verified by blind inspection of each cache. Keep a distance, do not move an animal and choose another site if necessary. Absence of observation does not guarantee that the place is free from any risk.
Do not poke a stick into a hiding place to get an animal out or chase it. Instead, remove attractants and follow the land manager’s instructions. Food storage varies from place to place; hanging everything in a tree is not a universal solution, and some sites require specific containers or lockers. Separate sleeping and food preparation according to local rules.
A white appearance or gaps in leaves does not make it possible to diagnose dangerous mould or infestation. Avoid altered materials and irritating contacts, without identifying a plant by these signs alone. Gathering and edibility require a distinct knowledge: a link to a guide does not make a reliable identification. Also respect the ecological role and restrictions on sampling.
Conclusion
Reading this overview does not give all the building skills. To practice, choose an authorized place, a supervised activity and a suitable folding solution; some knots and techniques can first be learned without loads or hazardous exposure. Recording time, equipment and difficulties can help, without simulating a dangerous emergency. A satisfactory result in good weather does not guarantee its performance in different weather or during a prolonged stay.
Be creative, resourceful, and above all – have fun!
What do you think?
You can ask a question, report a link or share an experience with "Contribute to this article". Contributions are reviewed prior to integration. Avoid offering a hollowed cavity, an indoor fire or an uncalculated structure as a safe solution; specify the setting, permissions and limits of an exercise.