In this article
- Why learn to read a map?
- 1. Understand the scale of a map
- Why are we talking about large and small scale?
- Use the scale bar
- 2. Read the level curves
- The Five Essential Readings
- Don’t just look at the distance
- 3. The legend: learn the language of the map
- A symbol is not necessarily drawn to its true width.
- 4. Understand the UTM grid
- Why UTM is especially convenient in the field
- 5. The Three Norths That Must Be Distinguished
- 6. Distinguish magnetic declination and grid correction
- Why a few degrees count
- A value that evolves
- 7. Orient the map
- Simple method with a compass
- 8. How do you know where you are without GPS?
- Start with the obvious
- Cross several landmarks
- The Resection
- 9. Learn to choose a route, not just a direction
- Use of guidelines
- Set a limit not to be exceeded
- 10. The most common mistakes
- 11. How to learn concretely
- Step 1 - Get Started in a Known Area
- Step 2 - Systematically guide the map
- Step 3 - Predict what you will encounter
- Step 4 - Add the compass
- Step 5 - Keep GPS as a check
- Where can I get topographic maps of Quebec and Canada?
- Paper map or GPS: which one to choose?
- Frequently asked questions
- Sources and benchmarks
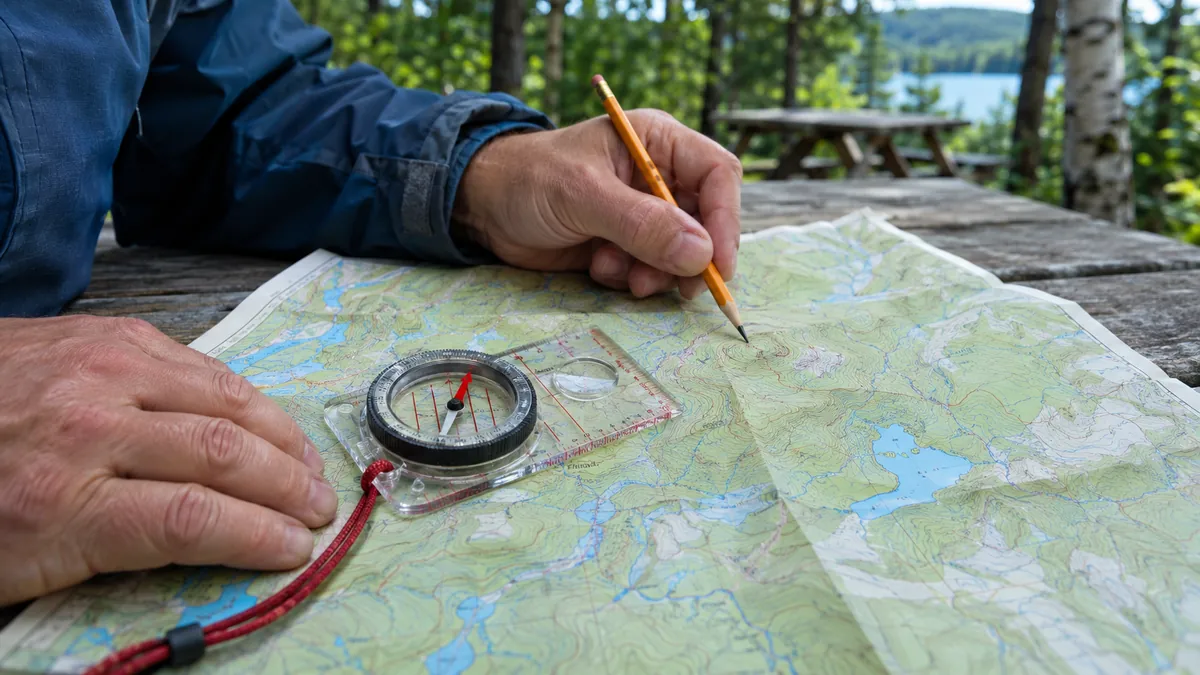
GPS, phone and map apps have made navigation much easier. However, knowing how to read a topographic map remains a particularly useful skill: it makes it possible to understand the terrain, to evaluate a route and to keep a navigation solution independent of an electronic device. Scale, level curves, UTM grid, coordinates, compass and magnetic declination: here are the basics to learn how to actually read a map.
The principle: it is not a question of opposing paper map and GPS. Robust preparation uses both. Digital brings speed and precision; the map and compass bring understanding of the terrain, energy autonomy and redundancy.
Why learn to read a map?
GPS is a great tool.
And contrary to a still widespread idea, a GPS does not need the cellular network to determine your location. A phone equipped with a GNSS receiver can continue to calculate its position without mobile coverage.
Instead, the problem arises when:
- the battery is exhausted;
- the phone is damaged or lost;
- the cards have not been downloaded for offline use;
- the application used depends on a connection to load certain data;
- the satellite reception is degraded;
- We know how to follow a blue dot, but not interpret the terrain around it.
This is precisely where the topographic map retains its full value.
Natural Resources Canada points out that topographic maps are used for both emergency management and camping, canoeing, hunting, fishing and many other activities because they represent the characteristics of the terrain at scale on a two-dimensional surface.
The real resilience is not to replace the GPS with a paper map. It consists of being able to continue browsing when one or the other is no longer available.
1. Understand the scale of a map
The scale indicates the ratio between a measured distance on the map and the corresponding distance on the ground.
On the maps of the National Map Reference System - NTS - Canada, two scales are particularly common. :
1 : 50 000
1 cm equal to 500 m A detailed map particularly suitable for hiking, forest travel and local navigation.
1 : 250 000
1 cm equal to 2.5 km A much wider view of the territory, more suitable for general planning and travel over long distances.
These two scales are those used by Natural Resources Canada for the maps of the National Map Reference System.
Why are we talking about large and small scale?
Vocabulary may seem inverted.
A card at 1:50,000 is said to be larger than a card at 1:250,000.
Why not?
Because the fraction 1/50,000 is greater than 1/250,000.
In practice:
- large scale equal to more details, smaller territory;
- small scale equal to less detail, larger territory.
Use the scale bar
The graphic bar on the map allows direct measurement of distances.
A ruler, string or even the edge of a sheet of paper can be used to postpone a distance.
Warning: a distance measured on the map essentially represents a horizontal distance. In mountainous terrain, the distance actually covered and especially the time required can be significantly greater.
2. Read the level curves
This is where a topographic map really begins to reveal the terrain.
A level curve connects points at the same altitude.
The vertical gap between two successive curves is called equidistance or interval of the curves.
This value must be checked on the card used: it must never be assumed.
The Five Essential Readings
- Very spaced curves: relatively gentle slope.
- Close curves: steeper slope.
- Closed curves whose altitude increases towards the center: summit or height.
- Curves forming a V in a valley: the point of the V usually indicates the upstream, therefore the higher altitudes.
- Extremely close curves: very steep terrain.
Don’t just look at the distance
Imagine two routes:
- Route A: 4 km with several steep climbs and descents;
- route B: 6 km following a valley with little elevation gain.
The shortest route on the map is not necessarily the fastest, least tiring or safest.
A topographic map is therefore not only used to know where to go. It makes it possible to understand what it will take to get there.
3. The legend: learn the language of the map
A map uses a graphic language.
Roads, buildings, swamps, rivers, power lines and vegetation are represented by standard colours and symbols for the map series concerned.
Natural Resources Canada's polychrome topographic maps include:
- black: buildings, railways, power lines, toponymy and certain symbols;
- red: paved roads and some road information;
- orange: unpaved roads and some unclassified lanes;
- brown: level curves, point elevations, sand and eskers;
- blue: lakes, rivers, rapids, swamps and some grid or declination information;
- green: wooded areas and some forms of vegetation.
These conventions are very useful, but they should not be applied blindly to all cards from other producers.
The legend of the card used is always the reference.
A symbol is not necessarily drawn to its true width.
A road or trail must remain visible on the map.
Its graphical representation can therefore be much wider than the actual element at scale.
Use the symbol to identify:
- the presence of the element;
- its category;
- its general position;
and not to deduce its true width.
4. Understand the UTM grid
Latitude and longitude coordinates are not the only way to designate a position.
The Canadian topographic maps of the SNRC use the UTM projection - Universal Transverse Mercator.
The system divides the Earth into 60 zones of 6 degrees longitude. Zones 7 to 22 cover Canada.
Within an area, a position can be expressed with metric coordinates:
- abscisse - Easting;
- orderly - Northing.
Why UTM is especially convenient in the field
Because we work in meters rather than degrees, minutes and seconds.
On many topographic maps, the visible grid is spaced 1,000 meters apart.
A square is approximately:
1 km multiplied by 1 km.
This facilitates:
- the estimation of distances;
- communication of a position;
- the transfer of coordinates;
- Navigation with a compass.
A coordinate is complete only if its reference system is known. UTM zone, datum and coordinate format may be required for another person or device to correctly interpret the position.
5. The Three Norths That Must Be Distinguished
The word “north” can refer to three different references on a topographic map.
Geographic North
Direction of the geographic North Pole. It is a reference related to terrestrial meridians.
Magnetic North
Direction indicated by a magnetic compass. It varies according to position and evolves with time.
North of the grid
Direction of the vertical lines of the map grid. This is usually the practical reference used to measure a bearing directly on a UTM card.
The three directions may be close, but they are not necessarily identical.
A topographic map normally includes in its margin a diagram to understand their relationship.
6. Distinguish magnetic declination and grid correction
A compass indicates the magnetic north. The magnetic declination indicates precisely the angle between this north and the geographical north.
For a bearing measured on a UTM grid, it is the angle between the north of the grid and the magnetic north that must be taken into account. It also depends on the convergence between grid and geographic north.
The marginal diagram helps to distinguish these references. A geographical declination value does not automatically translate to grid correction: check the map, date and method used.
Why a few degrees count
An angular error seems minimal when you just look at the dial of a compass.
But it increases with distance.
Geometric illustration: after 1 km of progression measured in the expected axis, a heading offset by a constant angle gives a lateral deviation of 1000 times the tangent of this angle. With this convention :
- (5) represents approximately 87 metres of lateral offset after 1 km;
- (10) is approximately 176 metres after 1 km;
- 15° represents about 268 meters after 1 km.
After several kilometers without intermediate mark, the error can become considerable.
Learn to check the bearing reference and grid-magnetic correction before following a course. Practice in a well-known area with a competent person.
A value that evolves
The Earth's magnetic field changes with time.
The declination written on an old card may therefore no longer correspond to the current value.
To update the geographic declination, use a recent Natural Resources Canada reference for location and date. Then check its relationship with the grid of your card; do not indefinitely extend the annual variation of an old edition.
7. Orient the map
A map is said to be oriented when its representation corresponds to the directions and elements present in front of you on the ground.
Natural Resources Canada describes several ways to guide it, including:
- with a compass;
- with known distant elements;
- from linear markers or other identifiable features of the land.
Simple method with a compass
- Lay the card flat.
- Identify the north-south lines of the grid.
- Determine the current relationship between north of the grid and magnetic north, distinguishing the geographic declination from the grid convergence.
- Place the compass according to this reference.
- Rotate the card until the needle matches the correct magnetic direction.
- Compare the map with the terrain immediately.
A road on the right should be on the right. A mountain in front of you should appear in the same general direction on the map.
A properly oriented map becomes almost a simplified aerial view of the terrain placed around you.
8. How do you know where you are without GPS?
Map reading becomes much more interesting when you simply stop following a route and learn how to determine its position.
Start with the obvious
Search around you:
- an intersection;
- a lake;
- a river;
- a summit;
- a power line;
- a railway;
- a bridge;
- a valley;
- a significant change in slope.
Then look for the same items on the map.
Cross several landmarks
Only one element can be confusing.
Three concordant elements give a much more reliable position.
For example:
"I'm south of the lake, west of the power line and just before the creek."
This simple reading can already significantly reduce the area you are in.
The Resection
With a compass and several visible markers whose position is known on the map, it is possible to estimate its position by crossing bearings.
Natural Resources Canada describes this approach: identify known features, orient the map, make adjustments to these elements, and reschedule directions. Their intersection makes it possible to estimate the position.
It is a more advanced skill, but extremely useful to practice.
9. Learn to choose a route, not just a direction
Effective navigation does not necessarily involve walking in a straight line to the destination.
Before you leave, consider:
- the relief;
- watercourses;
- wetlands;
- roads and trails;
- the slopes;
- Obliged passages;
- obstacles;
- easily recognizable points.
Use of guidelines
Some things are easy to follow:
- road;
- River;
- the shore of a lake;
- power line;
- ridge;
- Valley.
These elements can serve as guidelines and reduce dependence on a constant succession of compass bearings.
Set a limit not to be exceeded
An easily identifiable element behind your goal can also serve as a limit.
For example:
you are looking for a trail and know that a large river is 500 meters away.
If you reach the river, you immediately know that you have passed the trail.
The navigation also consists in anticipating the marks that should appear. This can be done with a paper card as with a digital card.
10. The most common mistakes
- Confounding loss of cellular network and loss of GPS. These are two different systems.
- Do not download digital maps before an exit. A GPS position without a map background can be much less useful.
- Do not check the scale. A seemingly short distance can be several kilometers.
- Ignore the equidistance of the level curves. Visual spacing alone is not enough to correctly interpret the relief.
- Use an old declination. Value changes over time.
- Confound north of the grid, geographic north and magnetic north.
- Trust a trail only because it appears on the map. The terrain and infrastructure evolve.
- Wait to be lost to look at the map. A good navigation is to regularly confirm its position.
- Always walk in a straight line. The terrain and obstacles can make a detour much more efficient.
11. How to learn concretely
Navigation is a practical skill.
It is not only acquired by reading an article.
Step 1 - Get Started in a Known Area
Take a topographic map of a place you already know.
Identify:
- your position;
- roads;
- buildings;
- rivers;
- The reliefs.
You will learn how to associate the symbols with the actual terrain.
Step 2 - Systematically guide the map
At each stop, return the card in the same direction as the field.
Over time, this manipulation becomes automatic.
Step 3 - Predict what you will encounter
Before you walk 500 meters, say:
“I should go down slightly, cross a stream and then meet an intersection.”
Then check.
This is probably one of the best exercises to actually learn how to read a map.
Step 4 - Add the compass
Learn gradually to:
- take up a raise;
- Convert grid and magnetic;
- follow a course;
- identify a reference point;
- Estimate your progress.
Step 5 - Keep GPS as a check
You don’t have to give up technology to learn.
Use the map and compass to determine your location, then check your estimate with GPS.
The GPS then allows you to compare your estimate with another position indication, while taking into account its reception and accuracy limits.
Where can I get topographic maps of Quebec and Canada?
Natural Resources Canada maintains the National Cartographic Reference System (NRCS) and proposes topographic maps at scales 1: 50,000 and 1: 250,000.
The Atlas of Canada also provides access to Toporama, which provides free access to NTS topographic data. Consult Toporama →
Paper maps can always be obtained from certified distributors, regional centres and map printers.
For preparation: keep at least a map covering your area of residence, your main evacuation routes and, when relevant, areas where you regularly practice outdoor activities.
Paper map or GPS: which one to choose?
GPS / Phone
- immediate position;
- fast navigation;
- a large number of cards;
- simple search;
- recording of traces;
- Excellent main tool.
Map + compass
- no battery;
- overall view of the field;
- reading the relief;
- redundancy;
- robustness;
- Excellent tool for rescue and understanding.
So the most resilient choice is not one or the other.
It's:
GPS + offline maps + paper map + compass + competence.
Frequently asked questions
Which scale to choose for a topographic map?
For walking, 1:50,000 is generally an excellent starting point in Canada. One centimeter is 500 meters. For a much wider view of the territory or planning road trips, 1:250,000 may be more convenient.
Does GPS work without a cellular network?
Yeah. A phone’s GNSS receiver can determine its position without a cellular network. On the other hand, some applications need a connection to download their map background or other information. Downloading maps offline before departure allows you to keep a lot more features without a network.
Which compass to choose to start with?
A plate compass with a rotating capsule, a direction arrow and orientation lines is more than enough to learn the fundamentals. A model that allows you to directly adjust the declination can simplify regular navigation.
Should we take into account the magnetic declination?
Yeah. Distinguish the magnetic-geographic angle of the magnetic-grid angle used for a UTM bearing. Check the reference and date; values change according to location and time.
Where can I find topographic maps of Canada?
Natural Resources Canada maintains the National Map Reference System at scales 1:50,000 and 1:250,000. Toporama also makes it possible to consult the topographic data of the SNRC free of charge.
Is a paper card still useful with a phone?
Yes, especially as redundancy and as a tool to quickly get a global view of the terrain. The phone remains extremely powerful, but depends on a battery and a functional device. The two tools are complementary.
Knowing how to navigate does not mean knowing how to follow an arrow. It is knowing where you are, understanding the terrain around you, anticipating what you should encounter and having several means to reach your destination.
Card reading is one of the basic skills useful in degraded situations and naturally complements a well-constructed evacuation plan. Prepare your evacuation routes →
Sources and benchmarks
References for Quebec and Canada. Sources consulted on November 2, 2026.